Let's Integrate Your Account With Facebook Ads
Facebook is quickly becoming one of the best platforms to build your brand in your local market, as well as generating a steady stream of motivated seller leads each and every month.
With recent updates to the Facebook Ad platform, this marketing channel is growing in popularity in the months and years to come.
Facebook Ads are a great marketing channel for real estate investors because it's the best platform to grow your brand, tell a story, and differentiate yourself in the marketplace. Additionally, motivated sellers are on Facebook every single day.
Specifically, Facebook Lead Ads are the best type of Facebook Ad to run to find motivated sellers because your prospect never has to leave Facebook, and the process for them to opt in is seamless.
We have built a direct integration with Facebook, so all of your leads are sent directly to your CRM inside of your REI BlackBook account. With this integration, you also have the ability to trigger an automated workflow to follow up with any leads you receive.
NOTE: The Facebook Lead Ads Integration is only available in the Small Business Plan and Accelerator Plan Subscriptions.
Objectives
In this support article, you will learn step-by-step how to integrate your account with Facebook lead ads.
Video
We have created a short video to show you how to integrate your account with Facebook lead ads.
Don't have time to watch the full video? Follow our step-by-step instructions below.
Steps
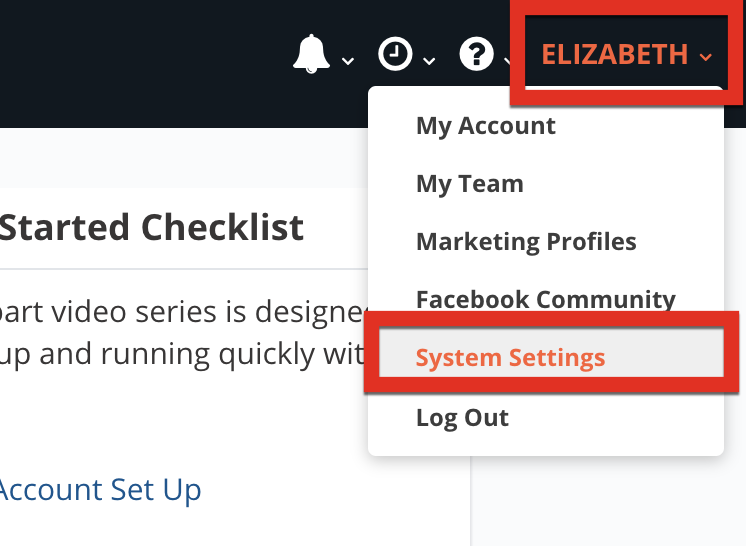
1. Log in to your account. Click on your name located in the upper right-hand corner of your dashboard menu. In the drop-down menu, click on System Settings.
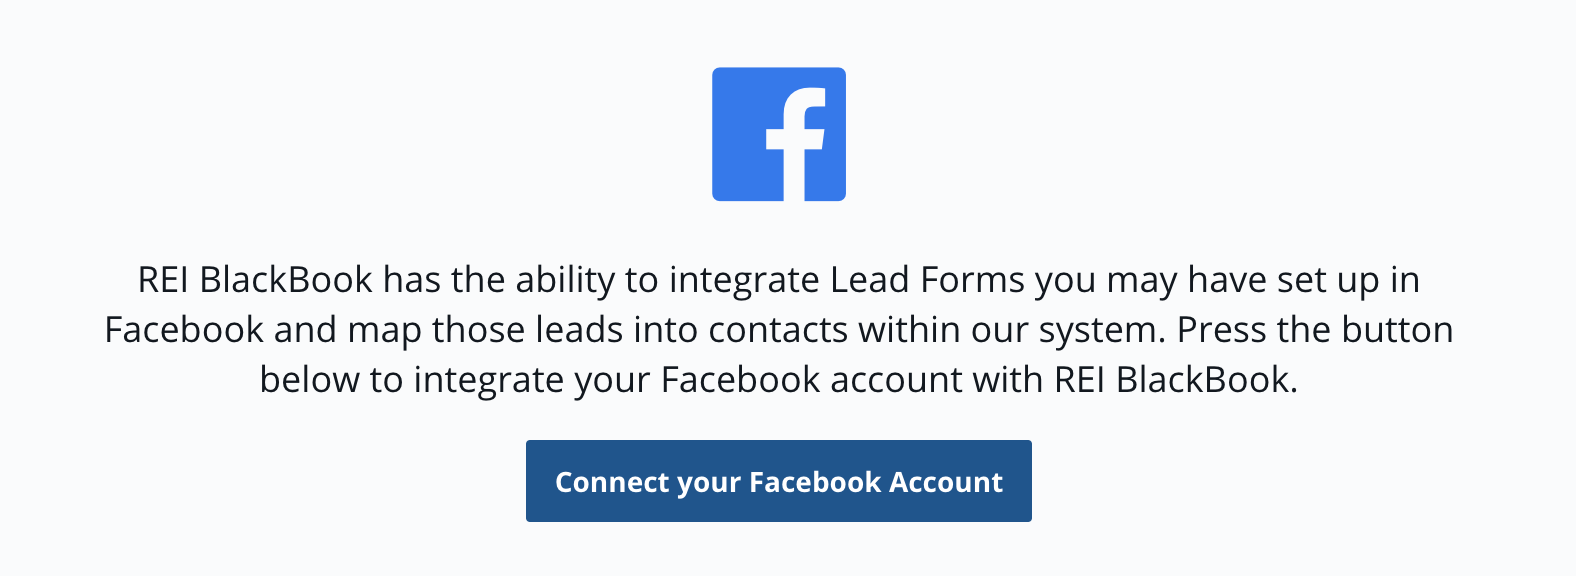
2. You will be directed to a new page. On the left-hand side, click on Facebook Leads under Integrations.

3. In order to integrate with your Facebook Lead Ads, you will need to connect your REI BlackBook account with your Facebook account.
Click on Connect your Facebook Account This will take you to Facebook to log into your Facebook account.
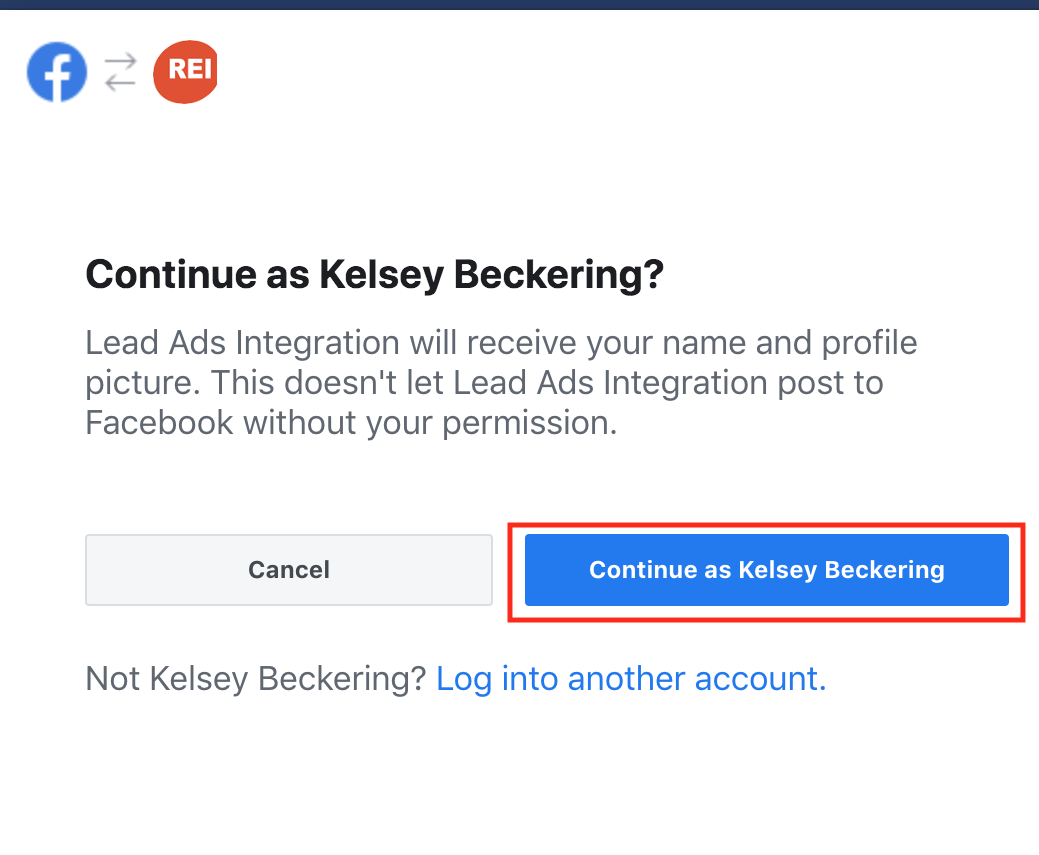
4. A pop-up box will appear. If you are already logged into your Facebook account, you will see the screen below.
Click on Continue as (Name) button to move on to the next step.
If you are not logged in already, you will be prompted to enter in your Facebook account information to proceed to the next step.
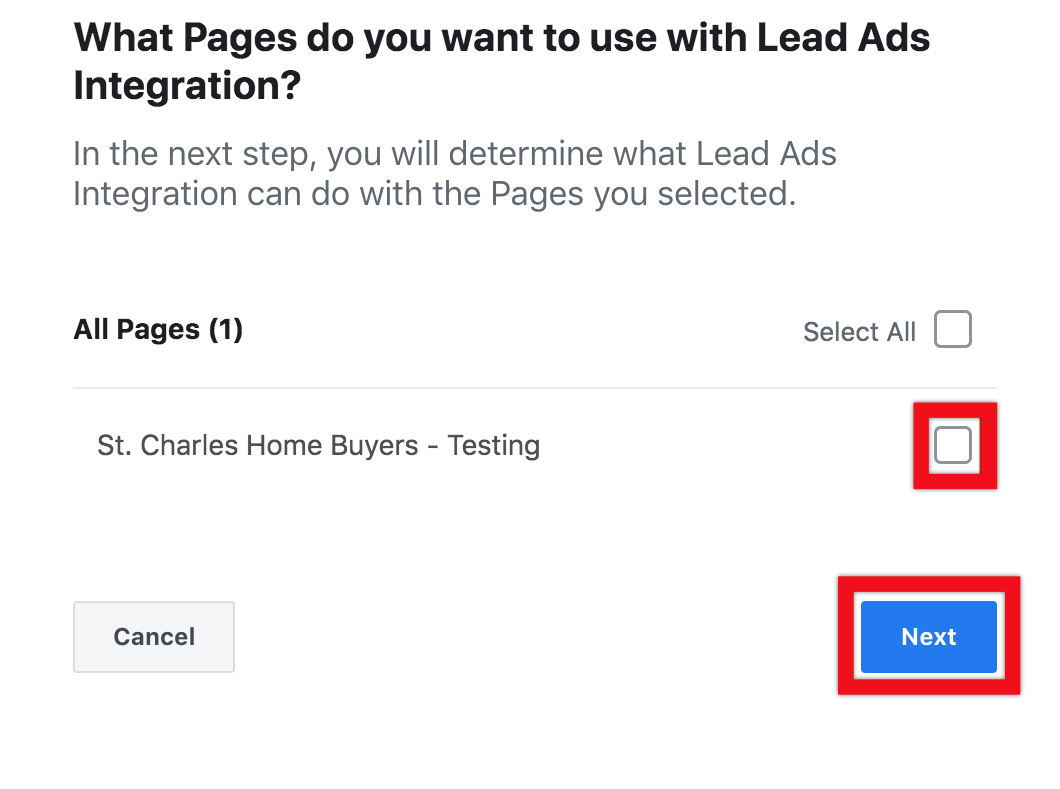
5. On the next screen, you will be prompted to select which of your Facebook pages you would like to integrate your REI BlackBook account with.
You can select multiple pages, or just one page. To do so, click on the box next the desired page.
Then, click on Next.
Note: You can go back and select/change the Facebook page(s) you are using at anytime, but you want to make sure you select the page(s) you will be running ads from.
6. Next, you will be asked what you would allow Lead Ads integrations to do.
Click on the toggles so that they point to Yes. These options are going to allow REI BlackBook to access your lead forms and the information submitted by leads.
If you leave either option turned off, the integration may not work properly. After updating the options click on Done.

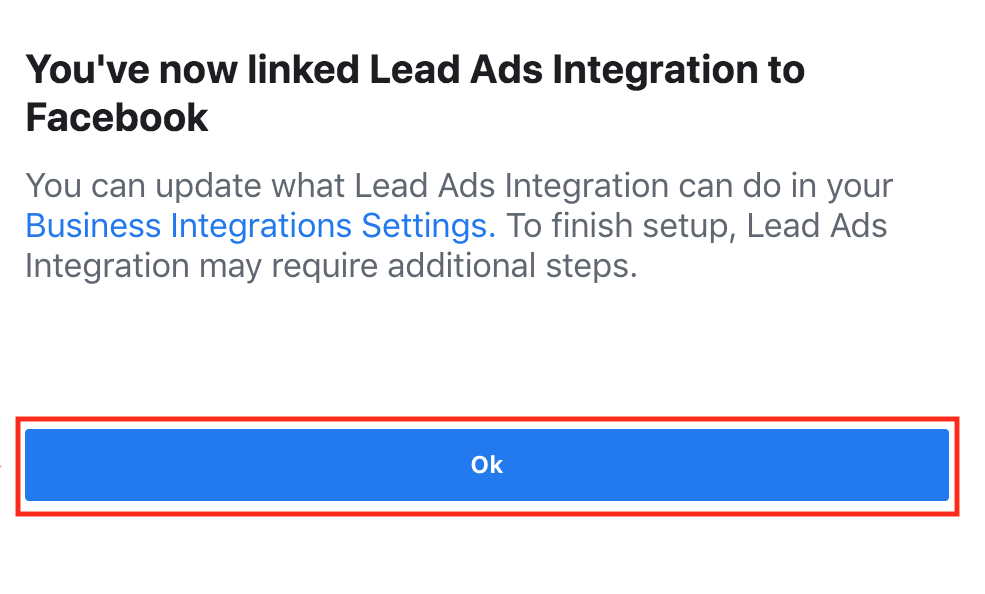
7. You have now linked your REI BlackBook account with Facebook Lead Ads.
Click on Ok, which will take you back to your REI BlackBook account.
8. After being taken back to your REI BlackBook account, you will see the integration automatically brings back the lead forms of the Facebook pages you selected.
Note: If you don't have any lead forms created on the Facebook pages that you selected, you will not see anything in your REI BlackBook account under the Facebook Leads Integration.
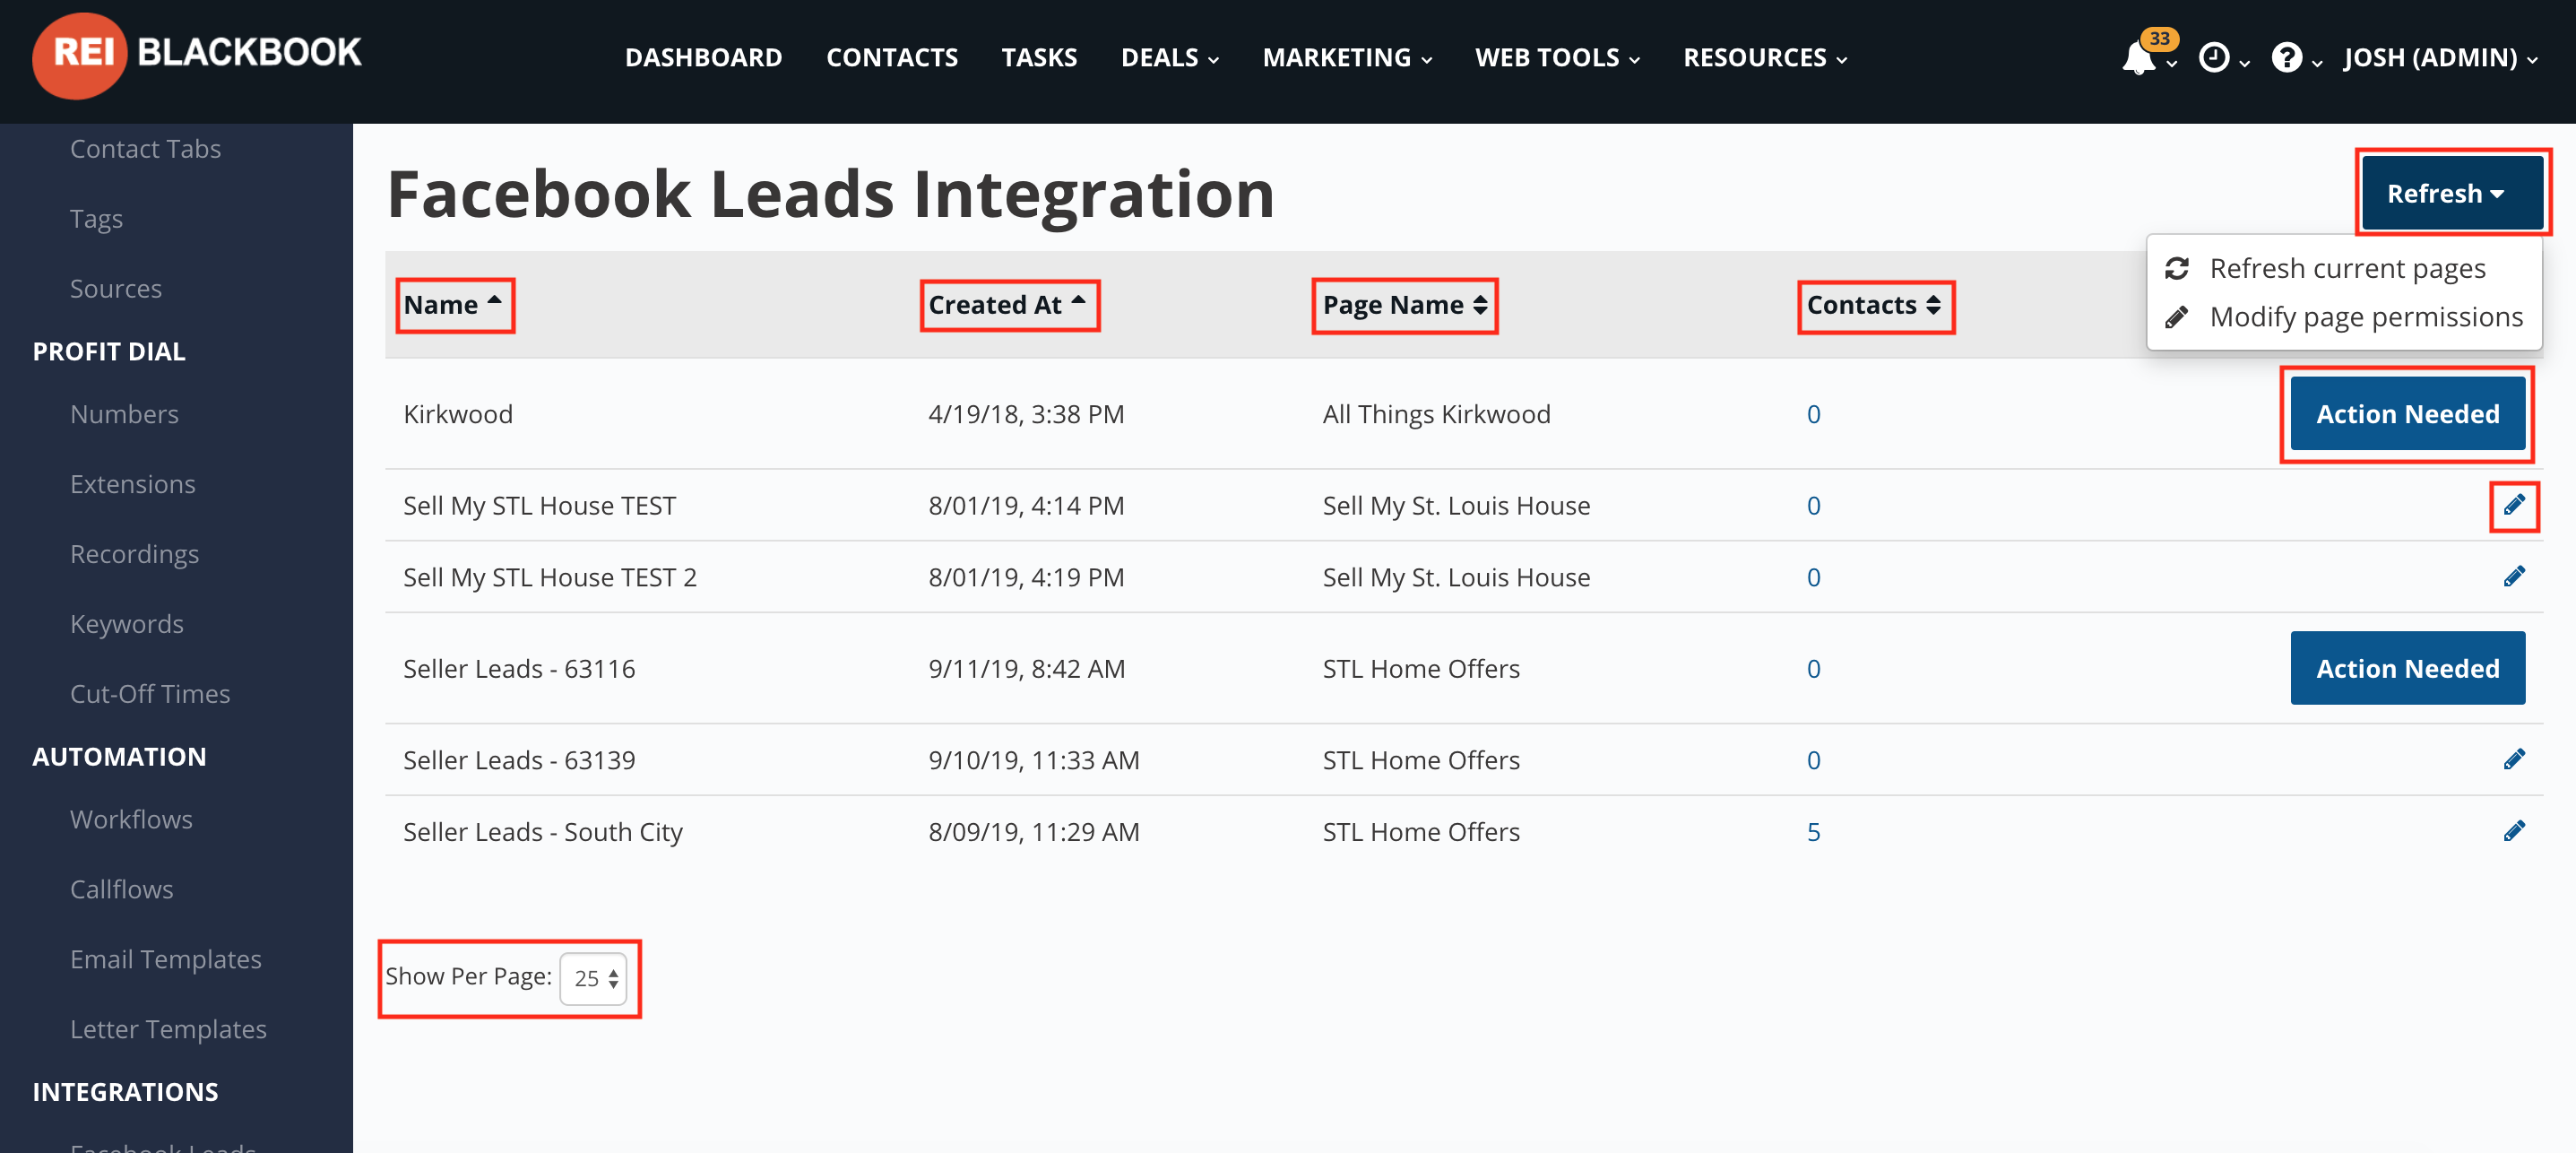
There are a few things to note on this page.
- Name: This is the name of the lead form on your Facebook page.
- Created At: This is date and time the lead form was created.
- Page Name: This is the name of your Facebook page.
- Contacts: This is the number of contacts you have from that Facebook lead form, and you can access those contacts by clicking on the number of the contacts.
- Refresh: By clicking this you will be given a drop down menu with two options.
- Refresh current pages: This will refresh the Facebook pages you currently have integrated with your REI BlackBook account, and update the lead forms for those pages.
- Modify page permissions: This will allow you to modify the page permissions that are integrated with your REI BlackBook account. So, you can add pages to integrate or remove pages you have already integrated with your account.
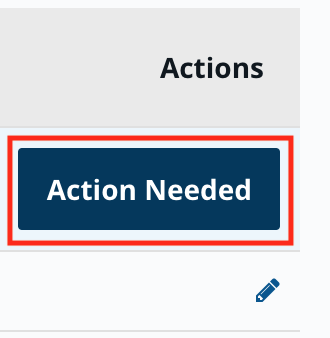
- Action Needed: This lets you know there is additional set up that needs to happen with that specific lead form. Typically you will either need to map fields on your Facebook lead form, so the contact information is routed to the correct field of the contact details in your CRM, or you need to assign a Workflow to be triggered for that lead form.
- Pencil Icon: This allows you to edit where the current fields of the lead form are being mapped, or change the Workflow that is being assigned to that lead form.
- Show Per Page: You can determine how many Facebook lead forms are showing on the page at a time. You can select between 10, 25, and 50.
9. To finish up the integration, you will need to map the fields on your Facebook lead form, so the contact information is routed to the correct field of the contact details in your CRM.
You also need to assign a workflow to be triggered for that lead form.
To do this, click on Action Needed located next to each lead form you have integrated into your REI BlackBook account.
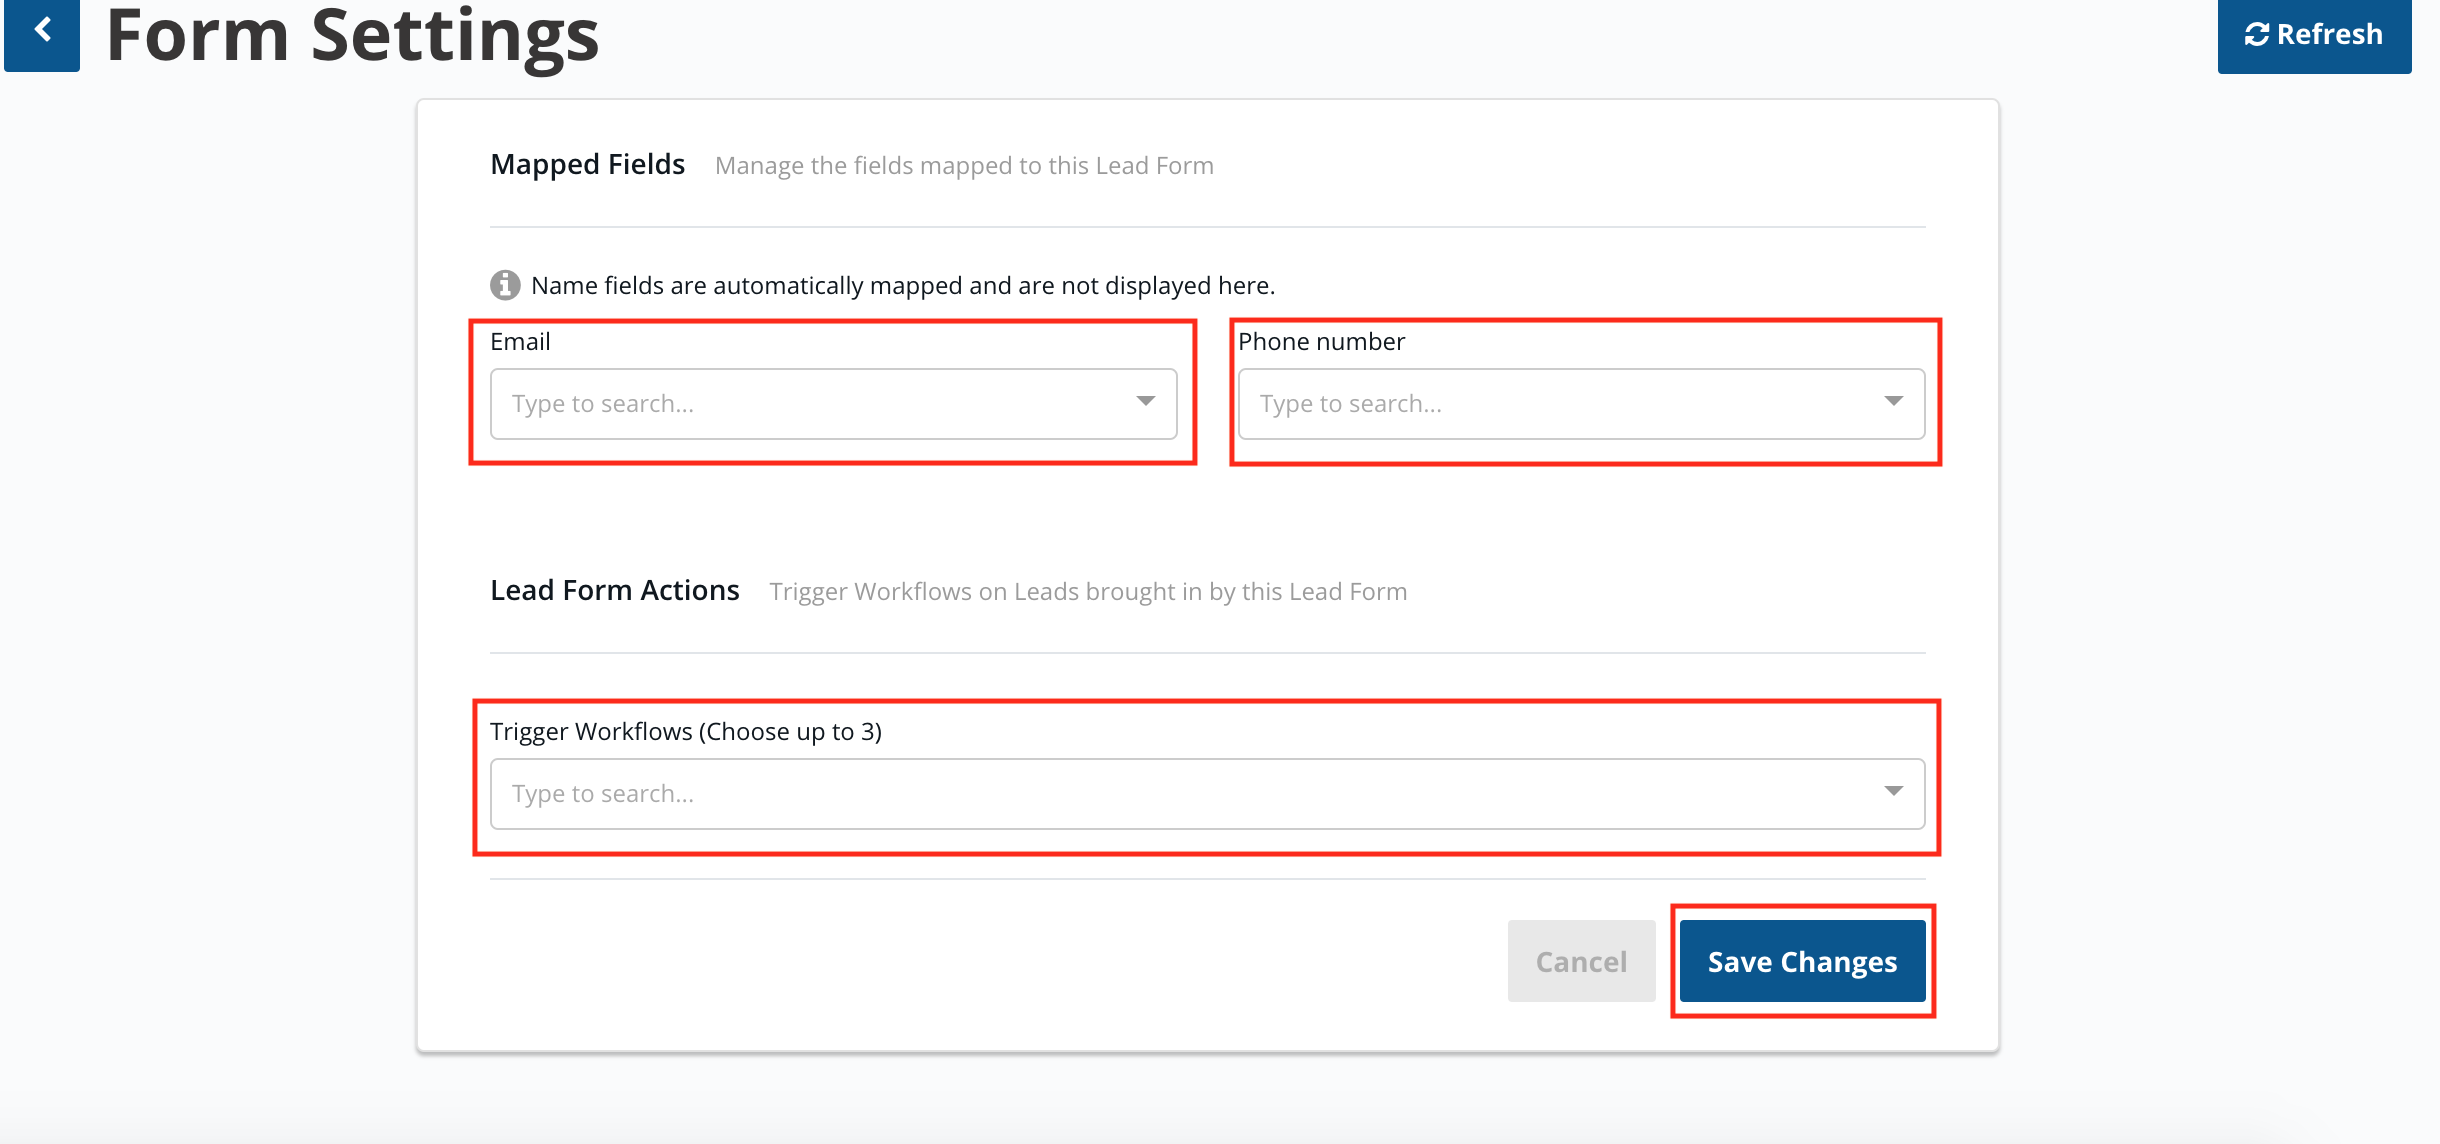
10. You will be taken to the Form Settings page where you can select where the fields from the lead form will be mapped to your CRM, and which workflow you want to trigger for that lead form.
To select where you want the fields mapped, click on the drop down menu for each field, and select where the field will be mapped to in your CRM.
The options will be fields that are currently in the contact record for your contacts in your CRM. Currently, you can't add Property Pipeline fields.
Note: The fields that you are mapping come directly from the questions that you selected to ask on the lead form for your Facebook page.
To select a workflow that you want triggered, click on the drop down menu of the Trigger Workflows, and select which workflow want to use.
Once you have made your selections, click the Save Changes button.
The Facebook Lead Ads integration is now fully set up, and you can start capturing leads from the Lead Ads you're running on Facebook.
This also means you now have the ability to set up automatic follow up with the leads you receive from the ads. If you don't currently have a Facebook page, and need assistance setting one up please review the article How To Set Up A Facebook Page.
If you need assistance setting up a Facebook Lead Ad please review the article Create lead ads on Facebook. You can also review the Facebook Ads Chapter in the Guide to Generating Motivated Seller Leads for a high level overview of how to set up Facebook Lead Ads as well.
Thank You!
We appreciate you taking the time to learn how to integrate your REI BlackBook account with your Facebook Lead Ads! If you have any questions or concerns about the information above please contact us at support@reiblackbook.com.