Please follow the instructions to create a new blog post for your website.
You may also follow these Step by Step instructions below to create a new blog post for your website.
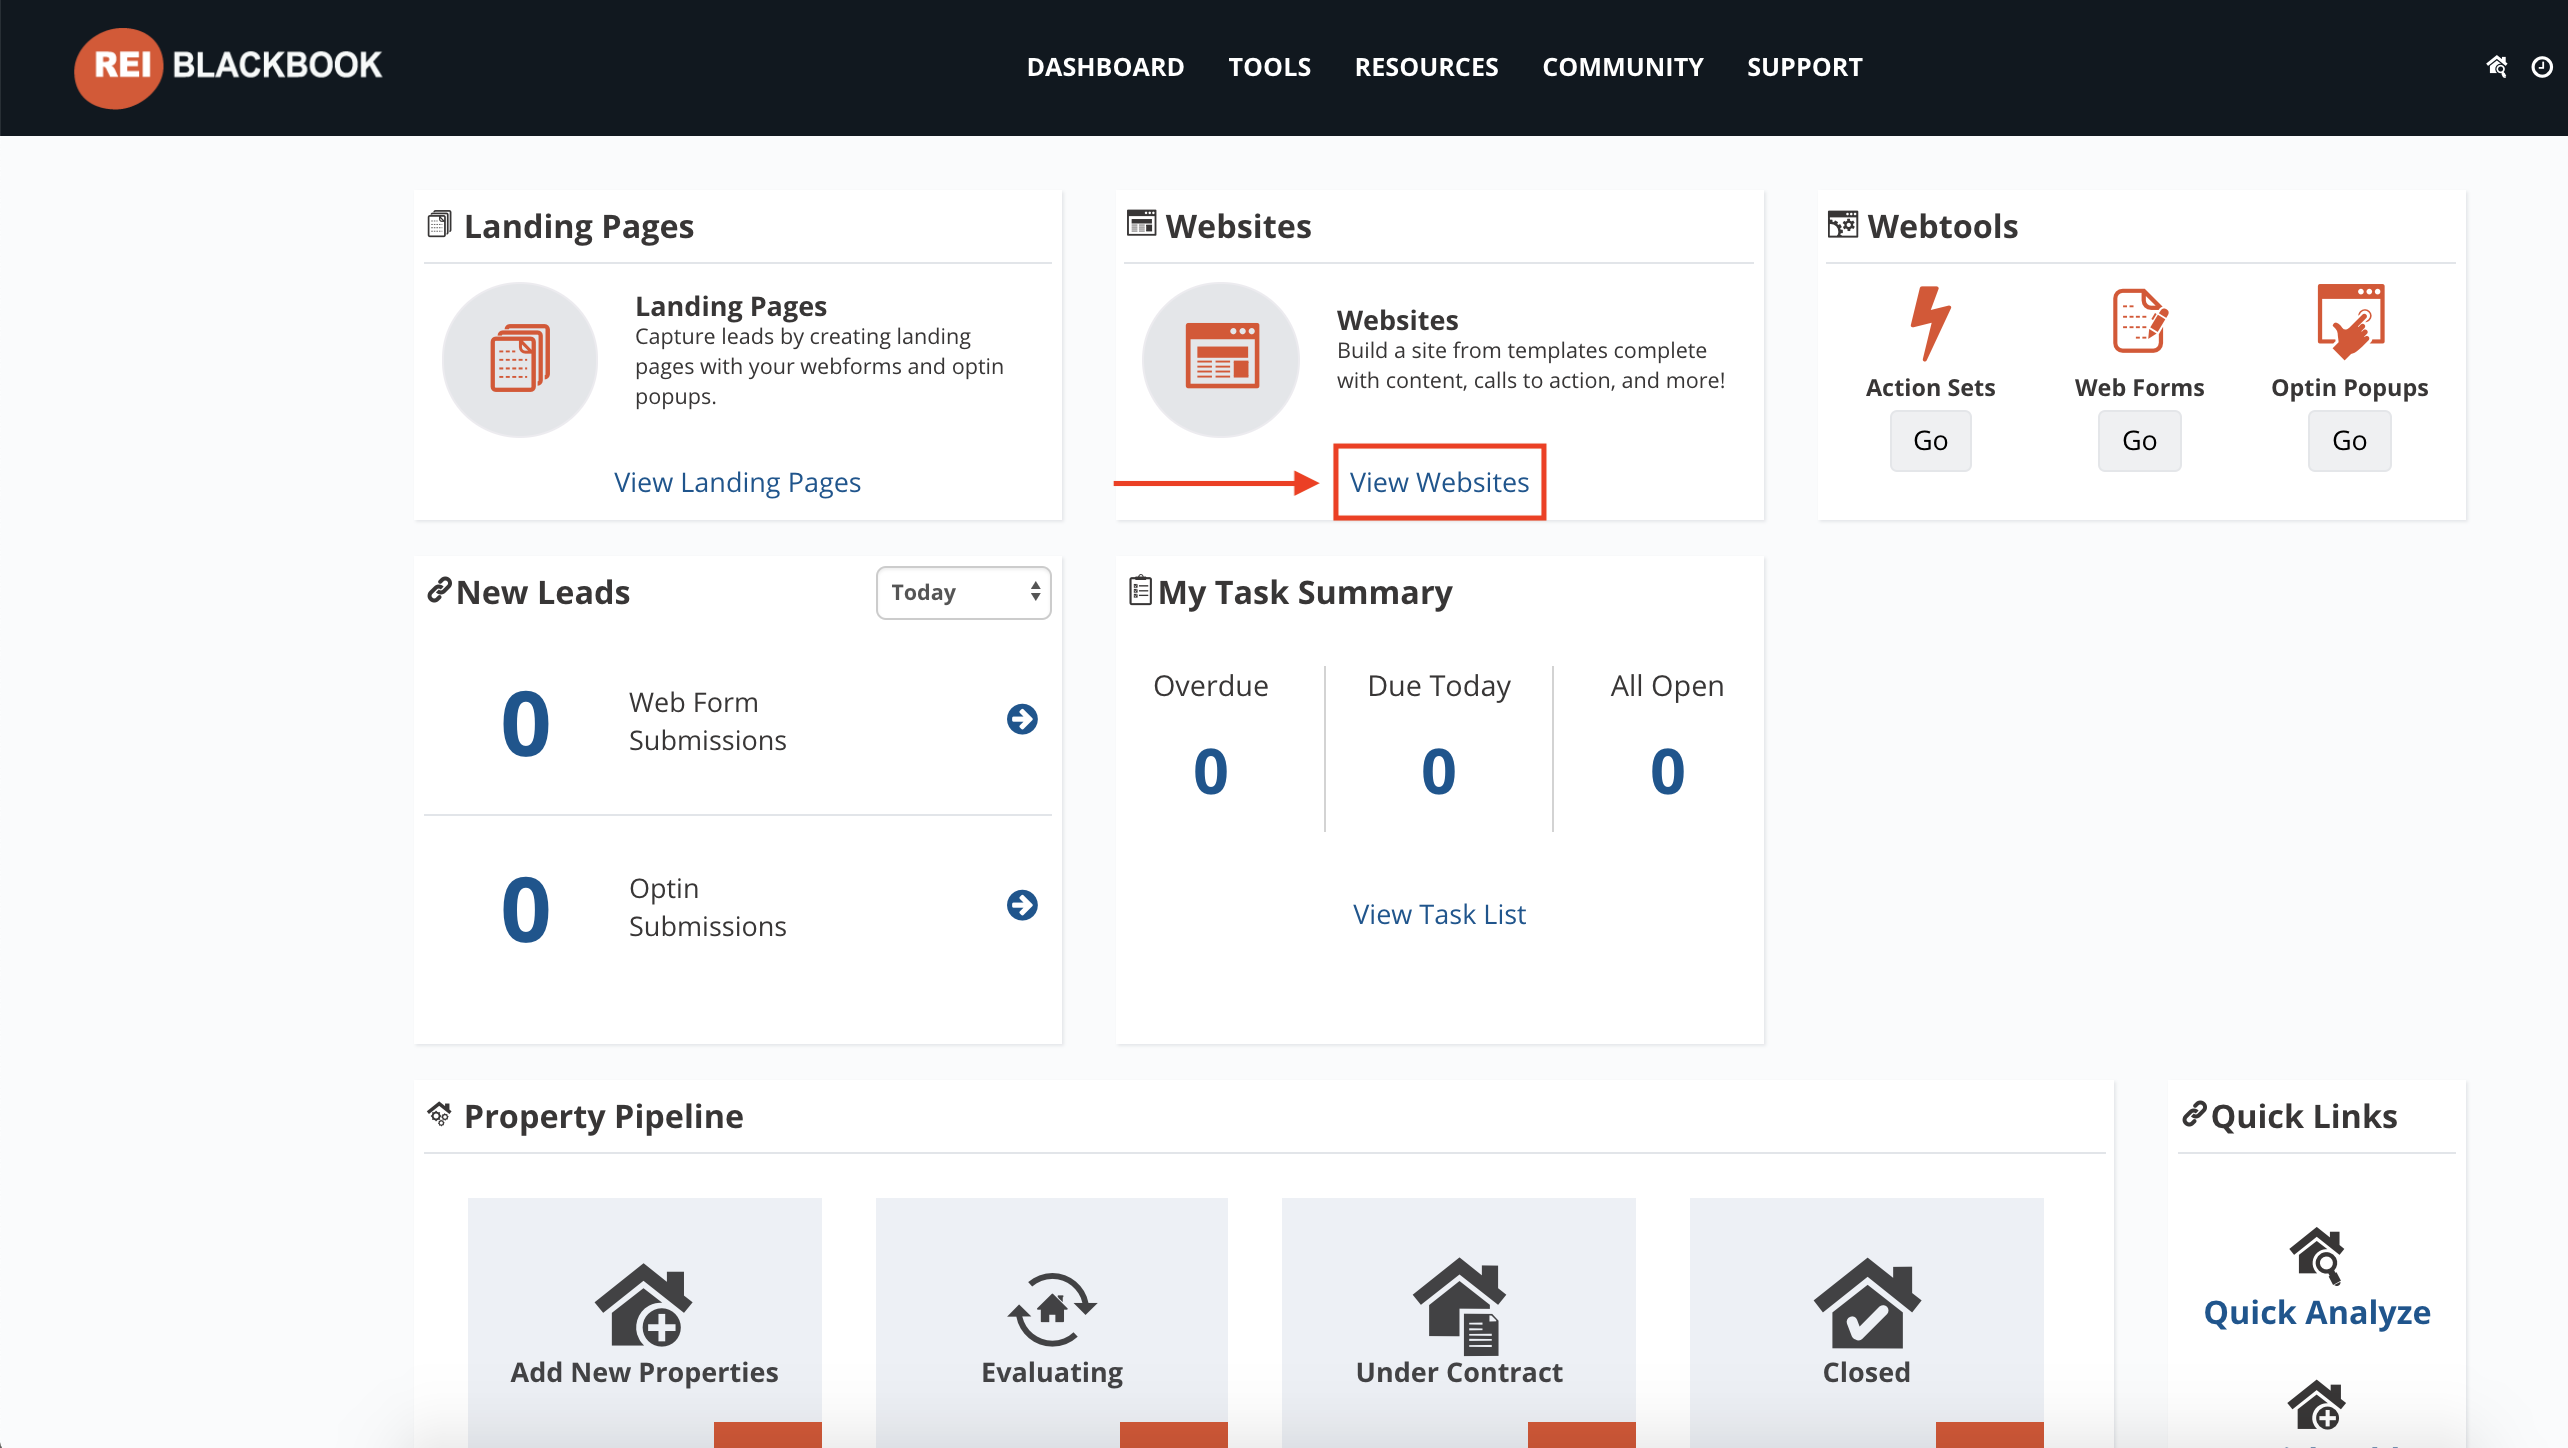
- From your account Dashboard click on View Websites.
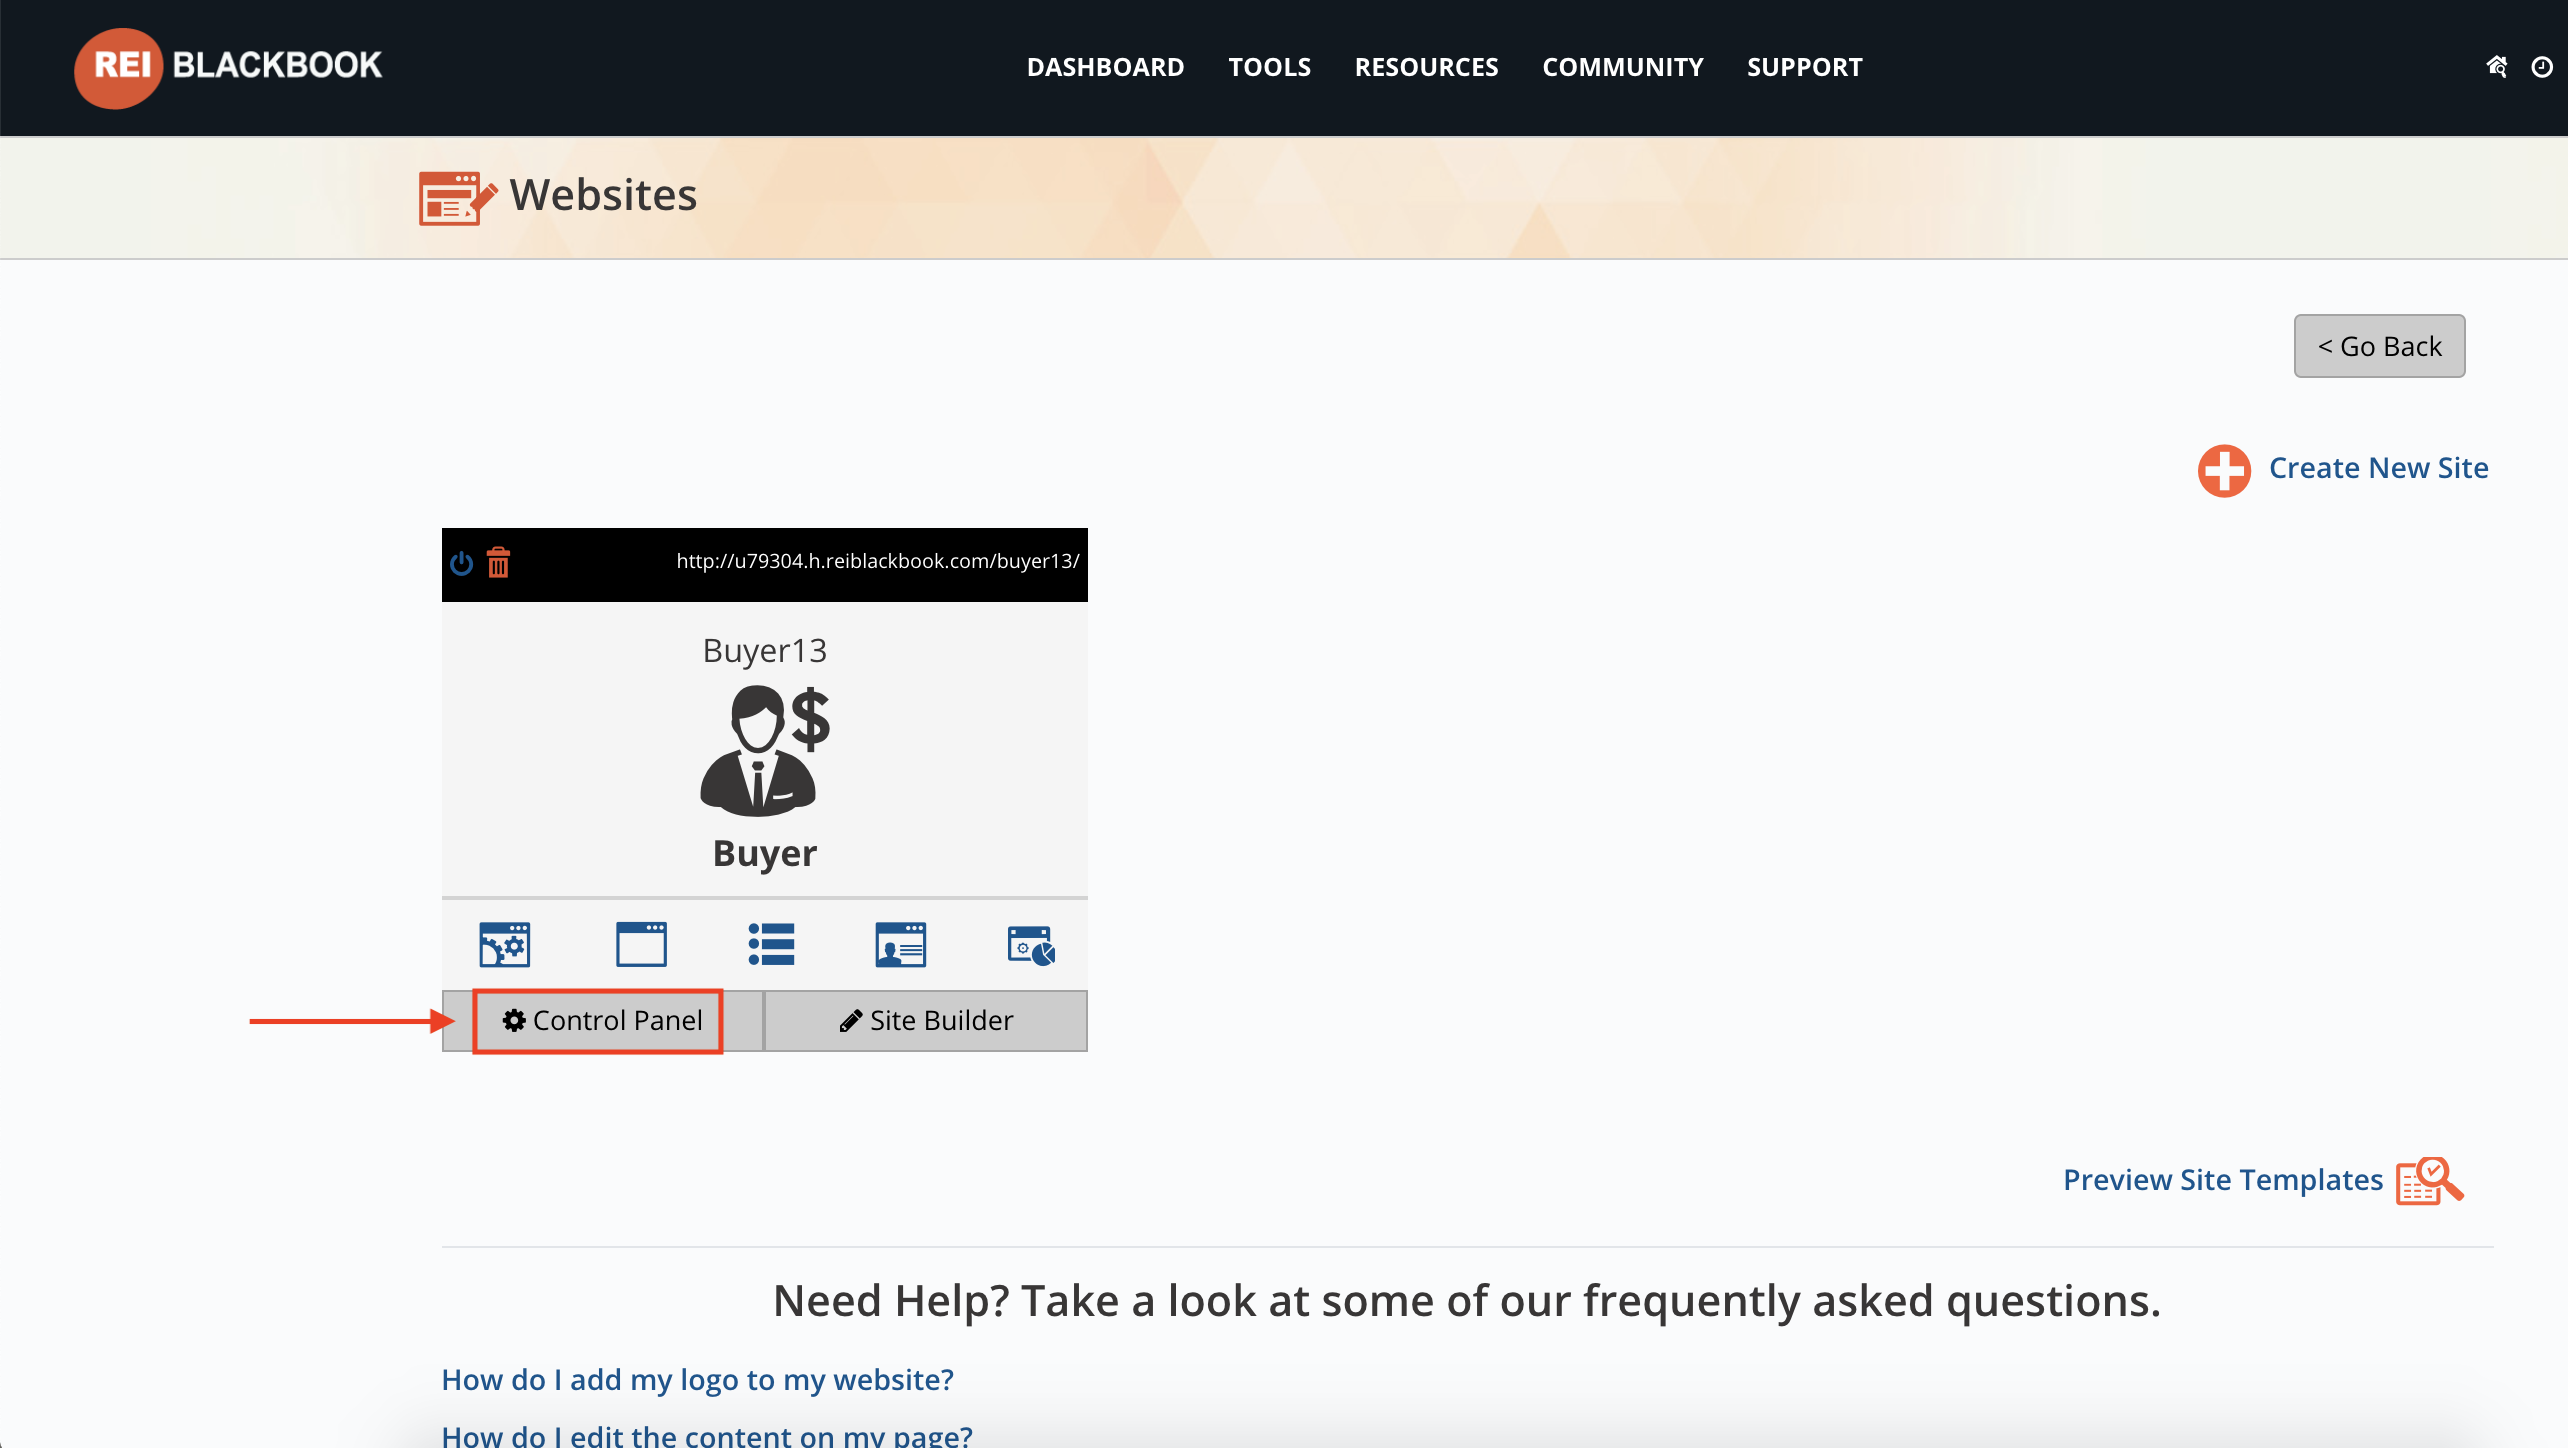
- Click on the ControlPanel button of the website you want to add a blog post to.
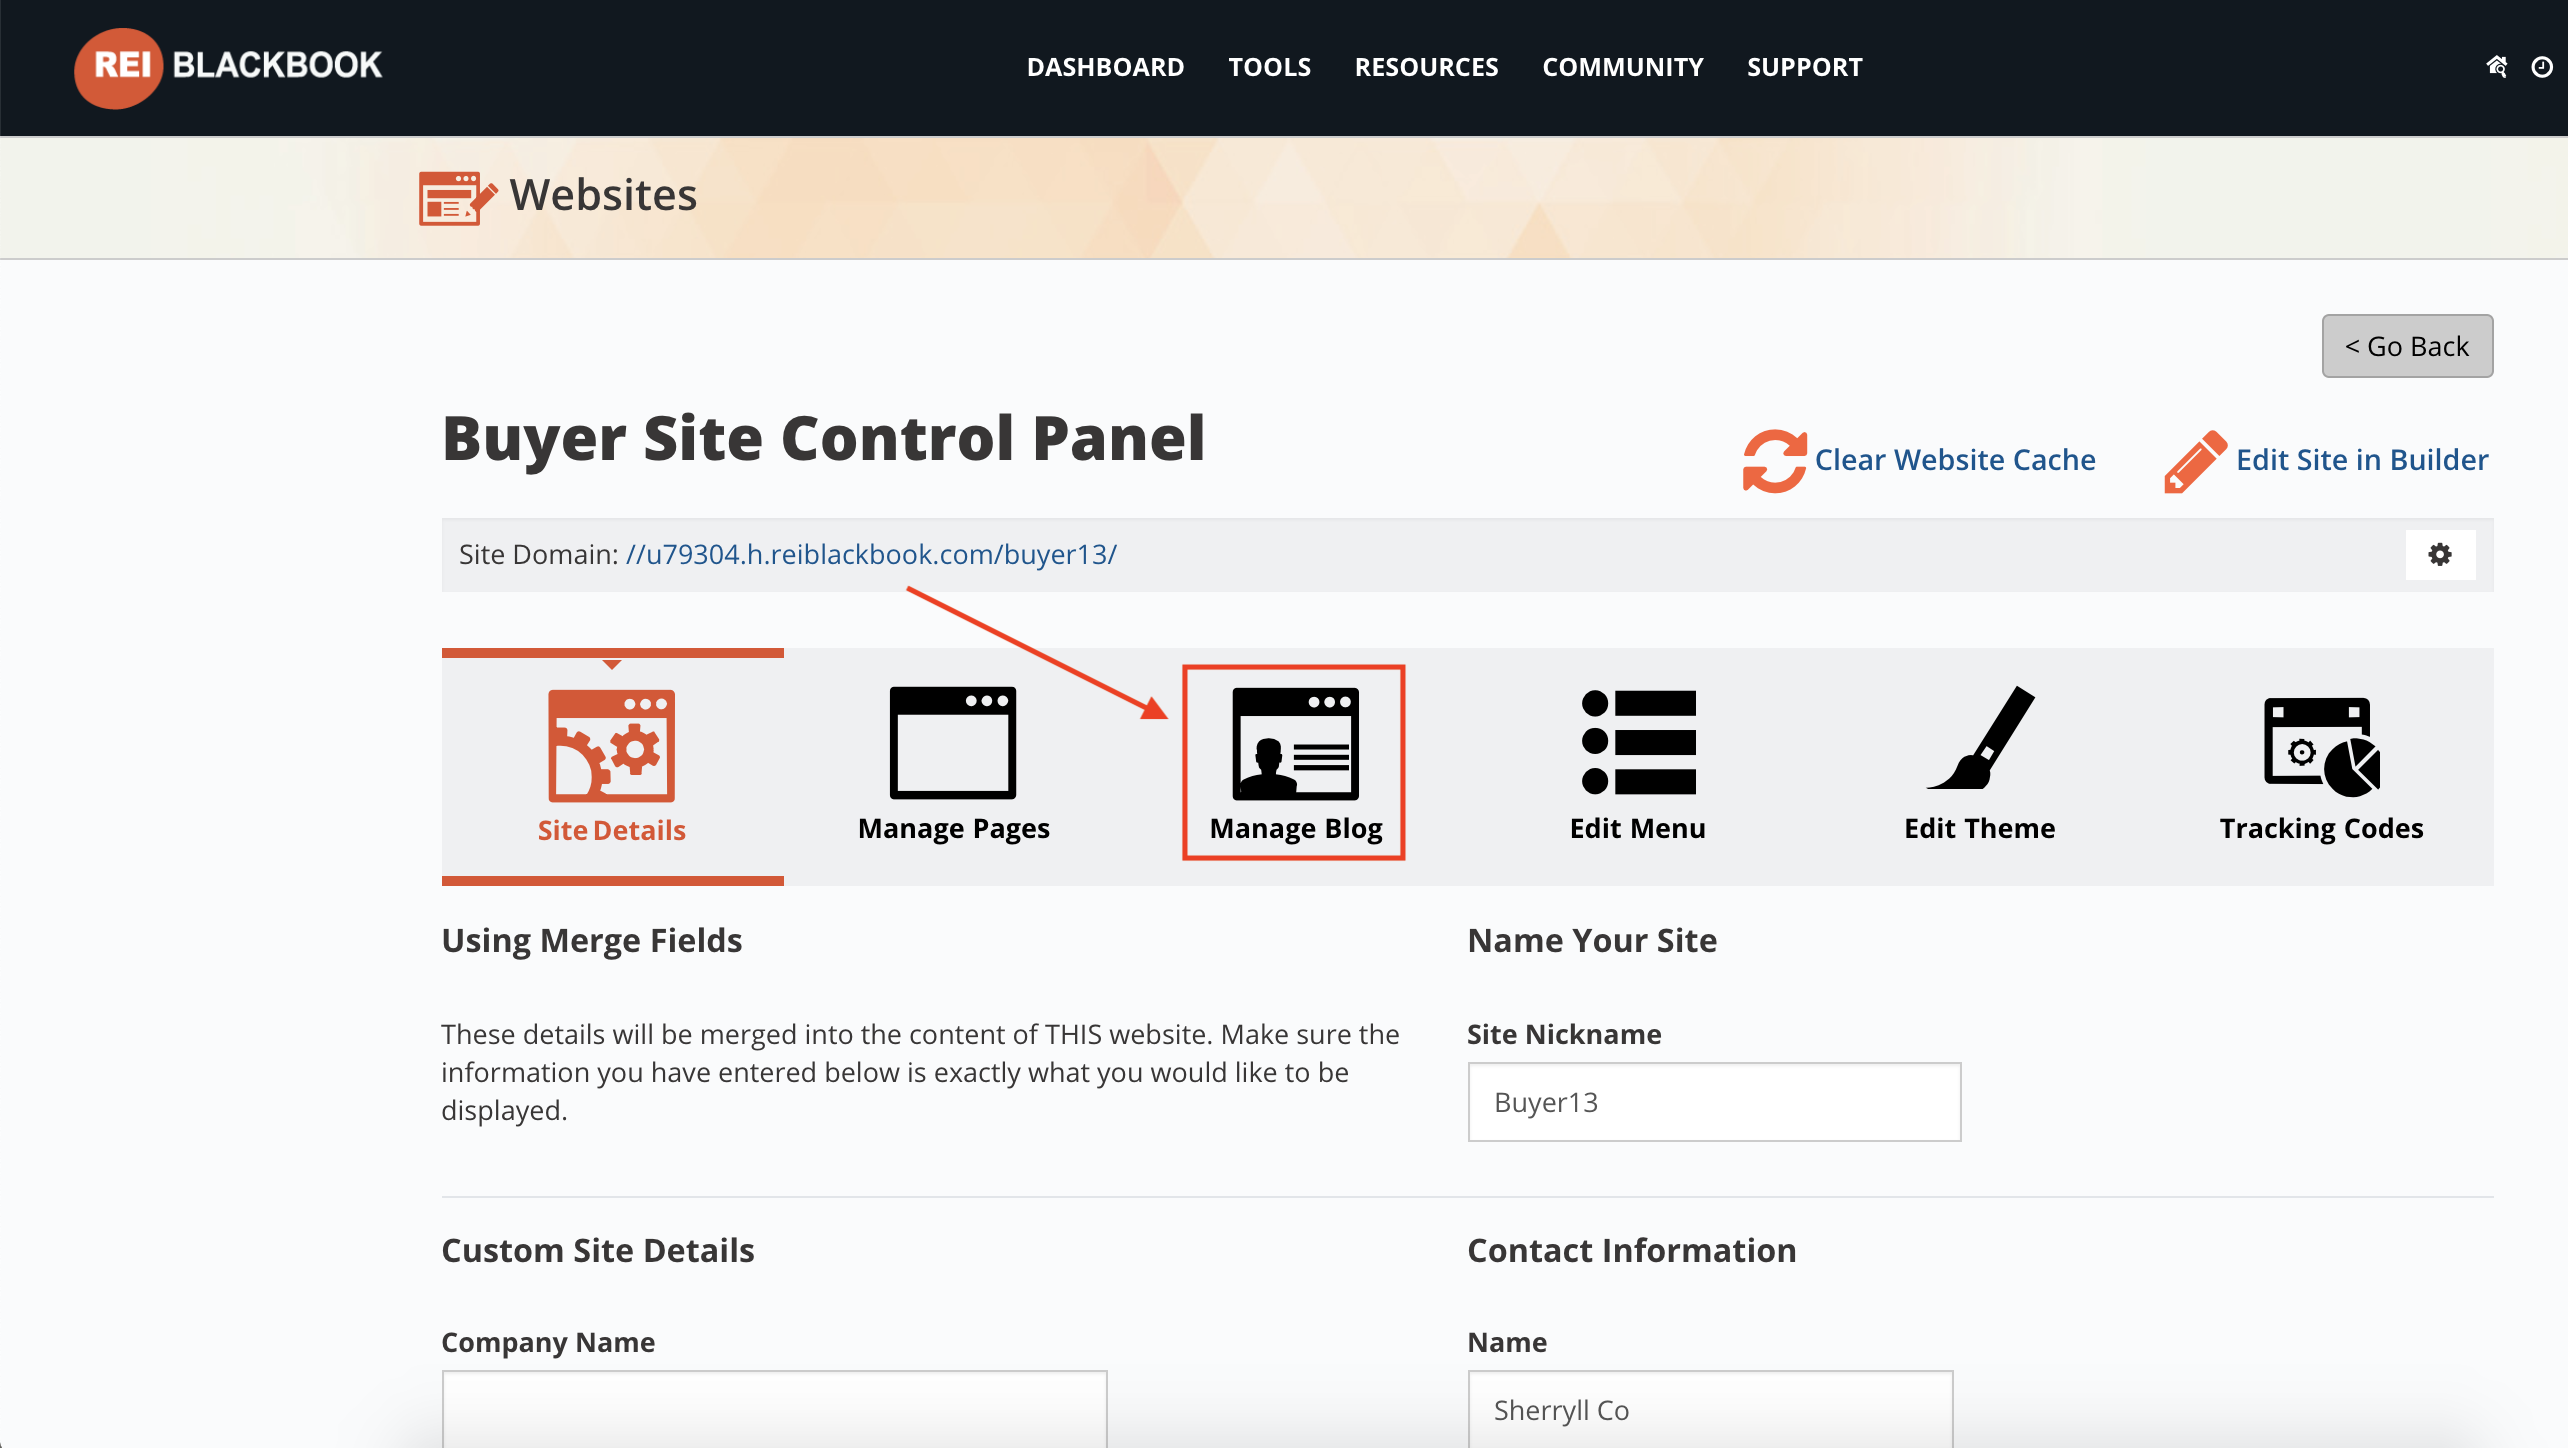
- Click on the Manage Blog tab.
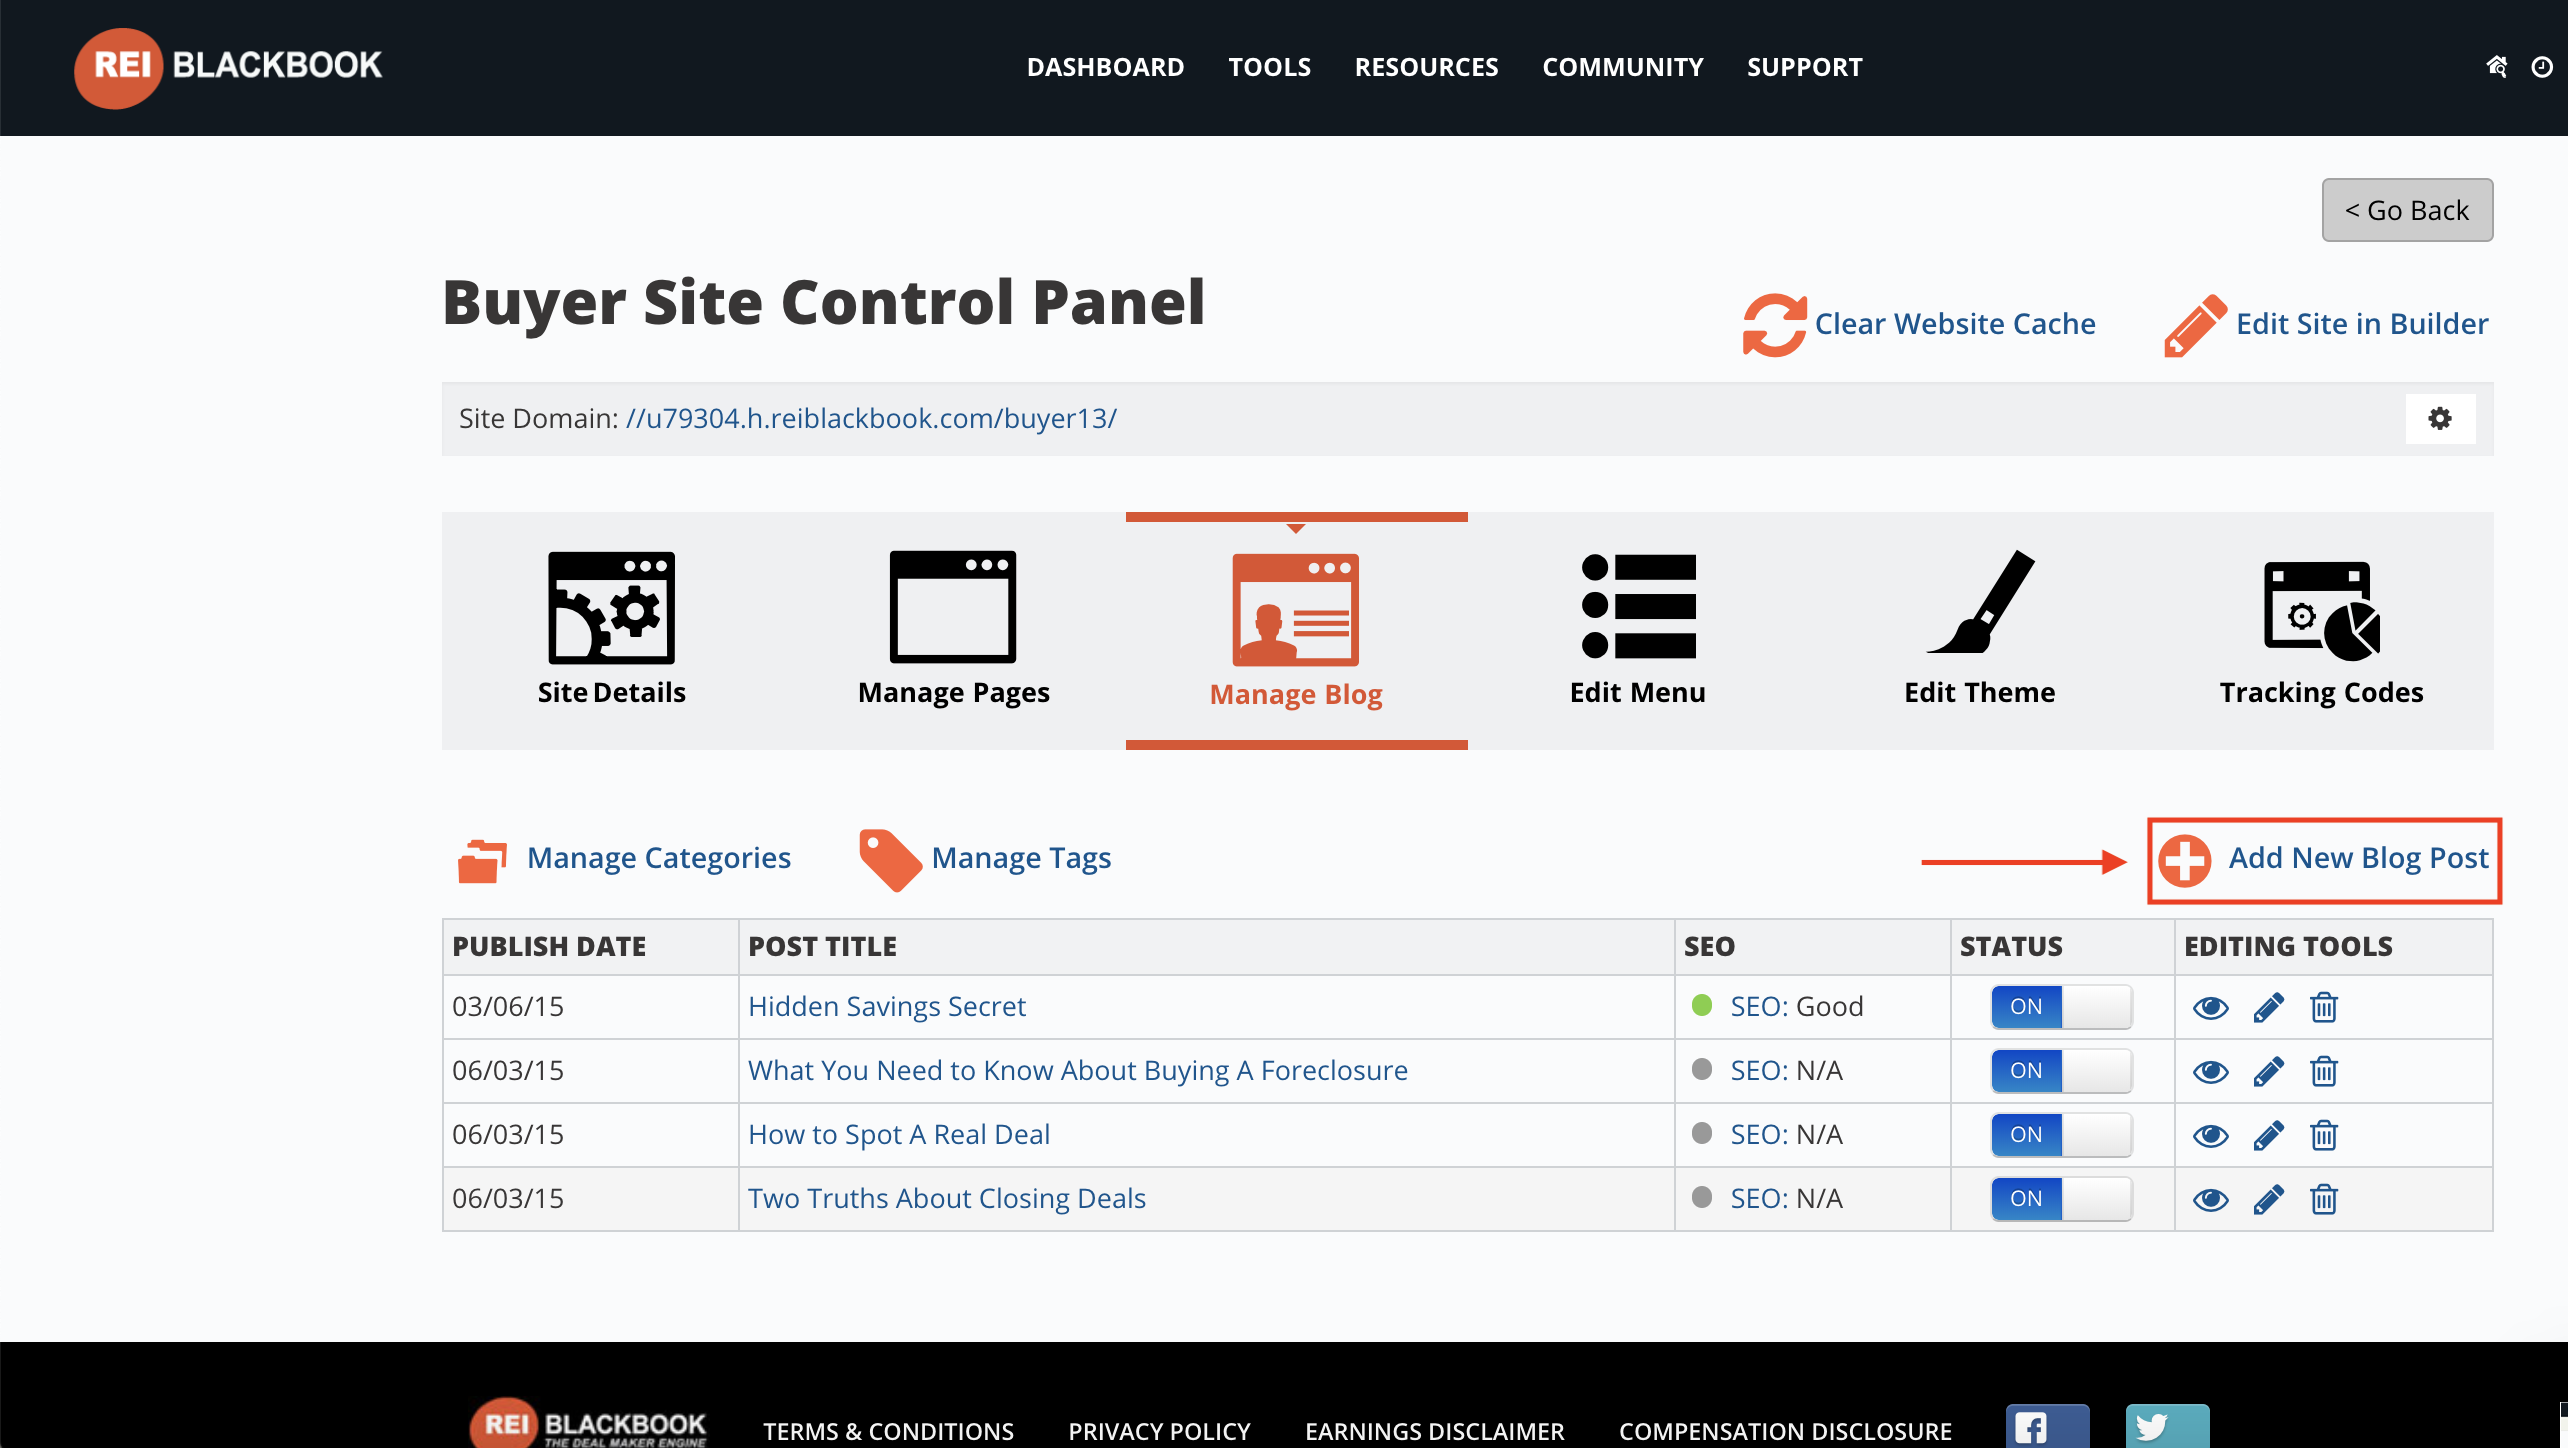
- Click on +Add New Blog Post.
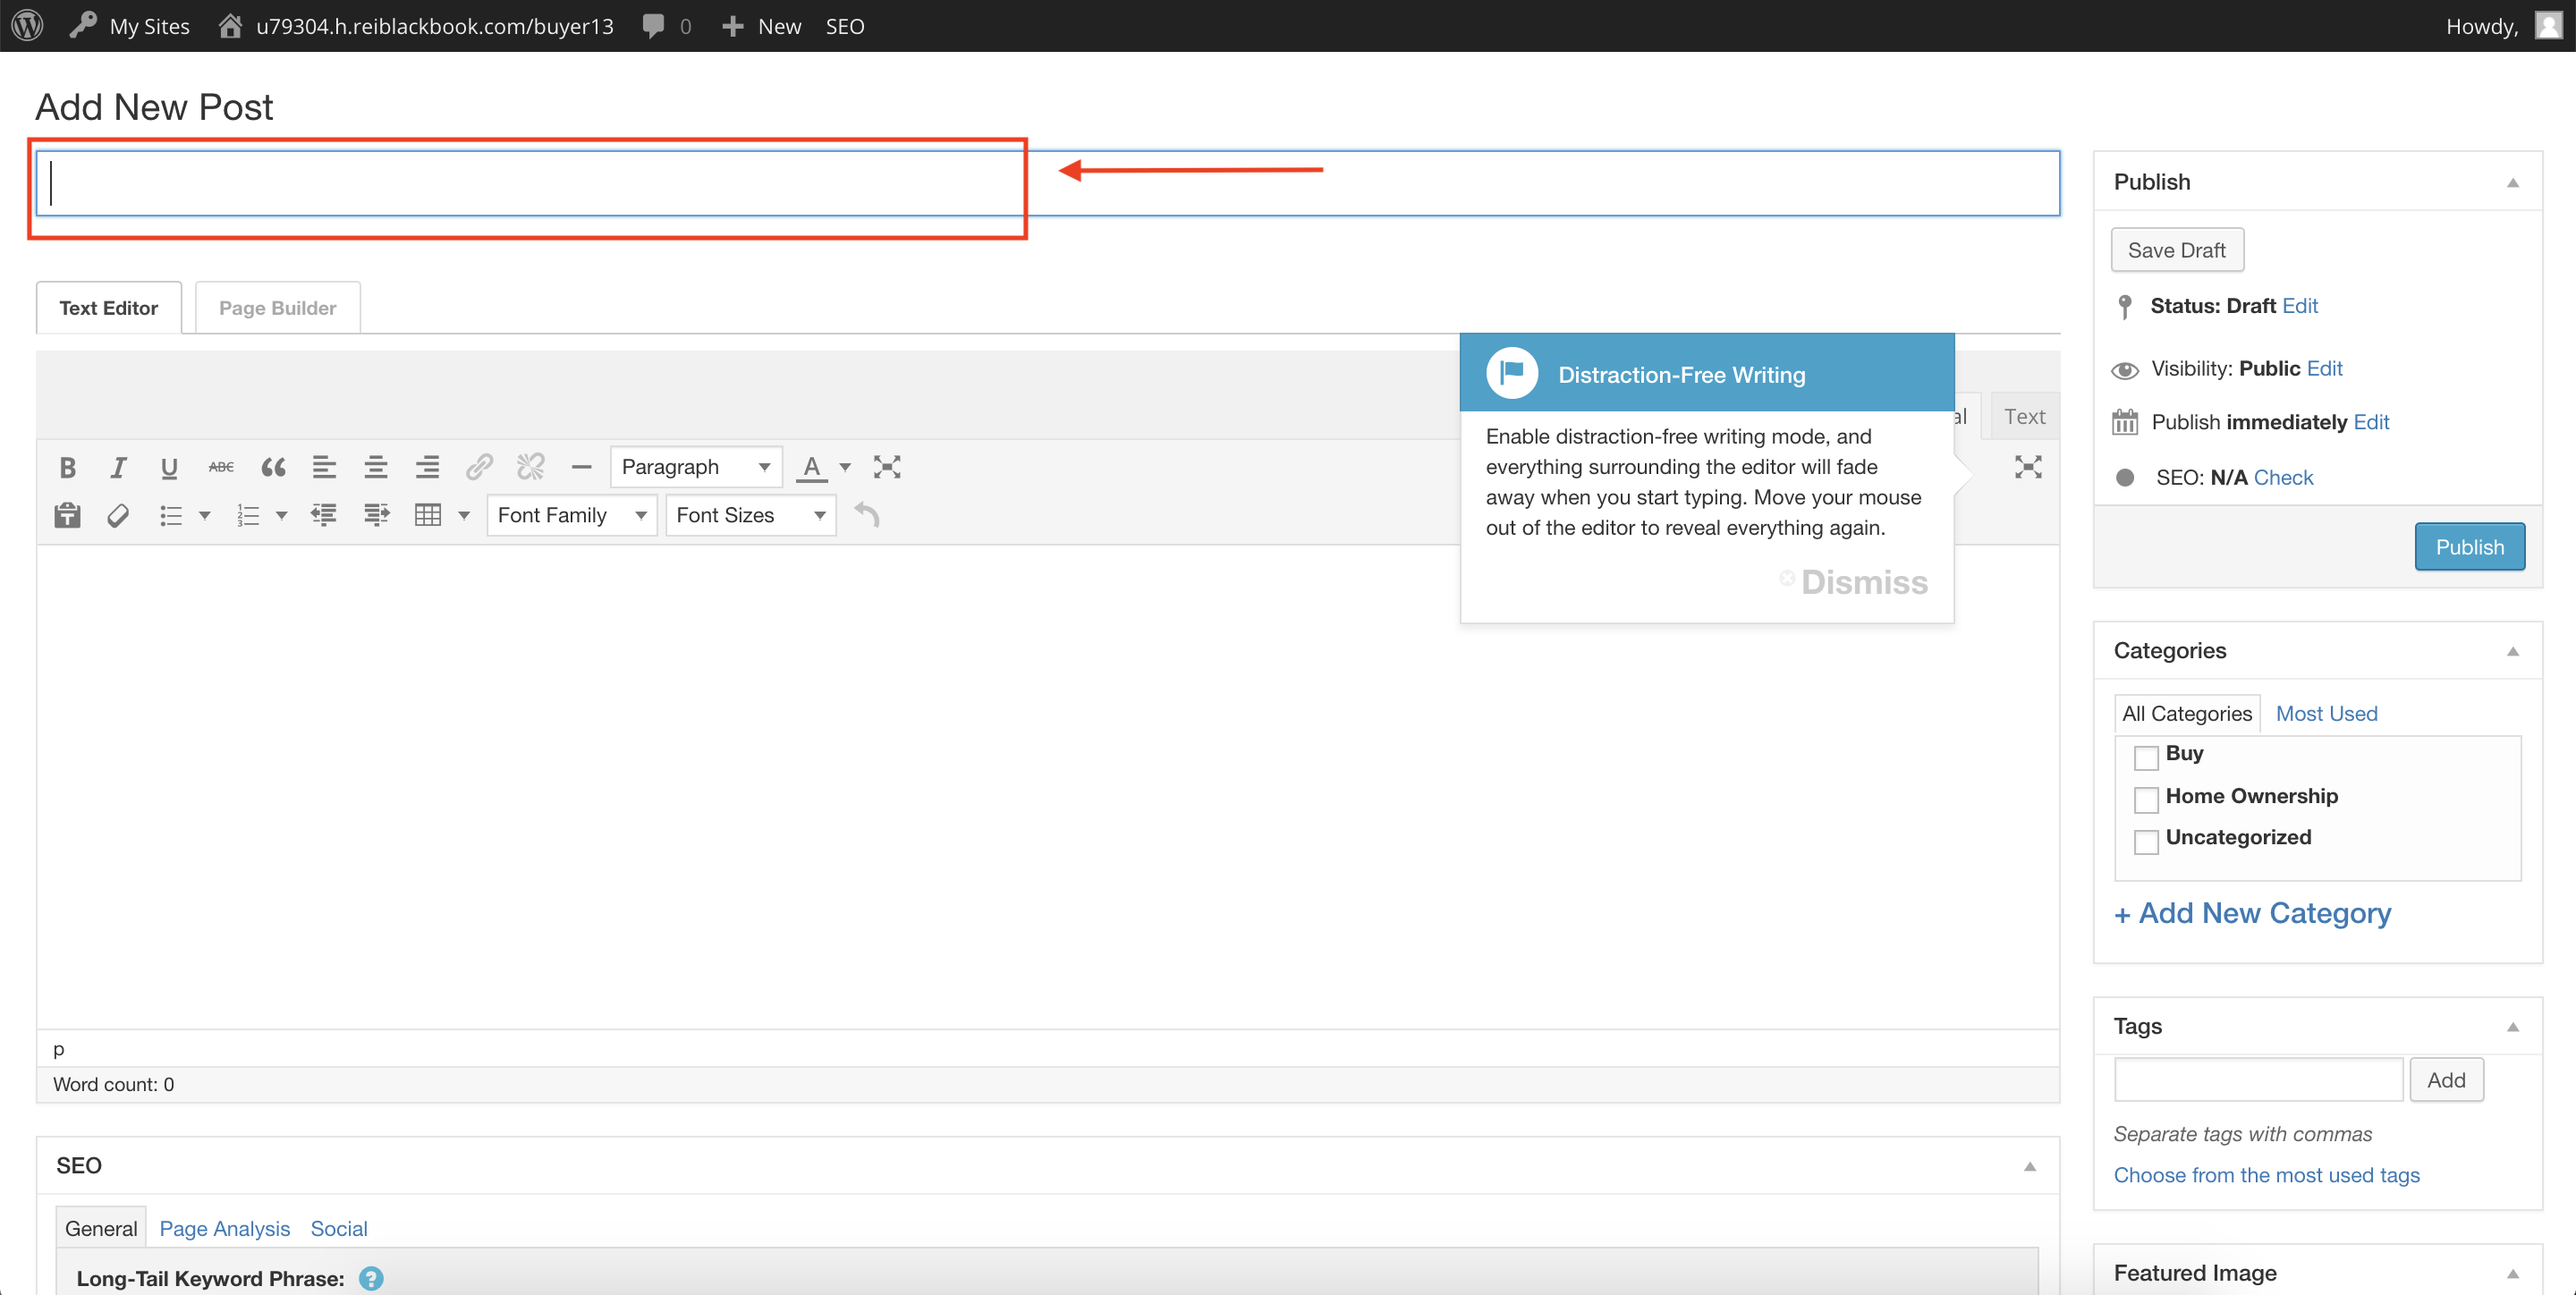
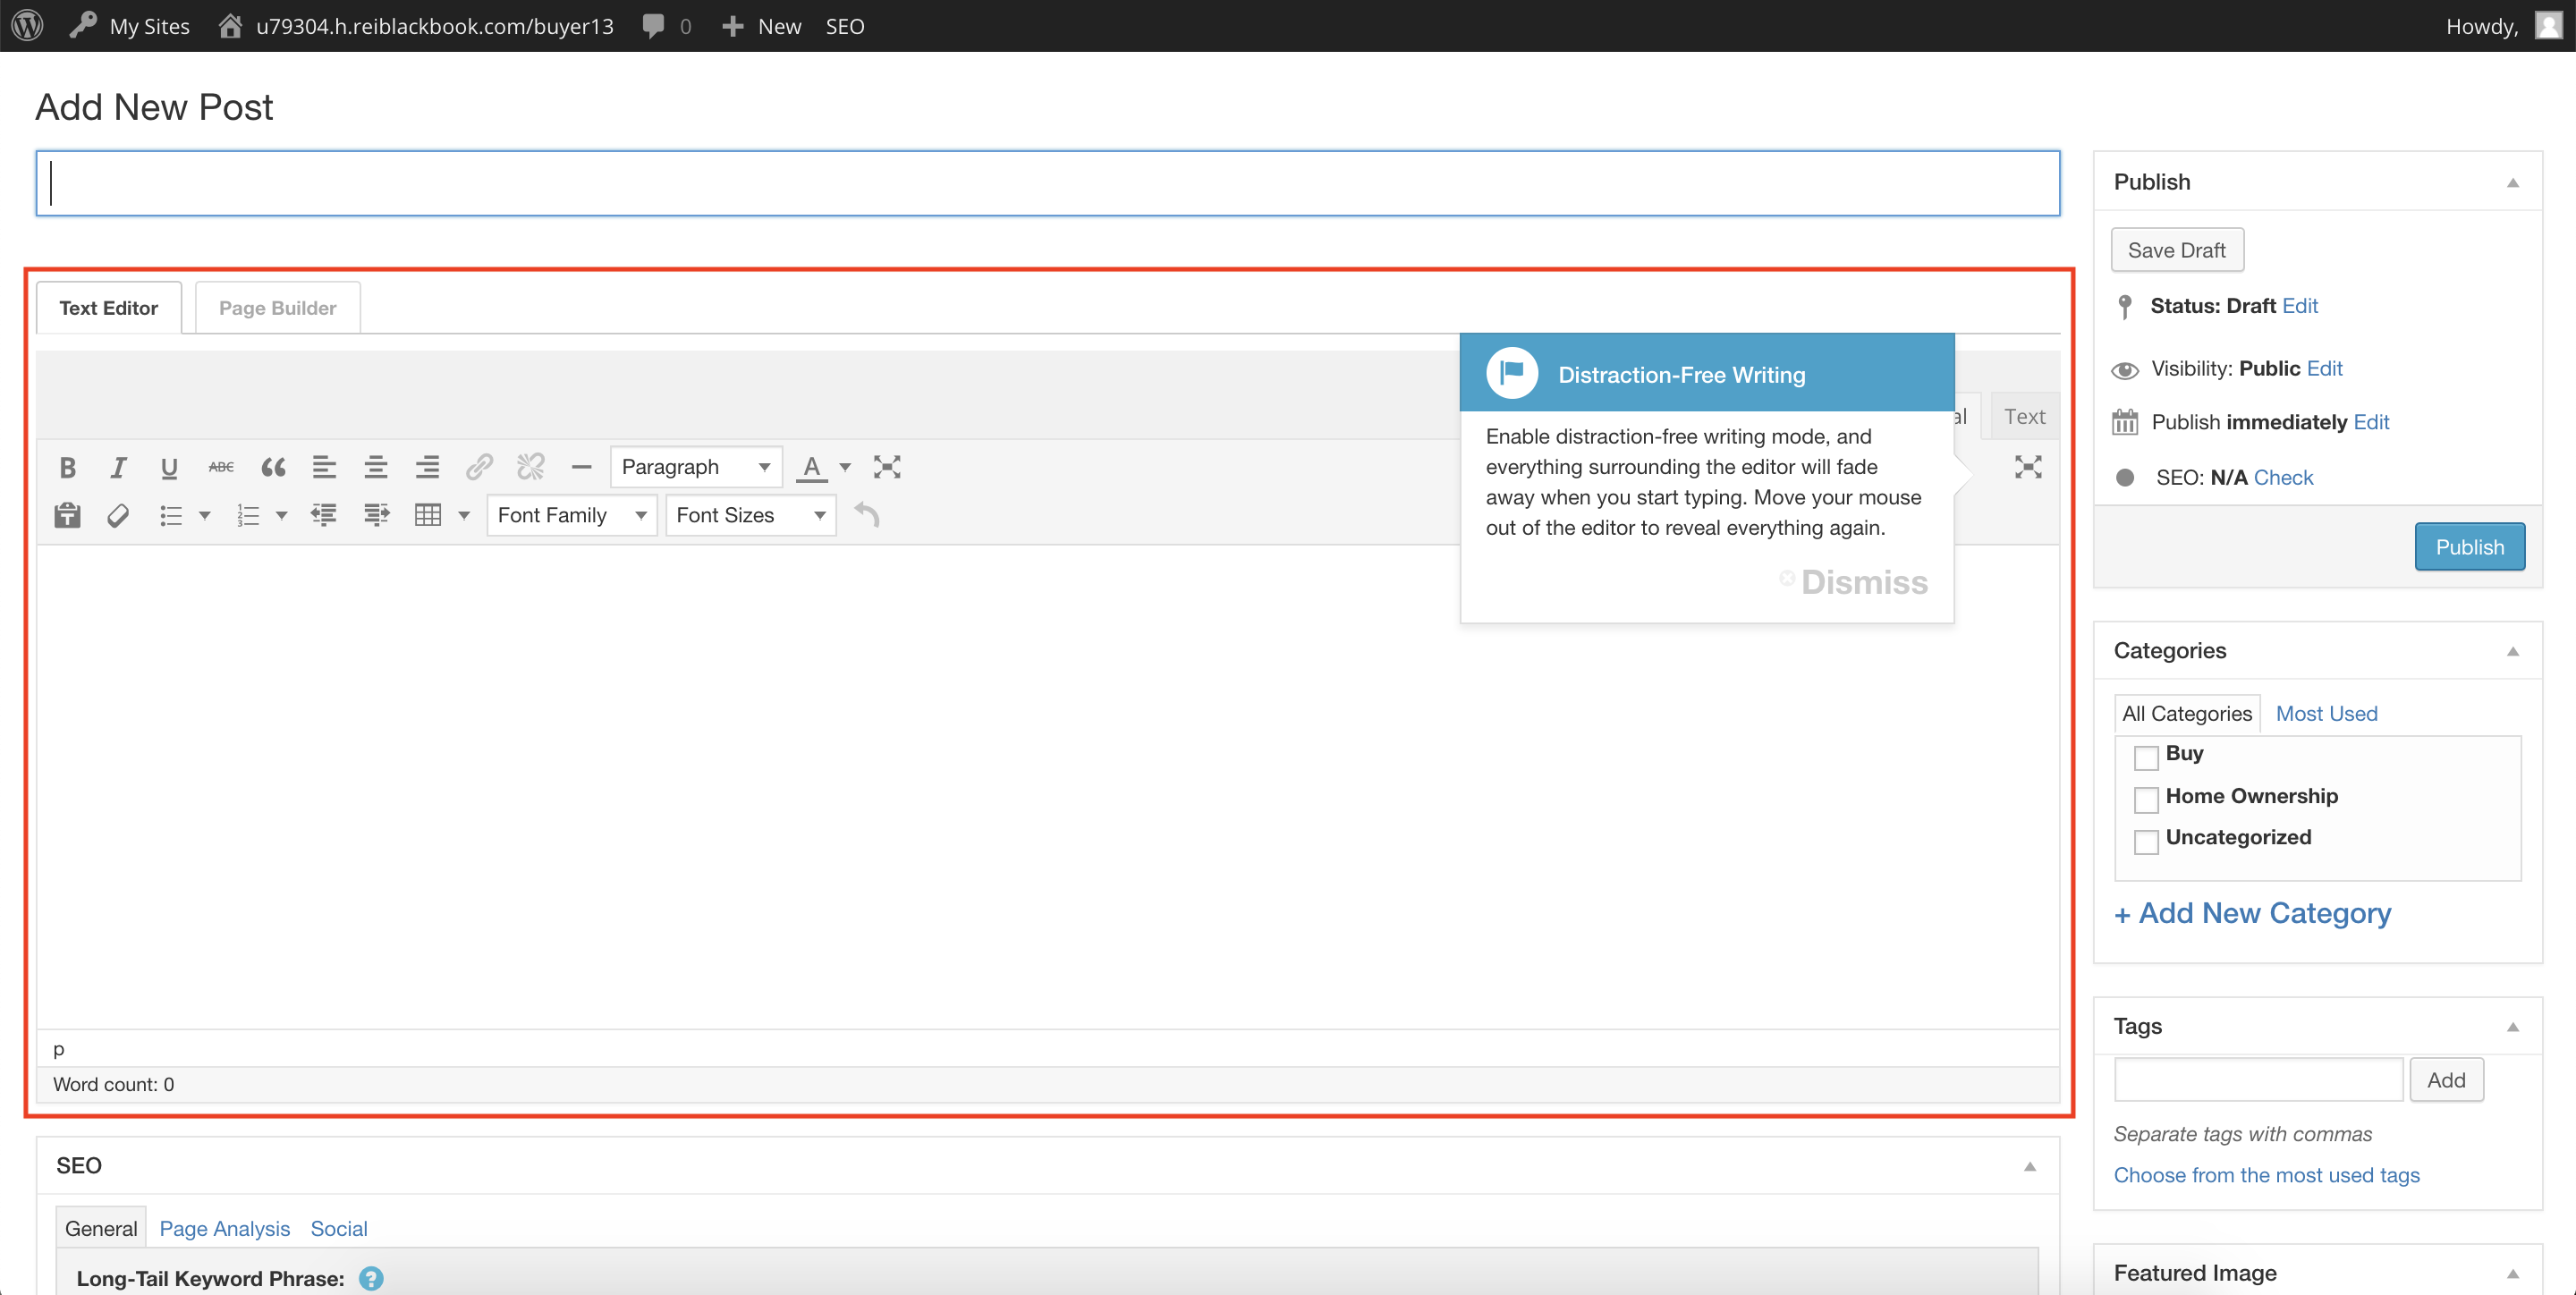
- Type in the title on Add New Post.
- Select the Categories on the right hand side of the page. This will make your blog posts easier to filter.

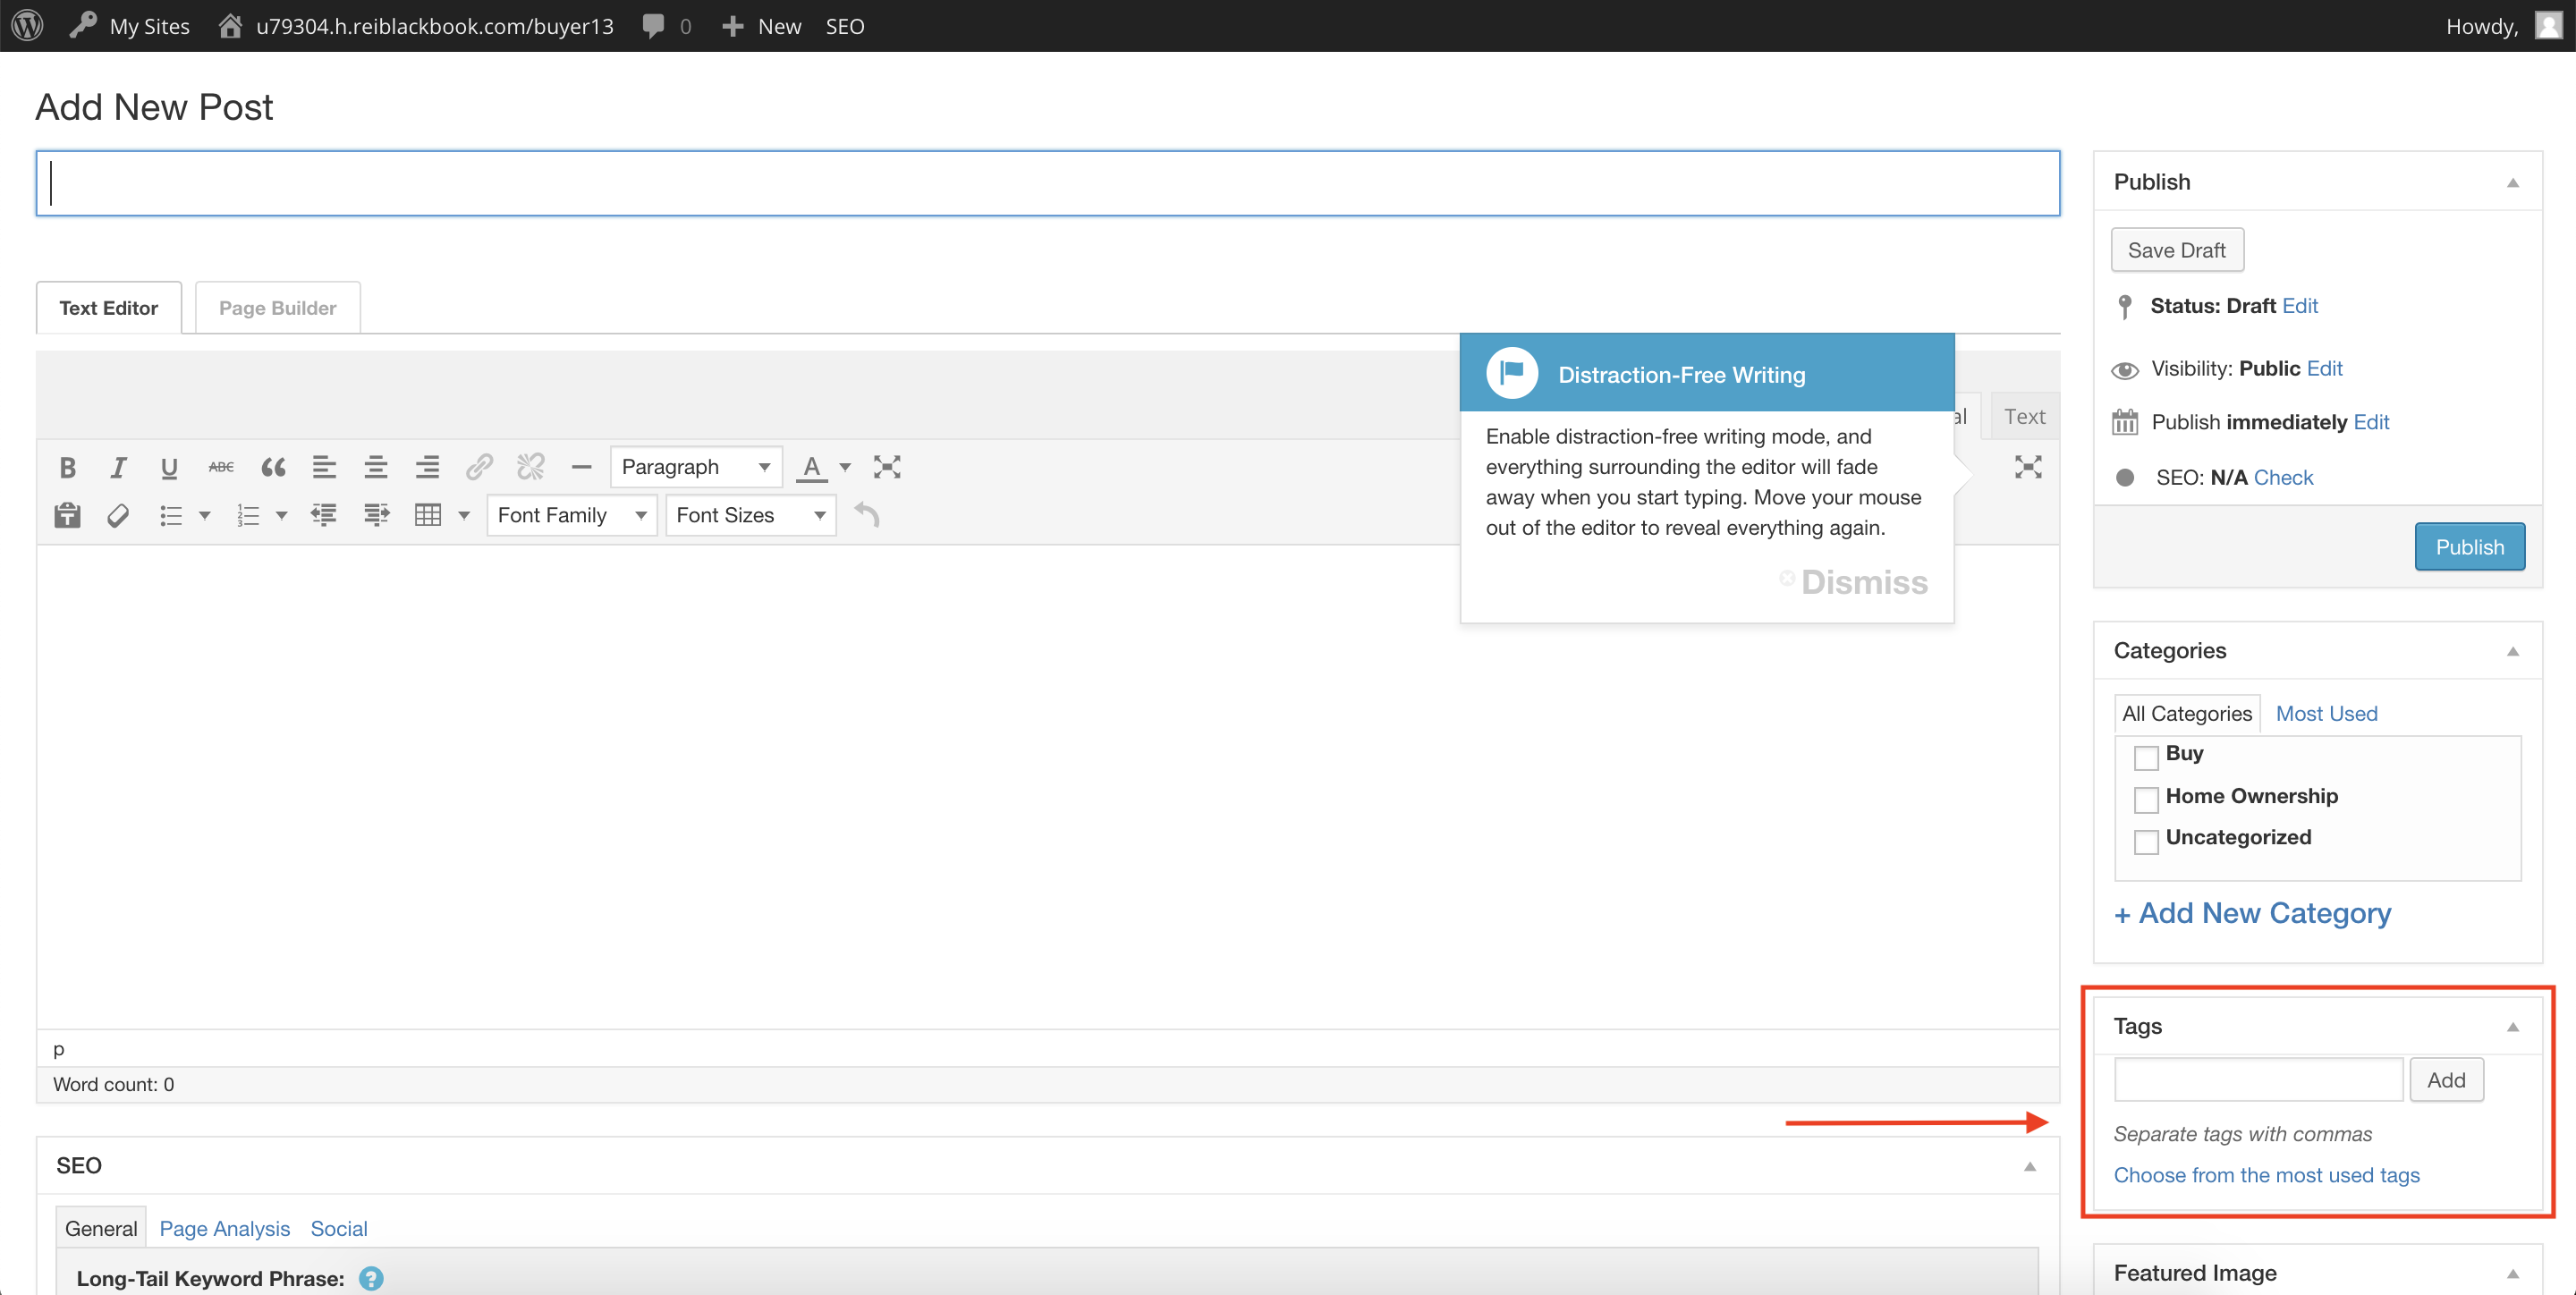
- Add Tags to make your blog post easier to search for.
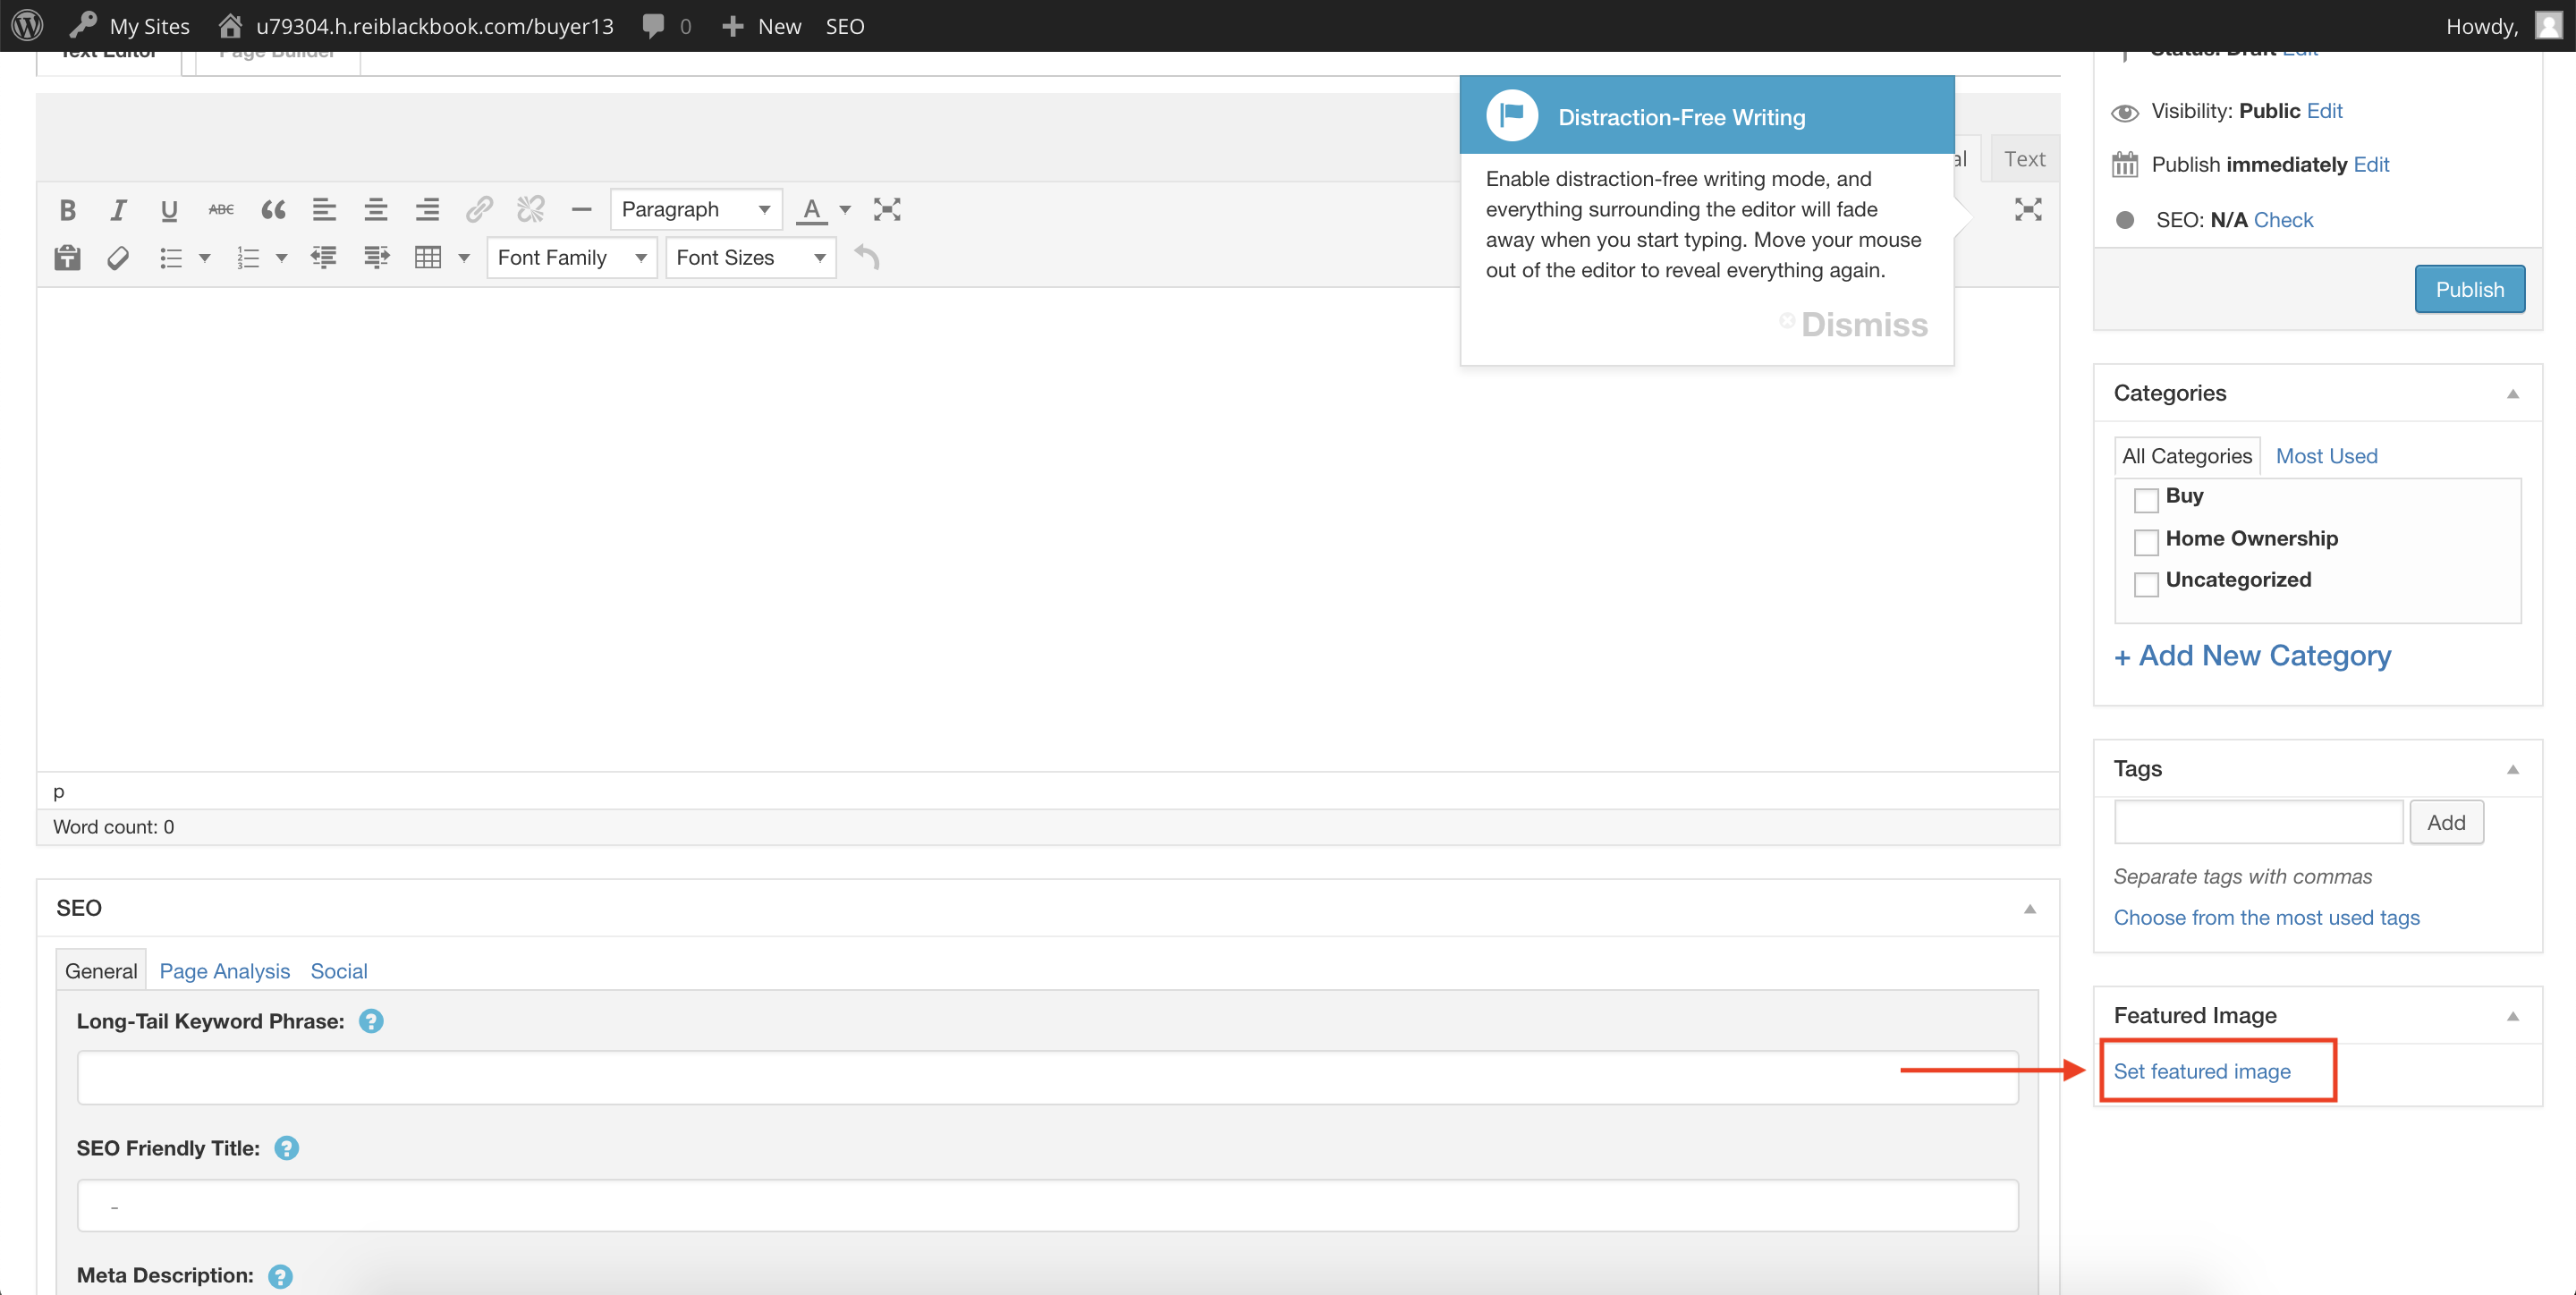
- Add a Featured Image.
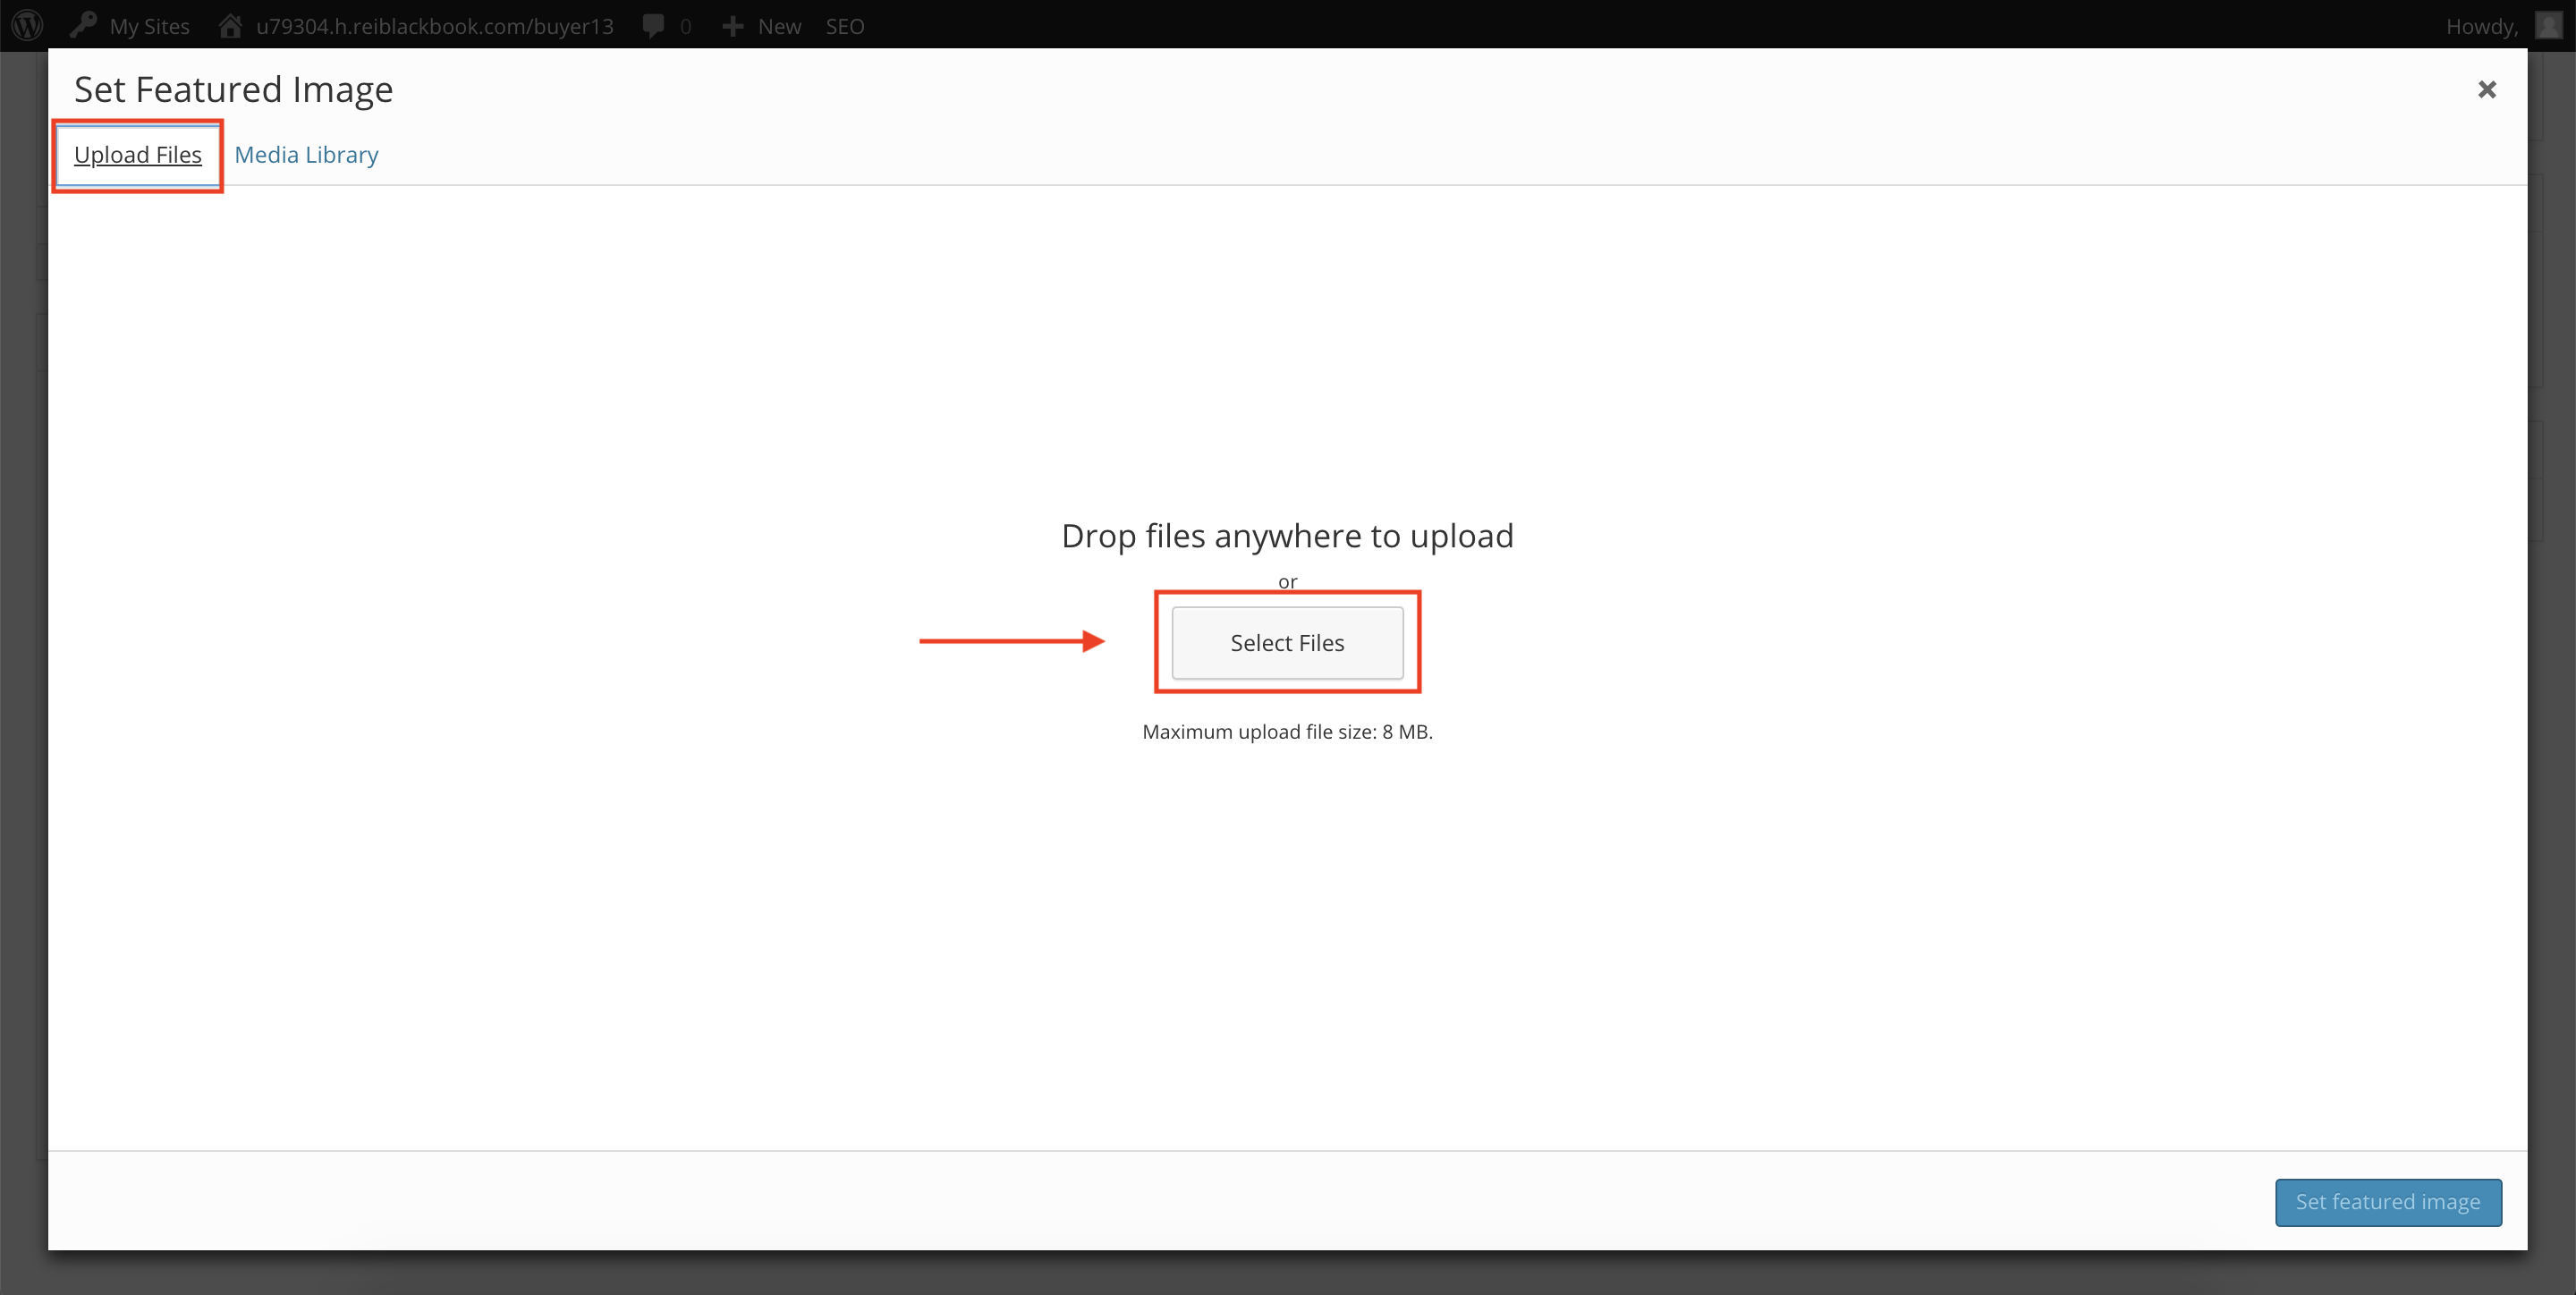
- Upload Files - click on the Select Files button to upload a photo from your computer.
- Media Library - contains previously uploaded photos.

- Upload Files - click on the Select Files button to upload a photo from your computer.
- Add your blog's contents on either of the following:
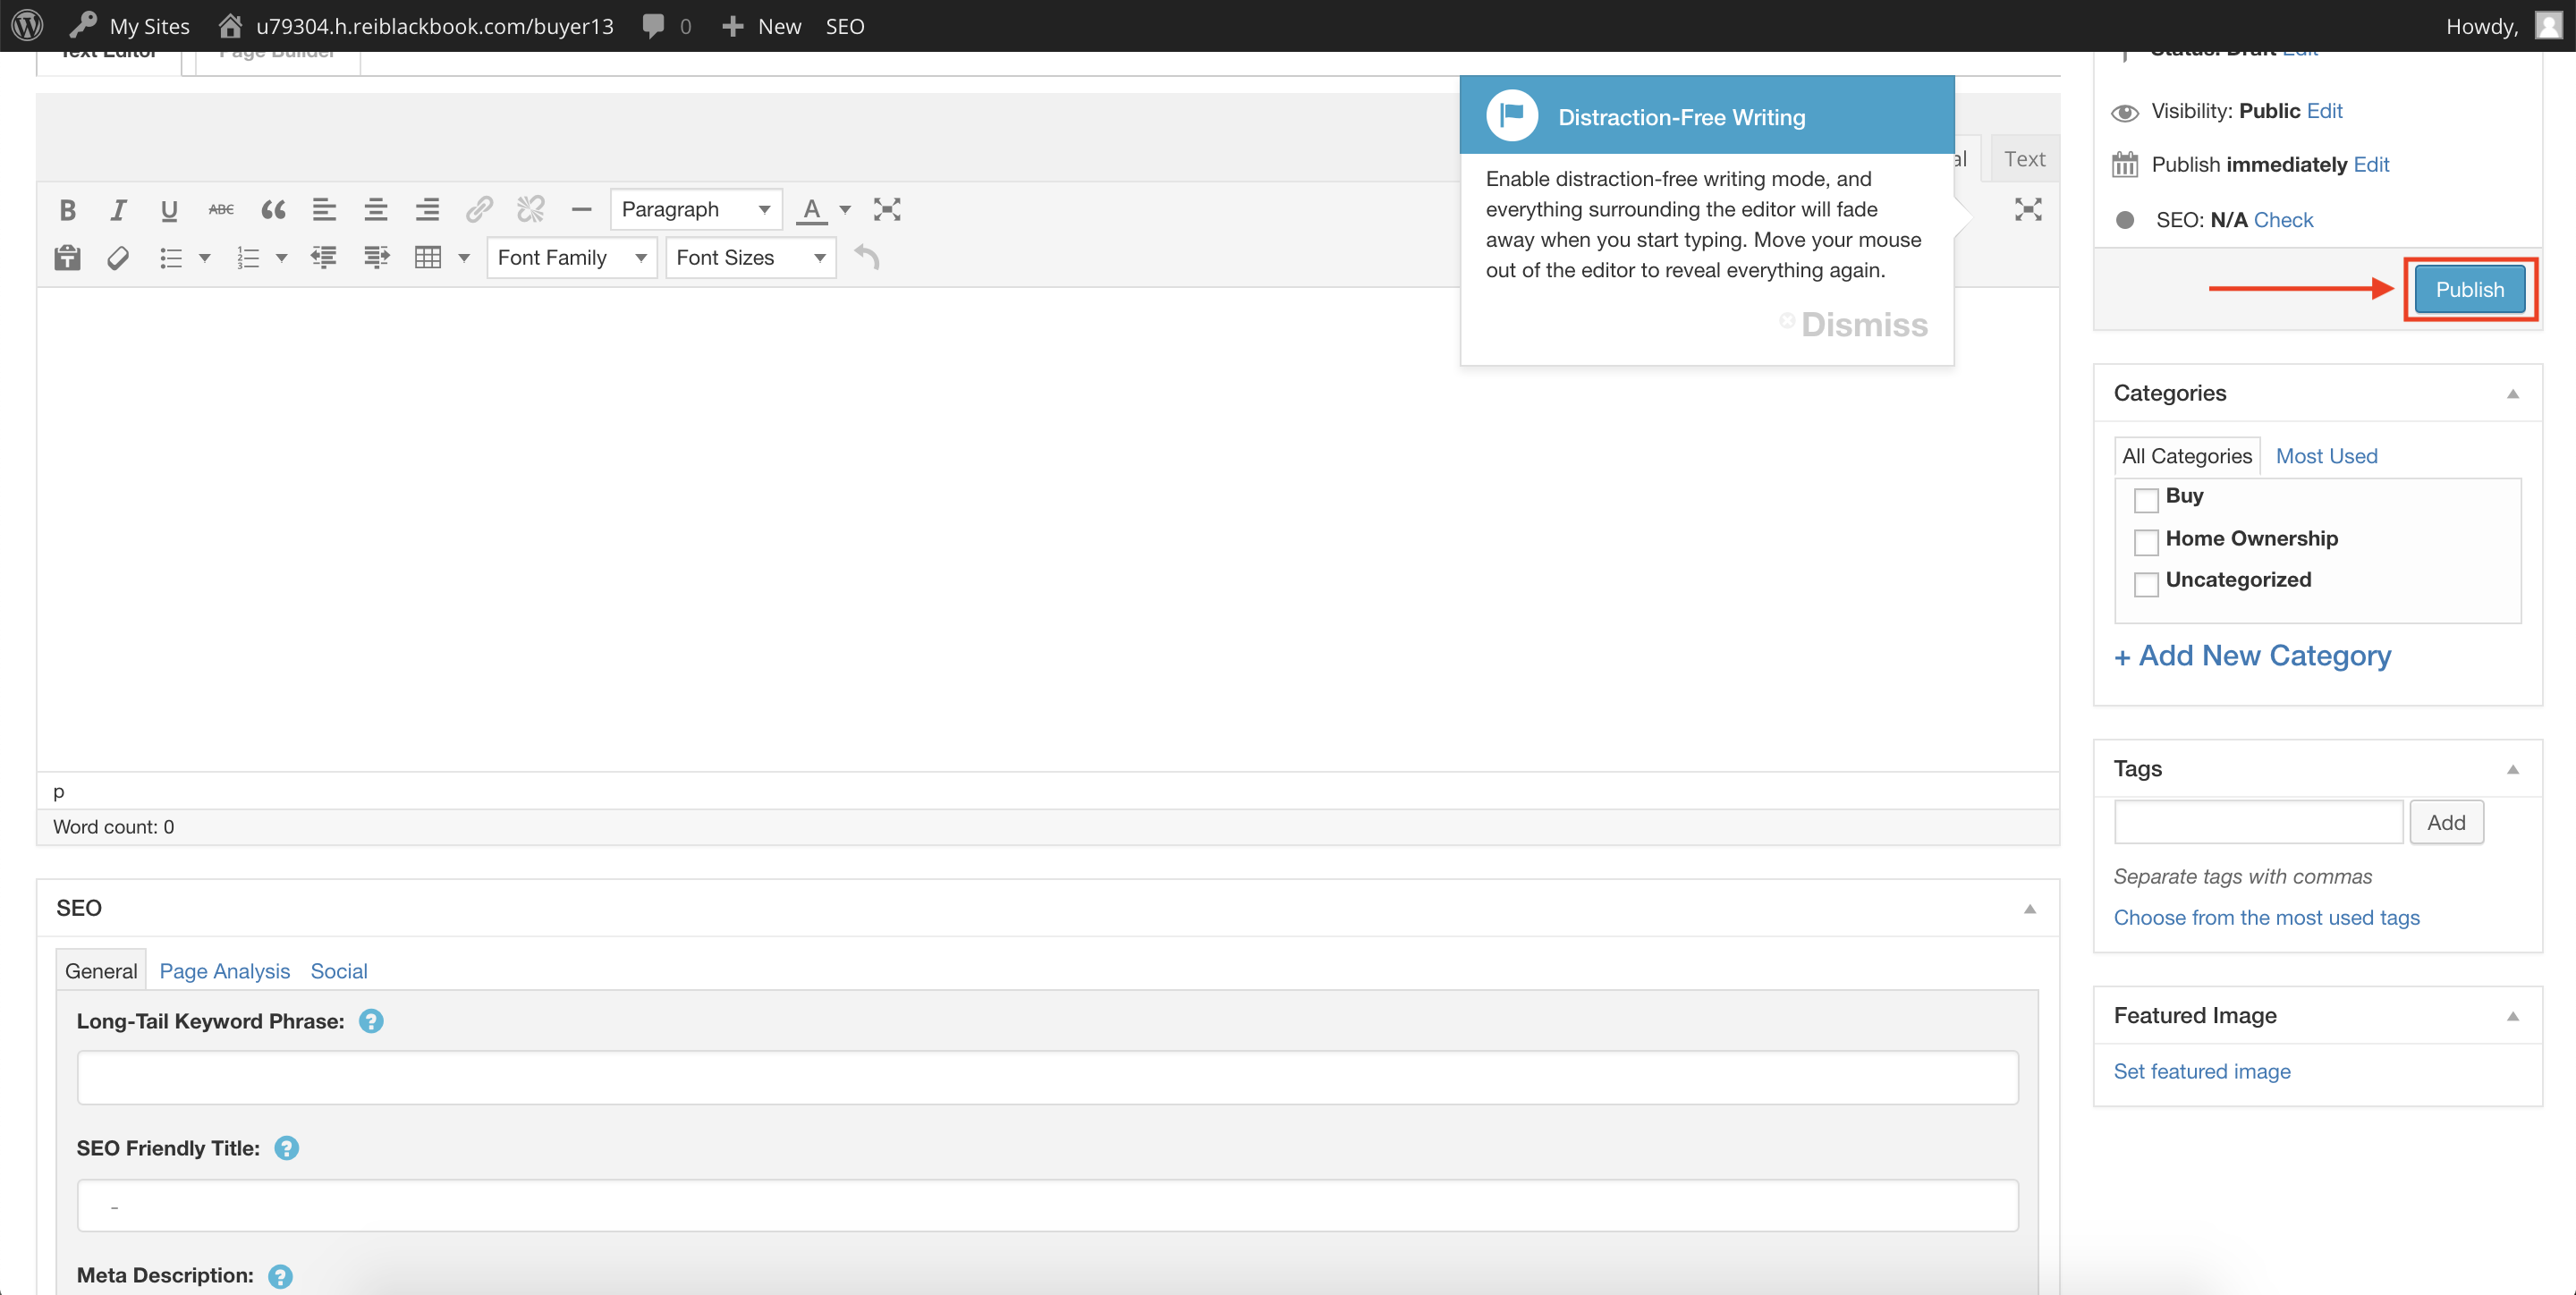
- Text Editor - type in or paste the content on the space provided. Click on Publish when done.
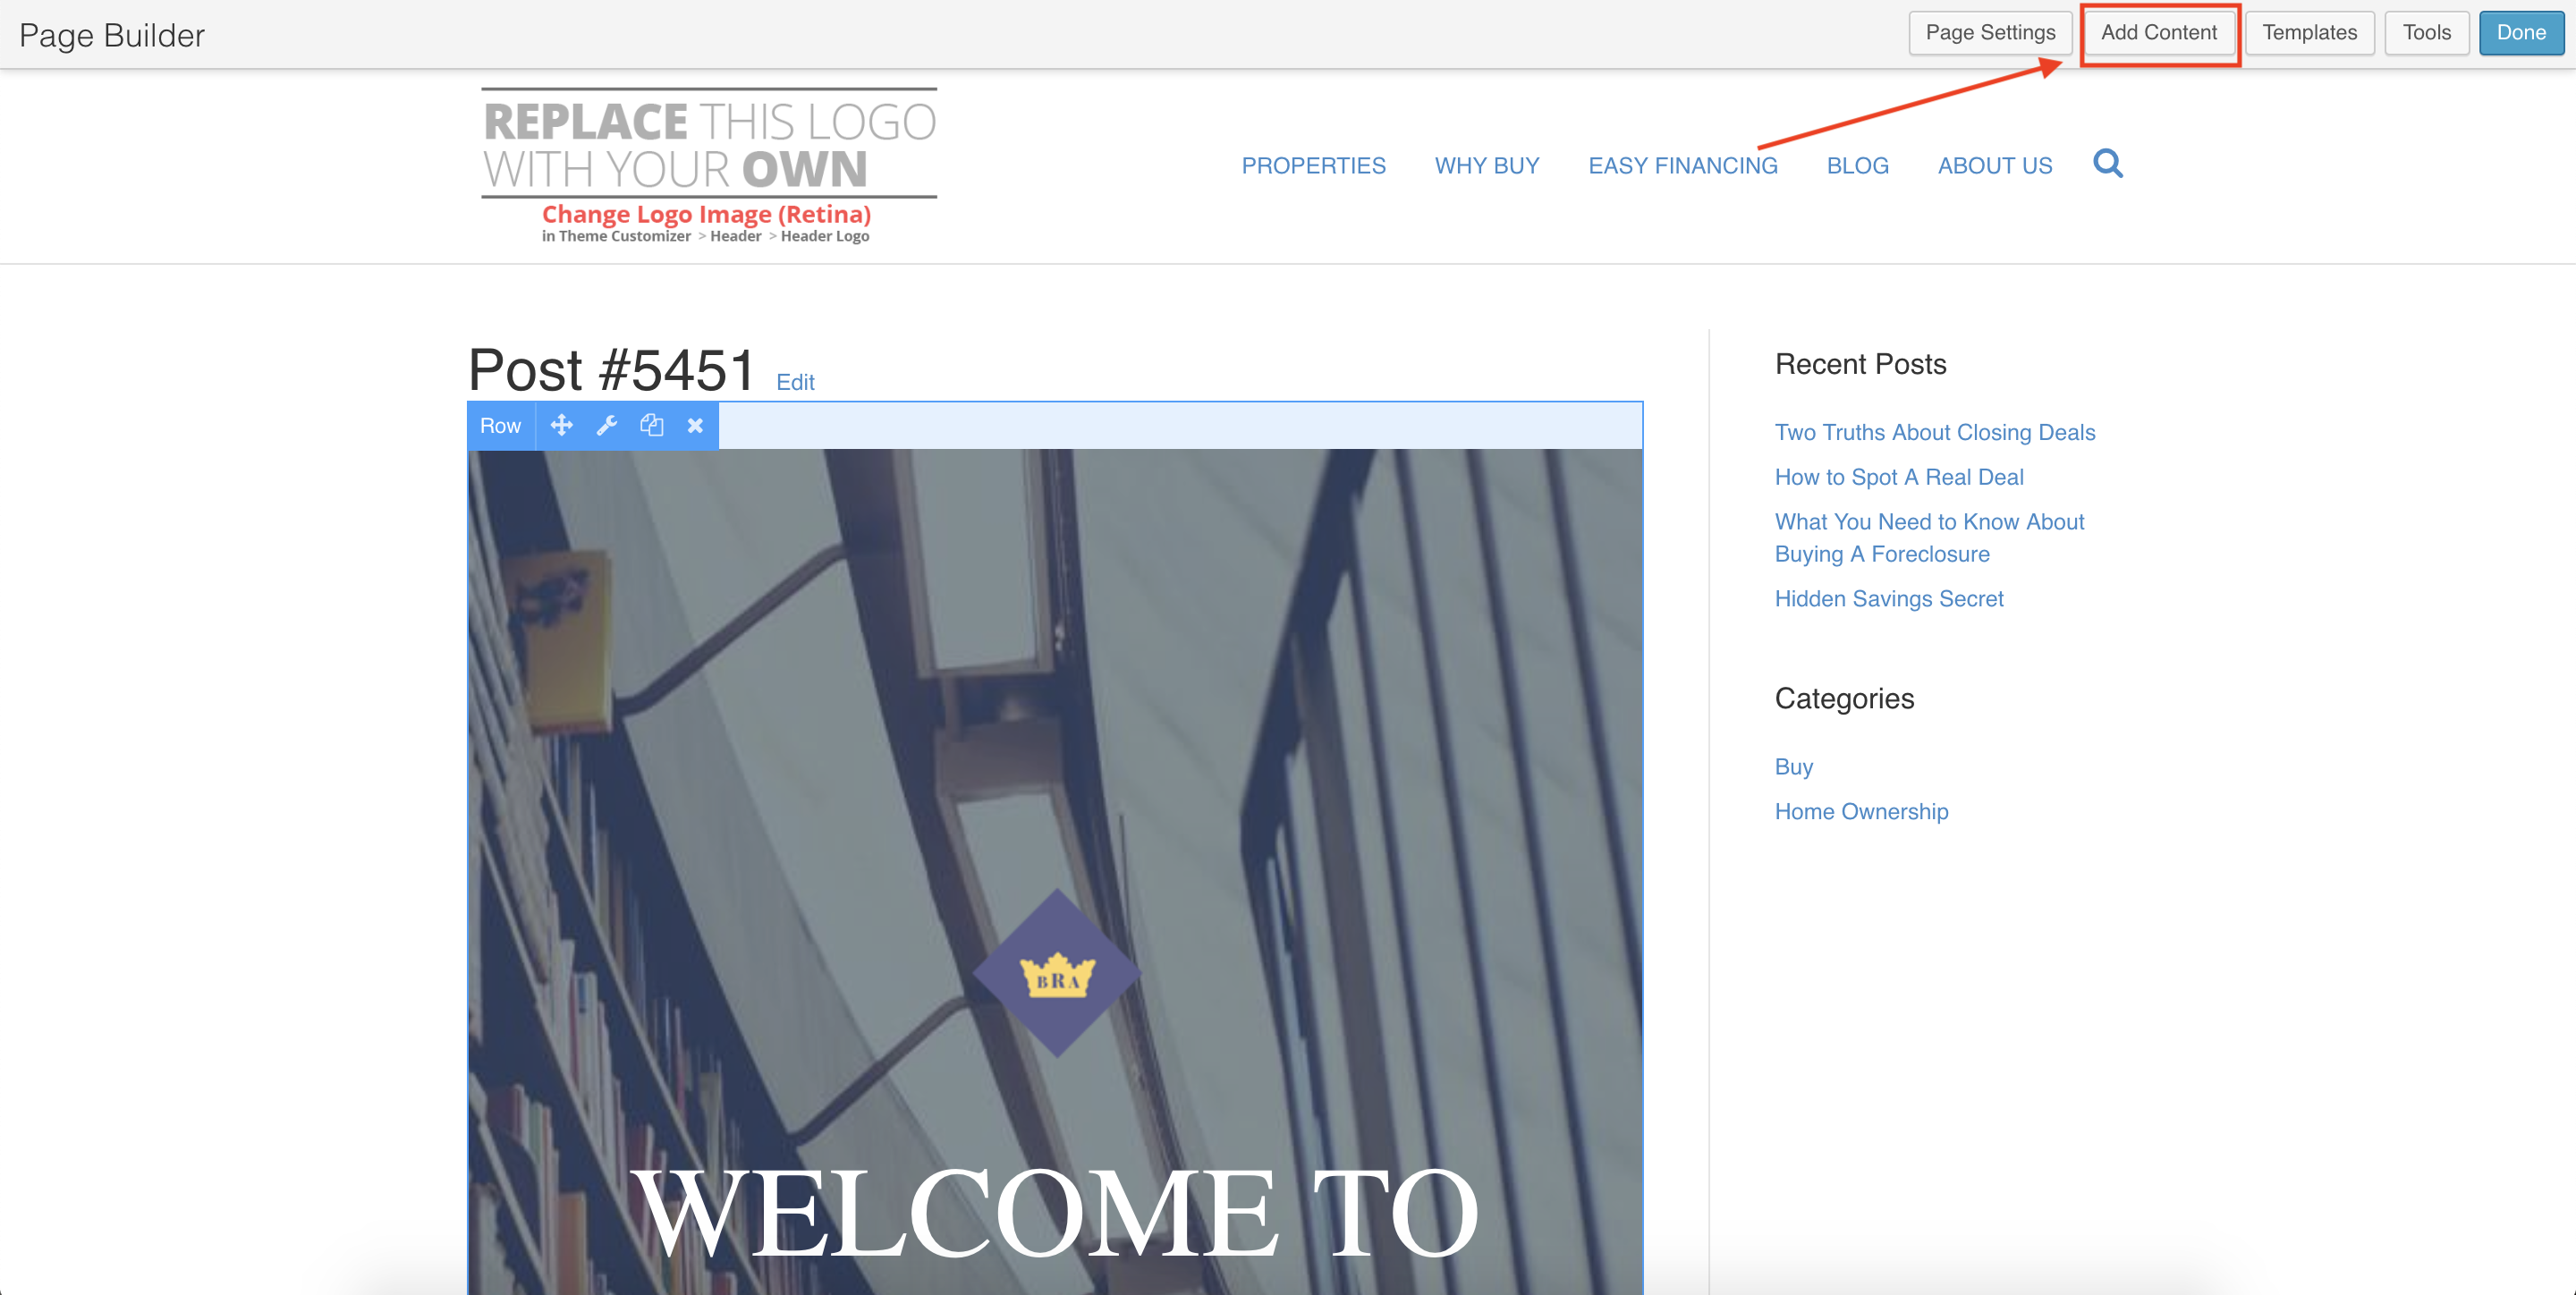
- Page Builder
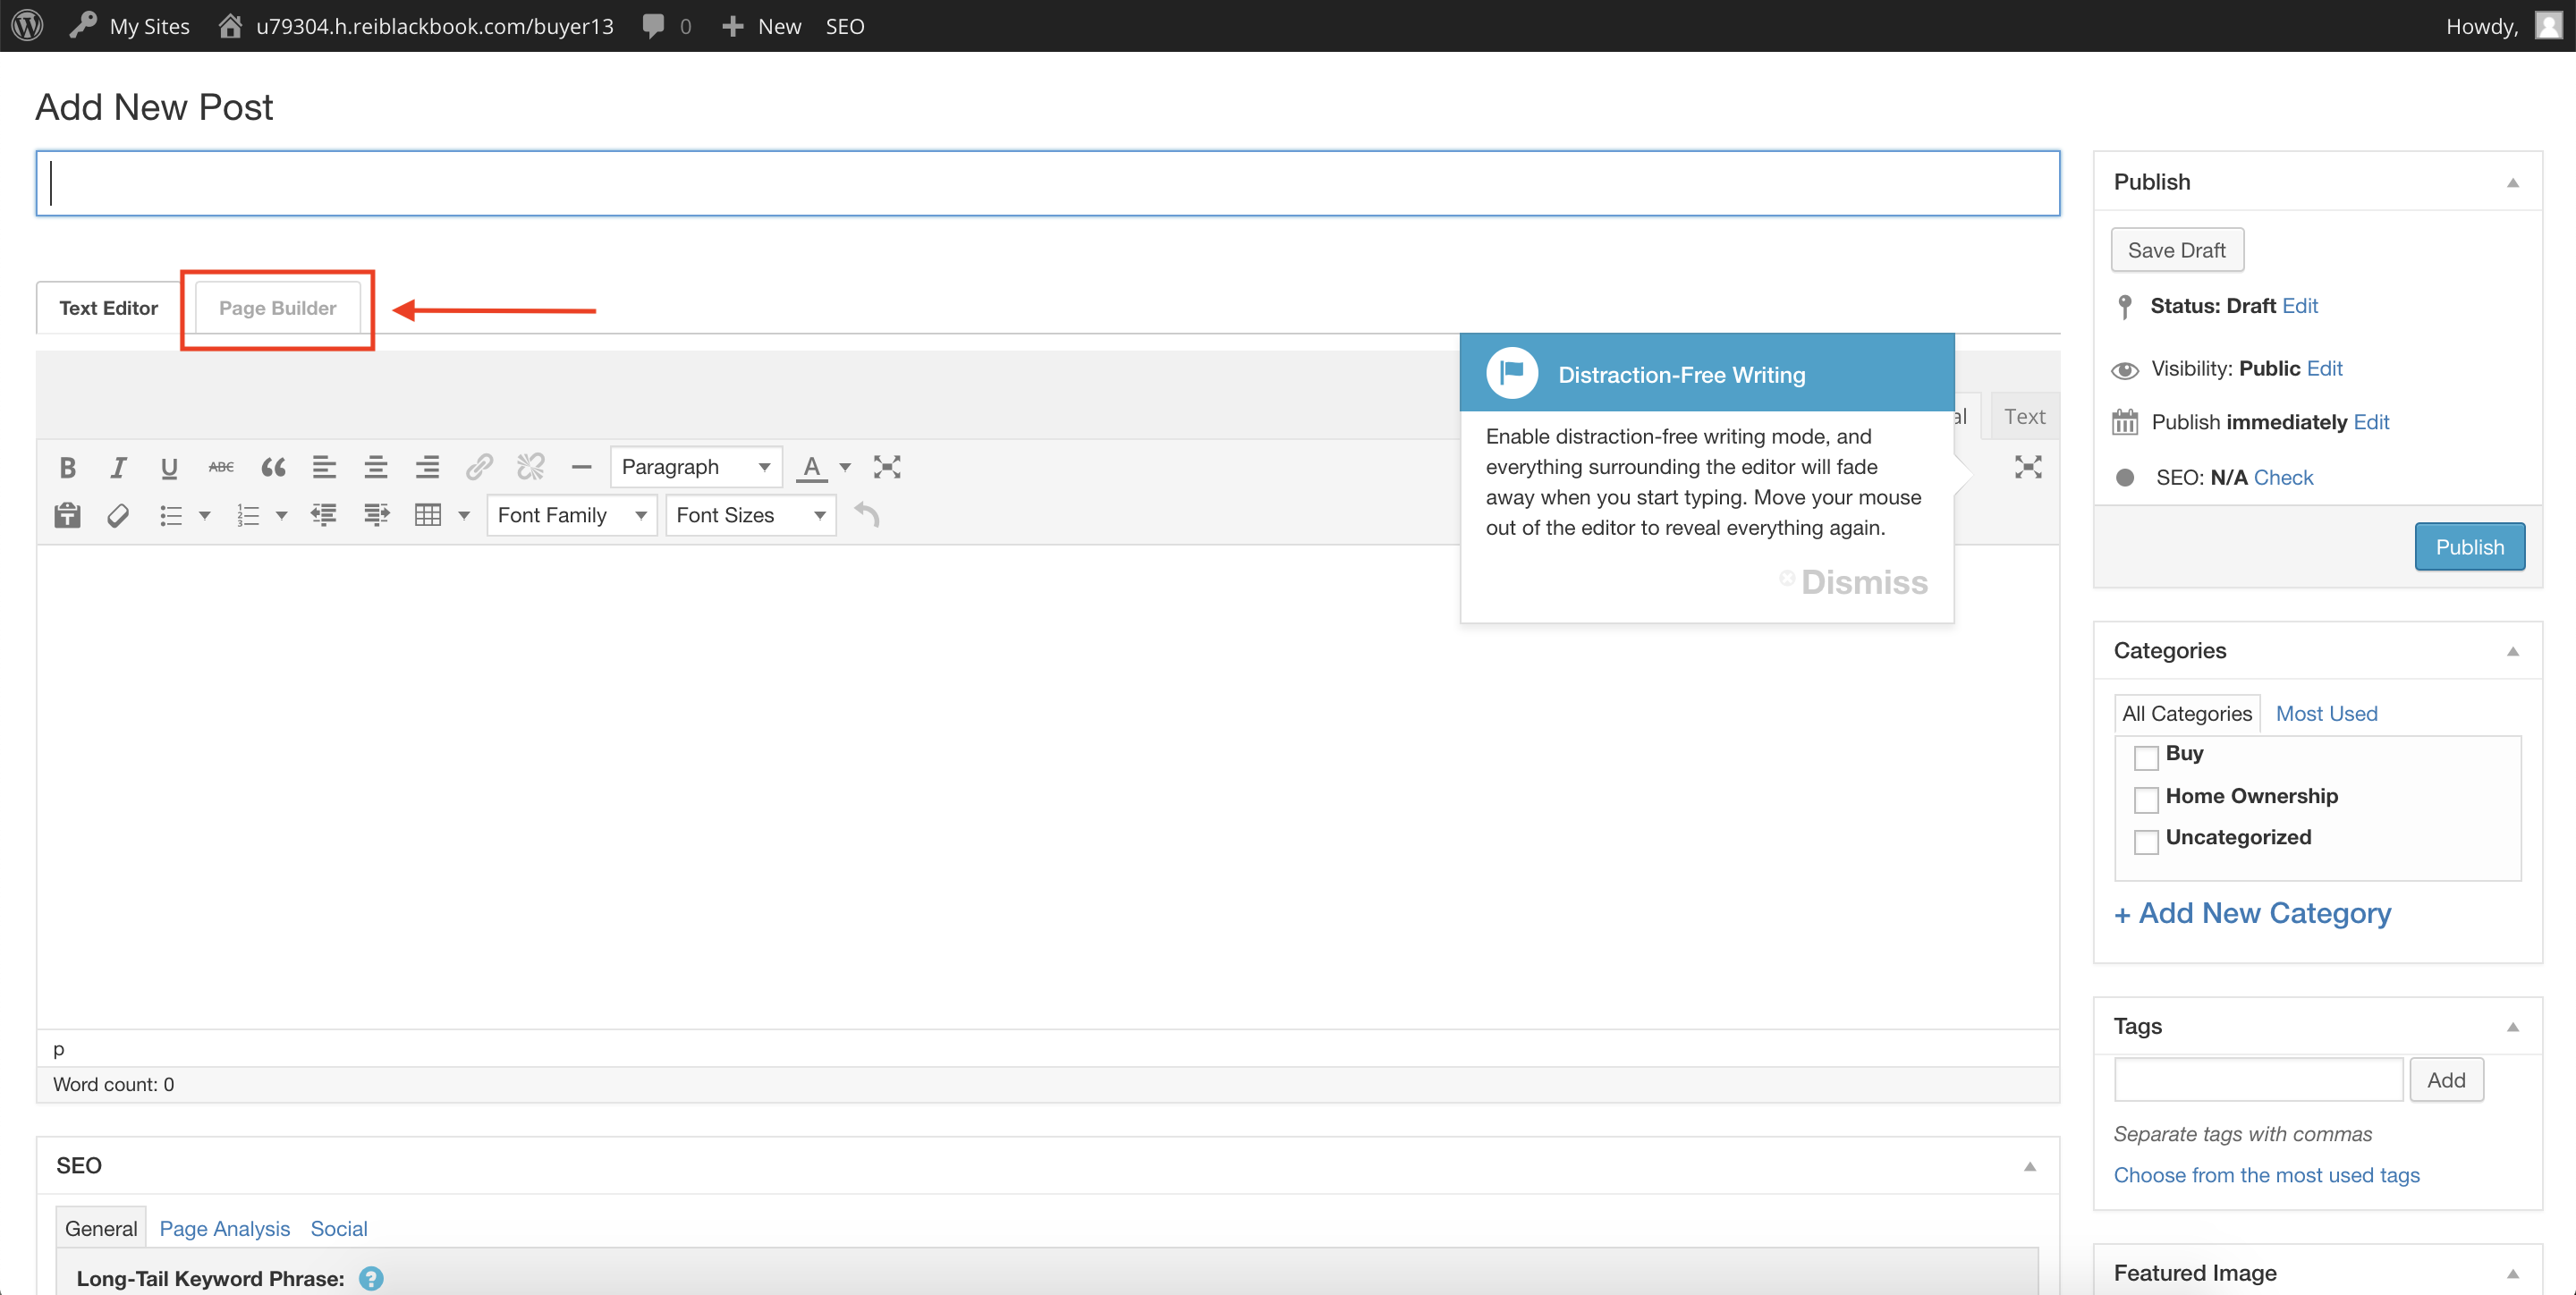
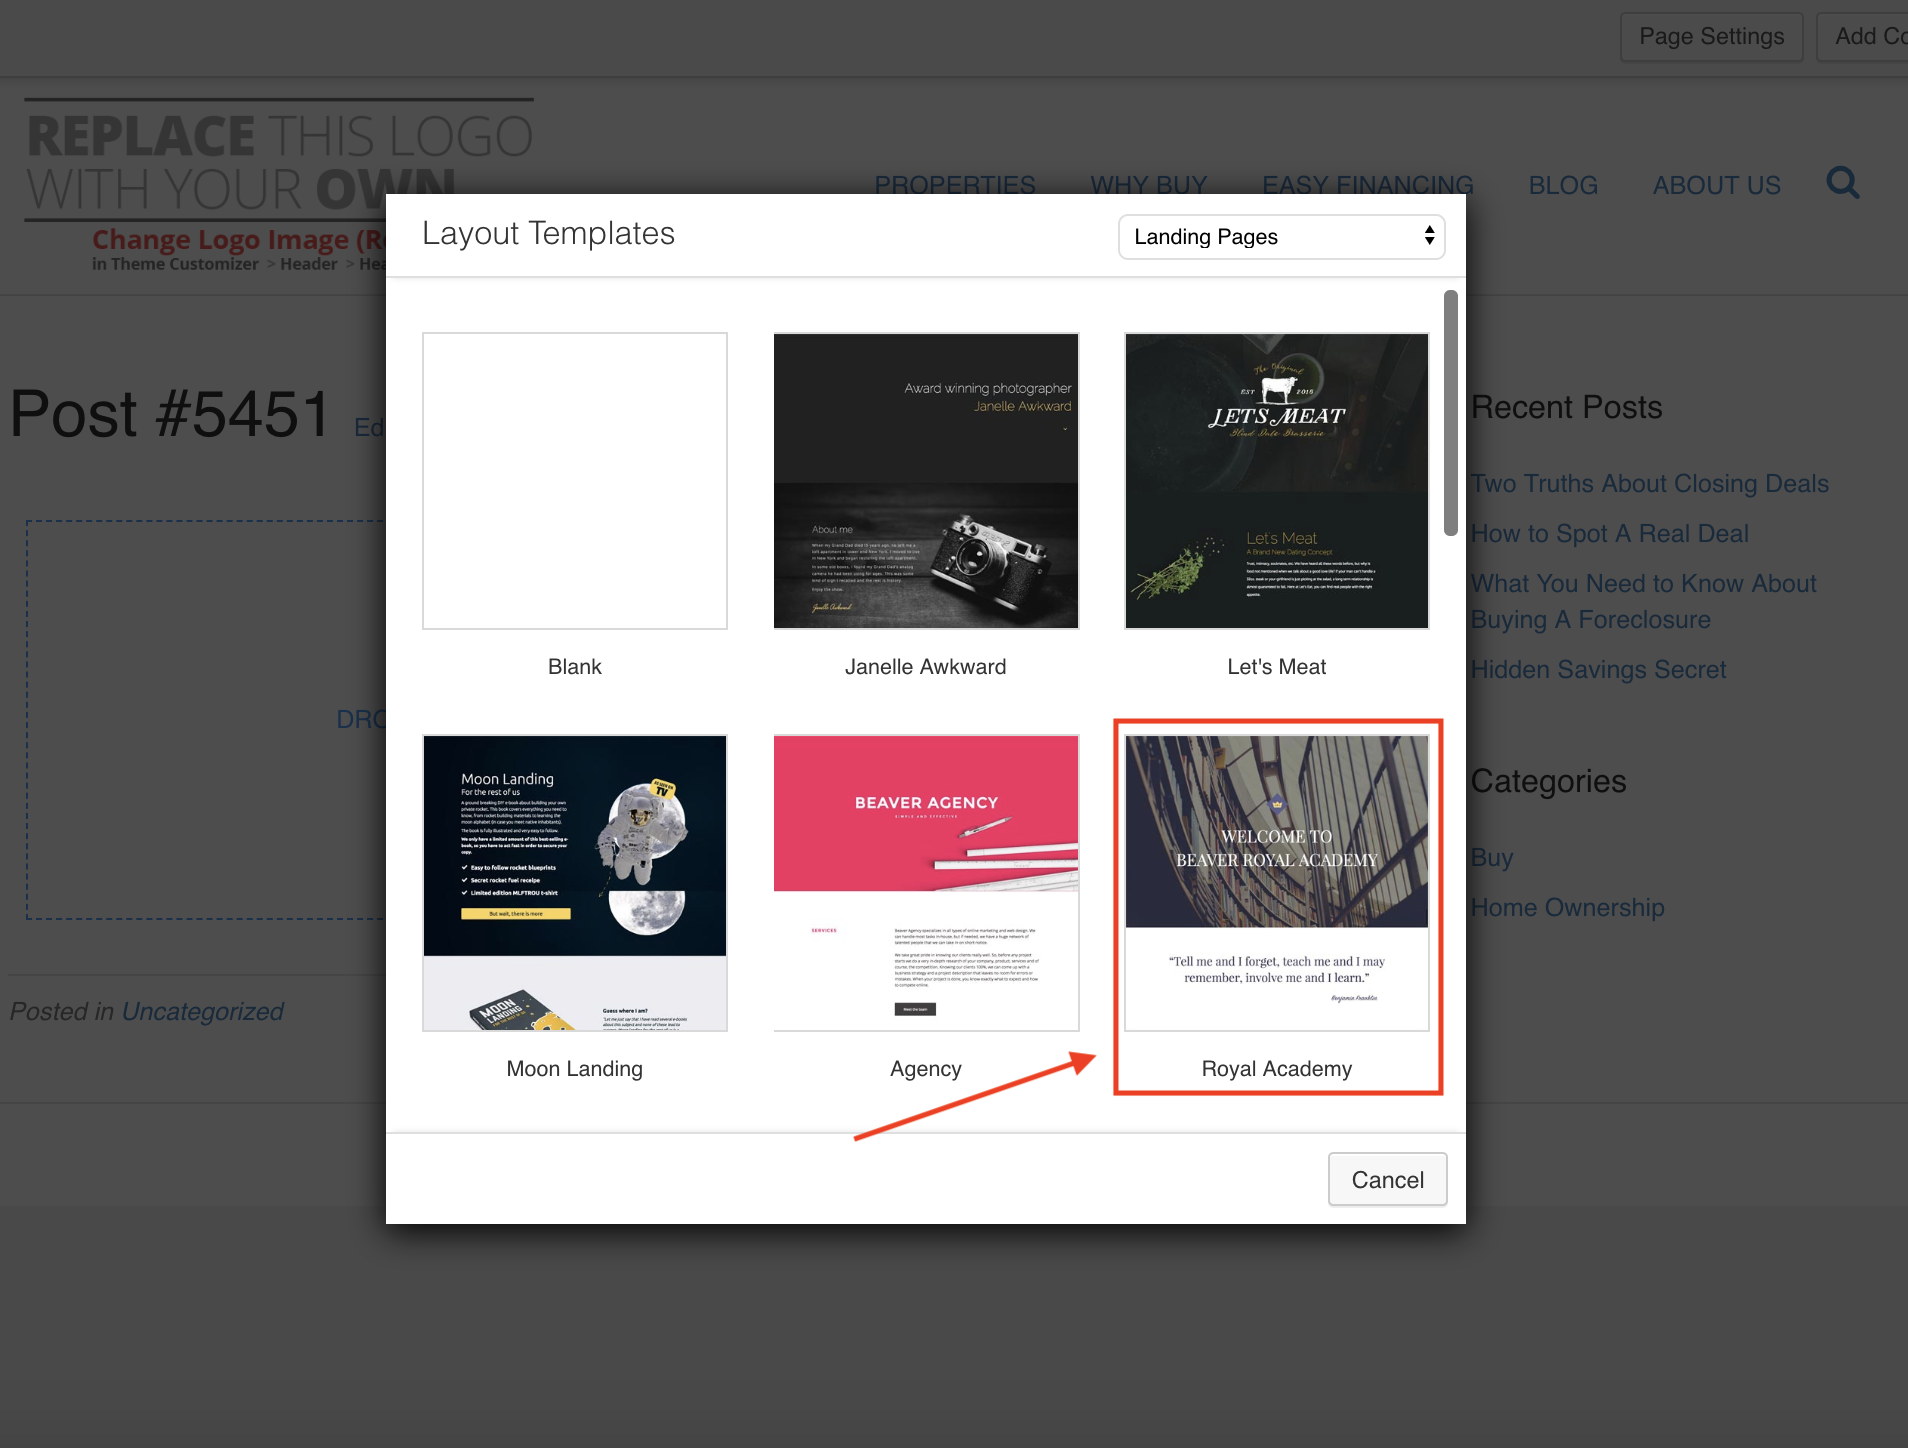
- Select a Template.
- Click on Add Contents.
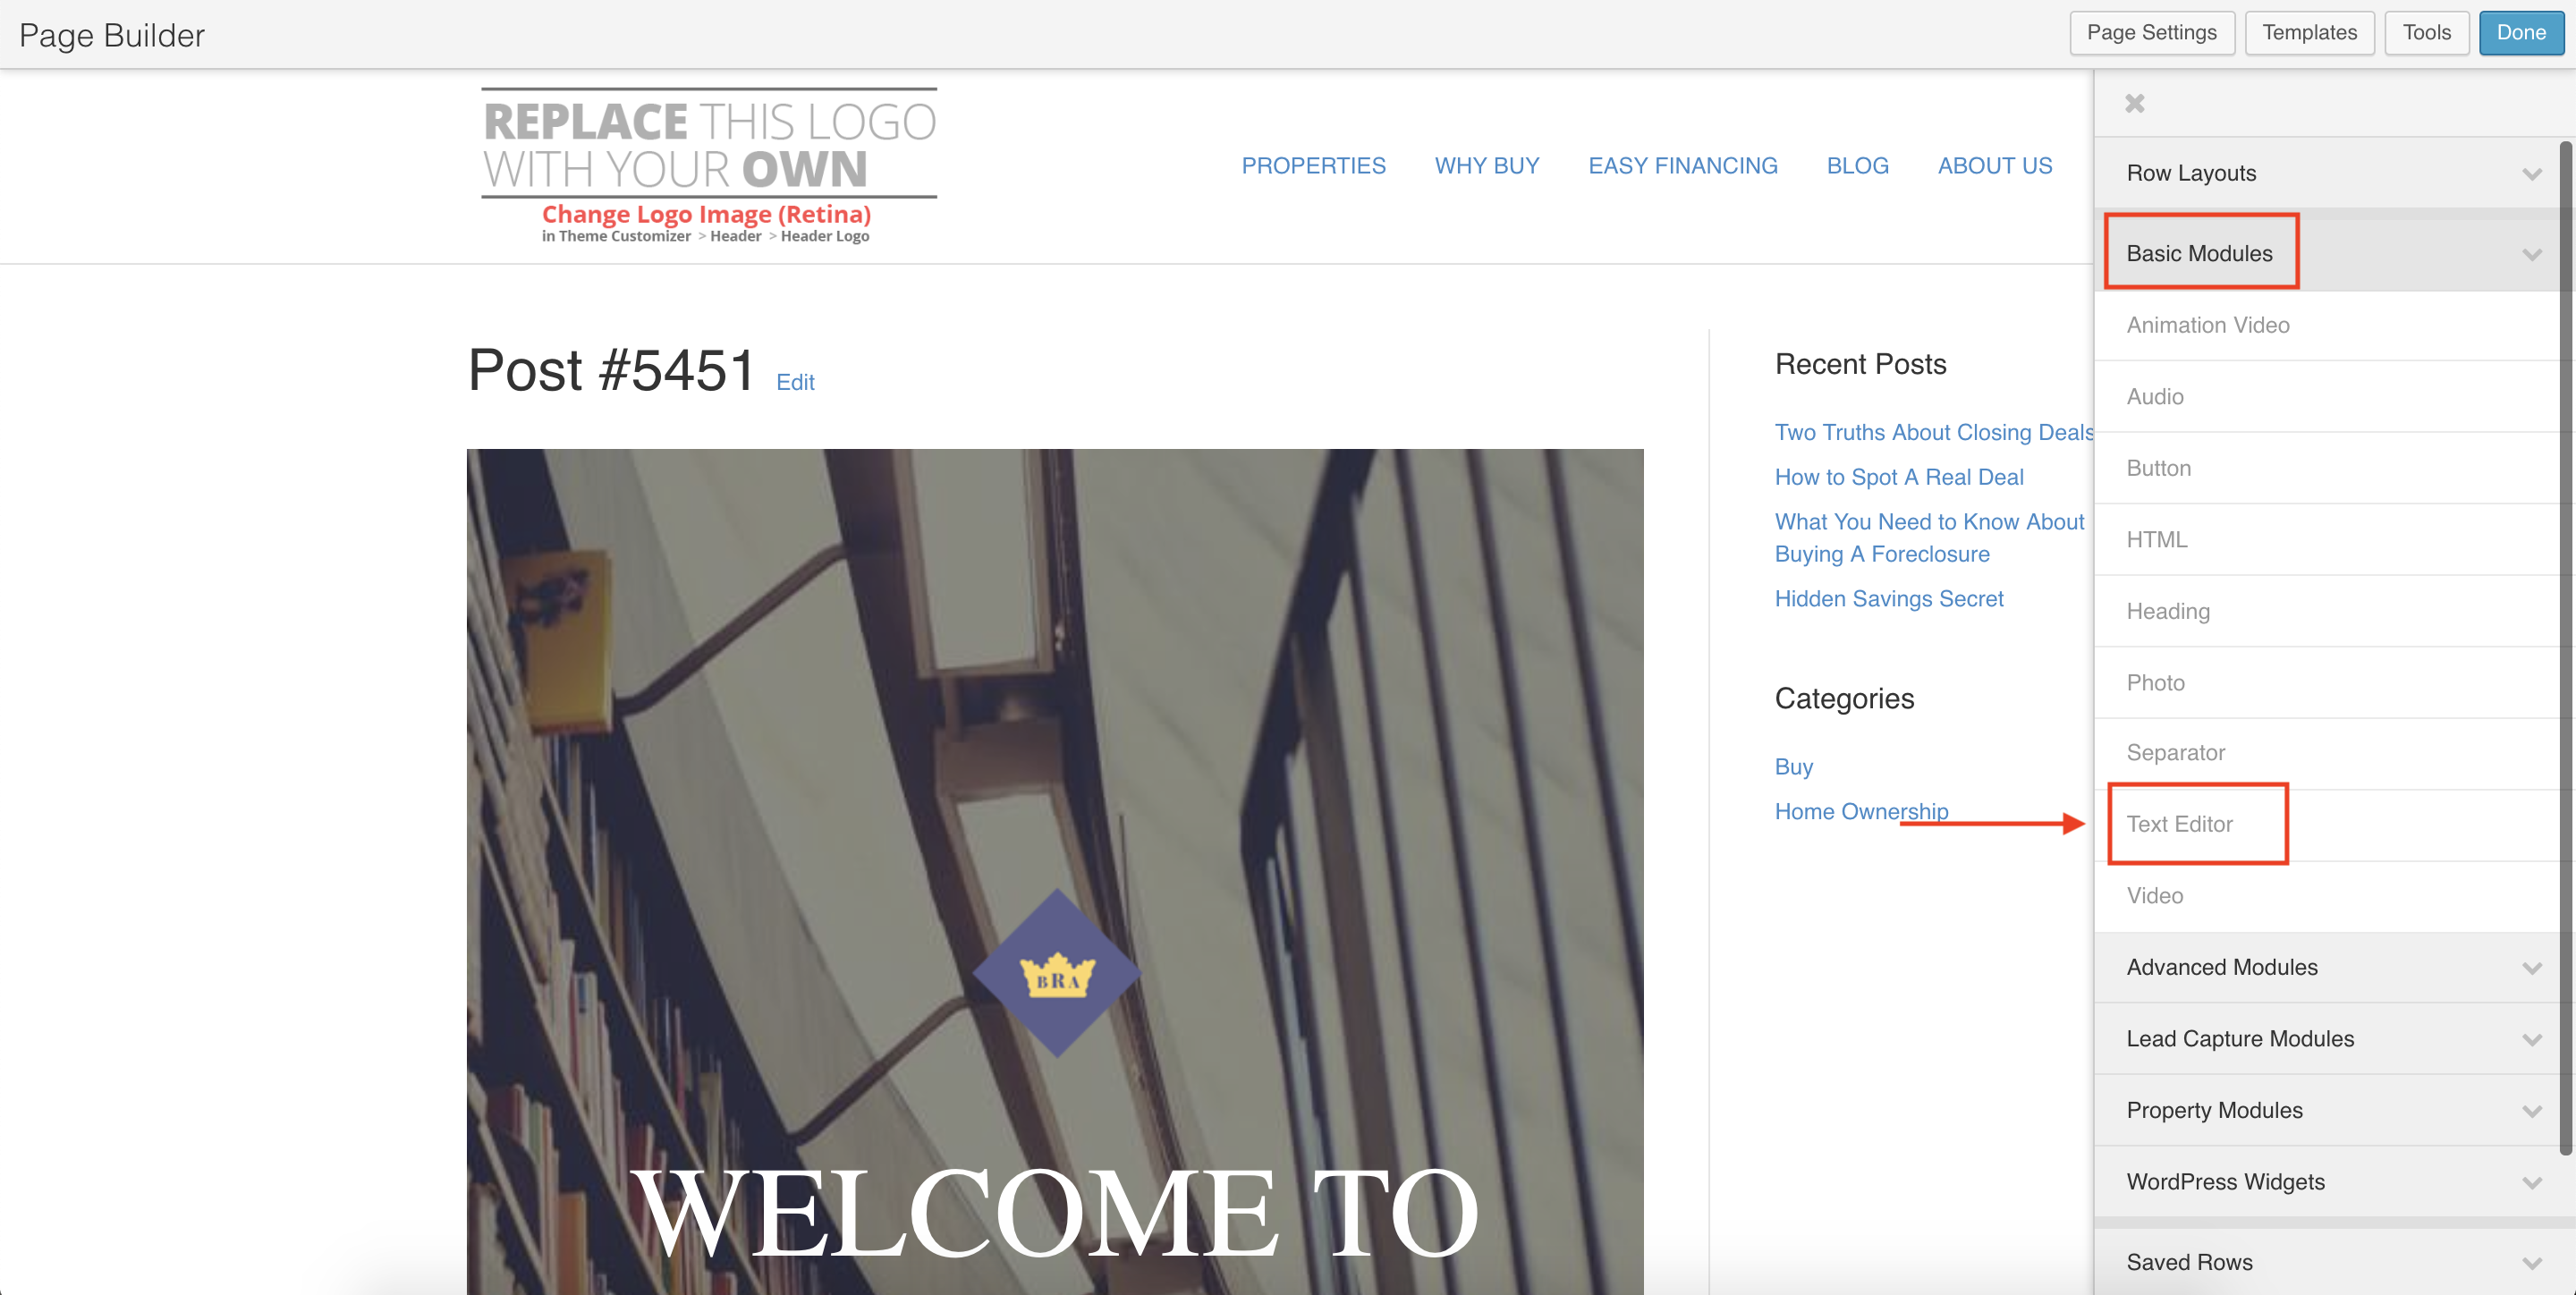
- Under Basic Modules, drag Text Editor on the blog post.
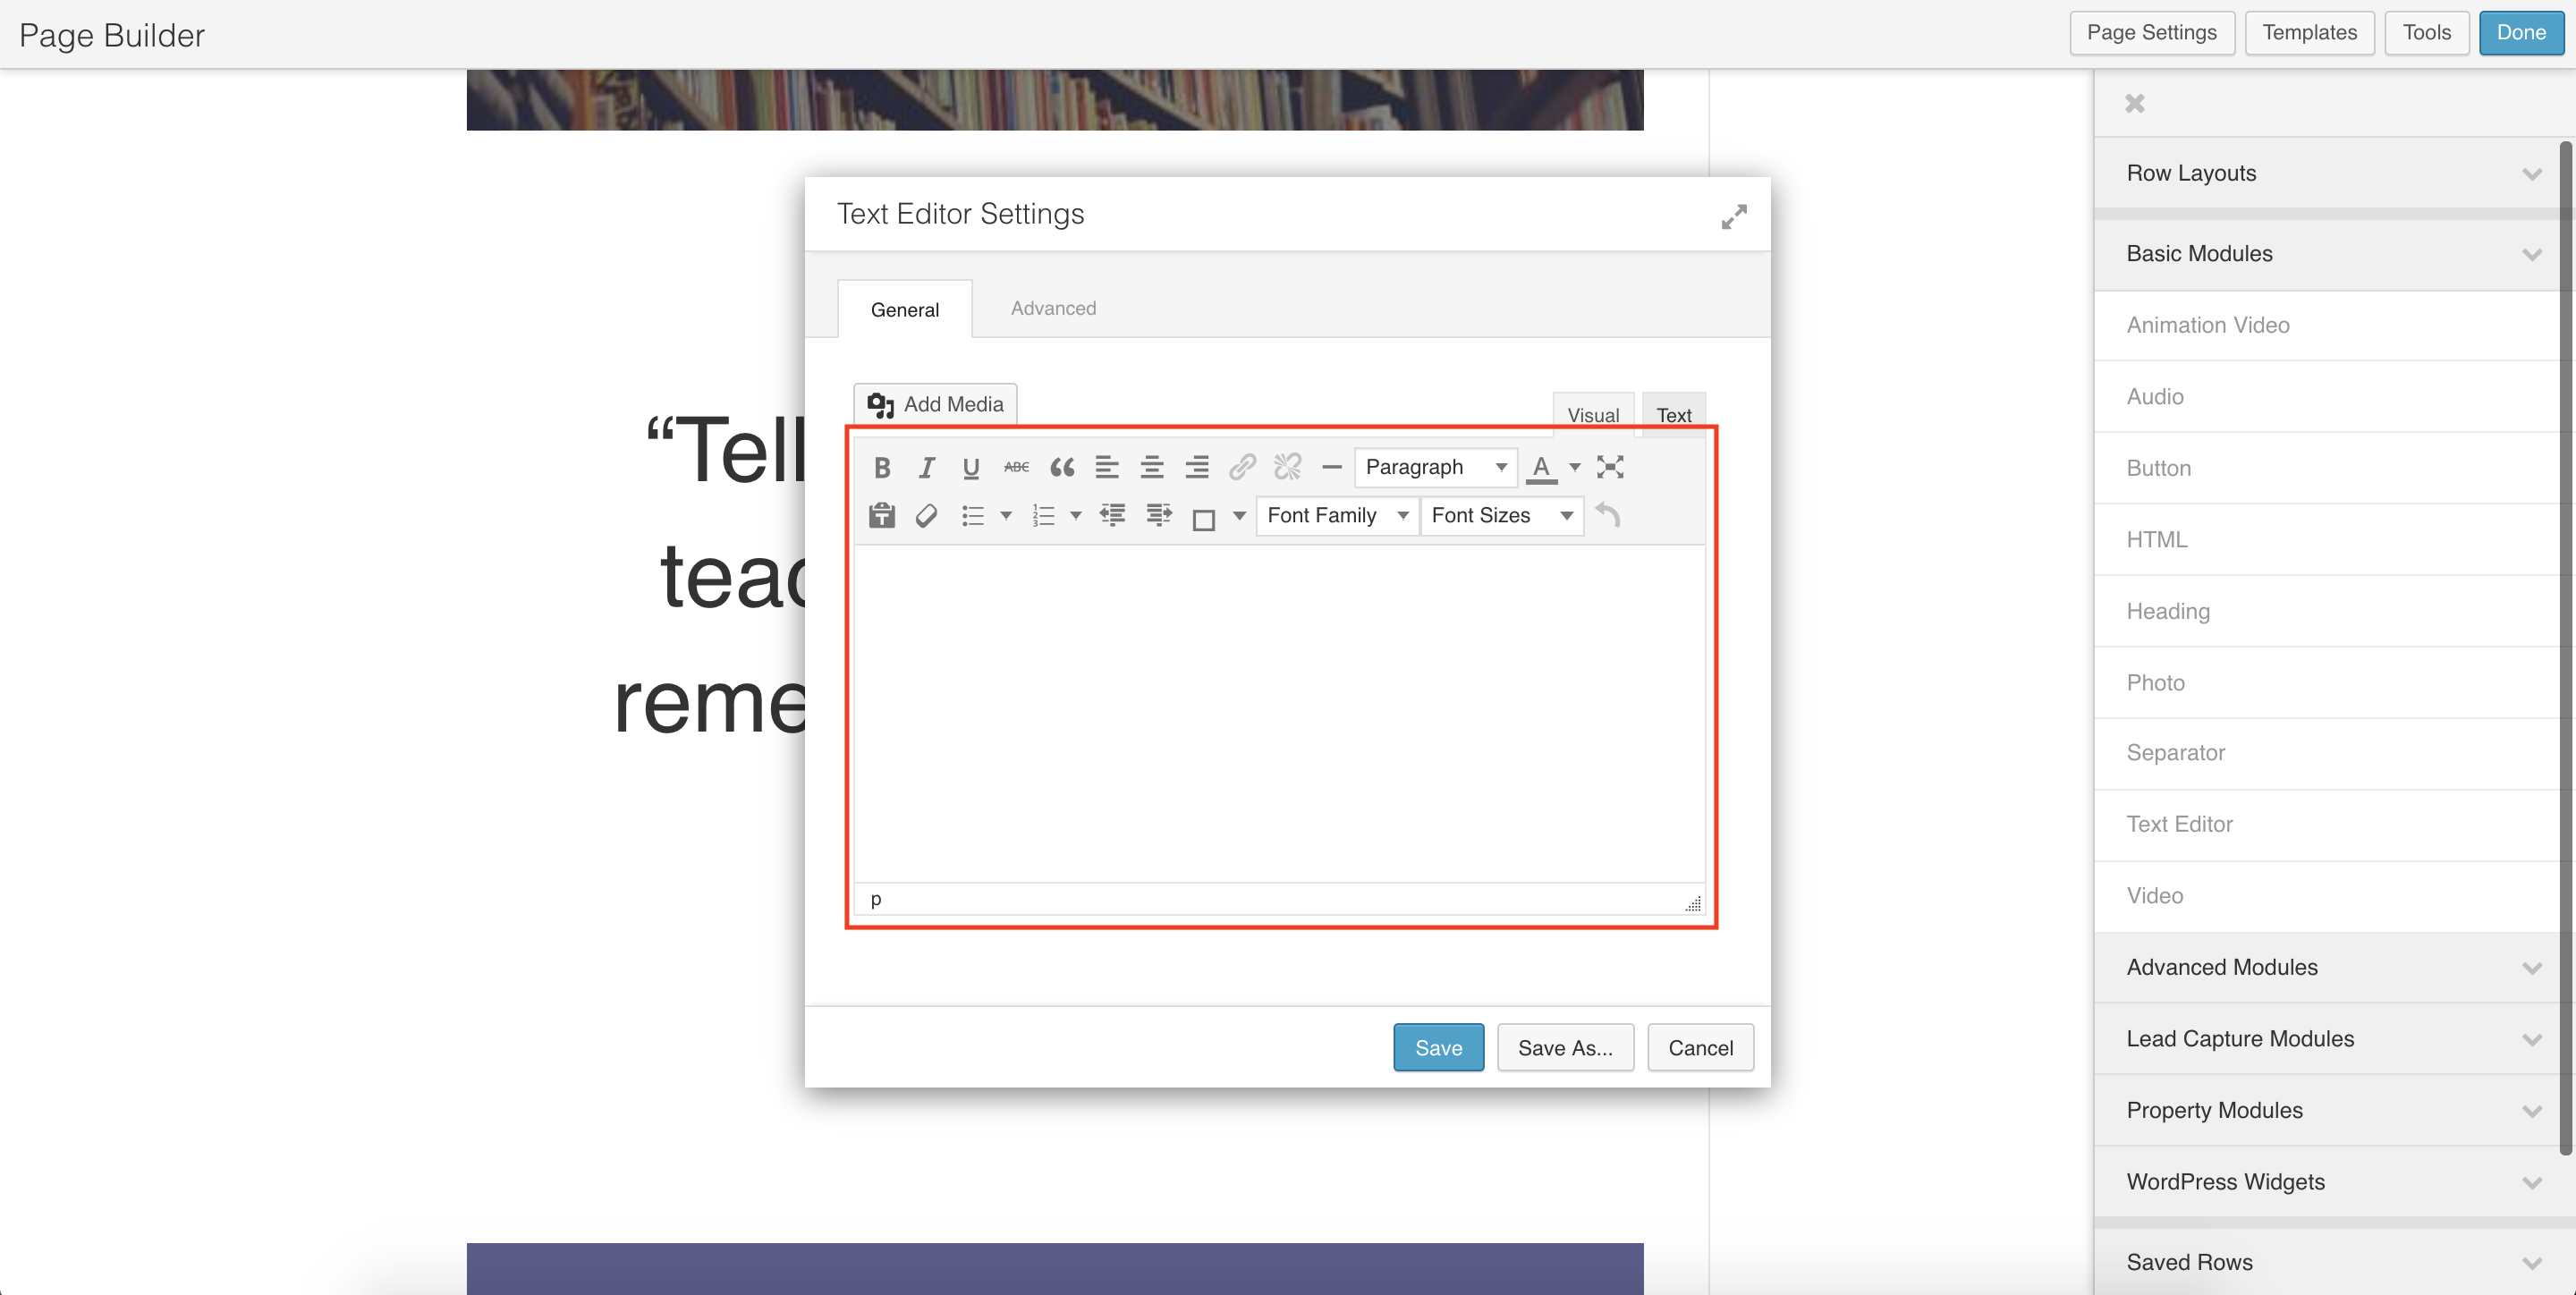
- Type in or paste the contents under the General tab of the Text Editor Settings.
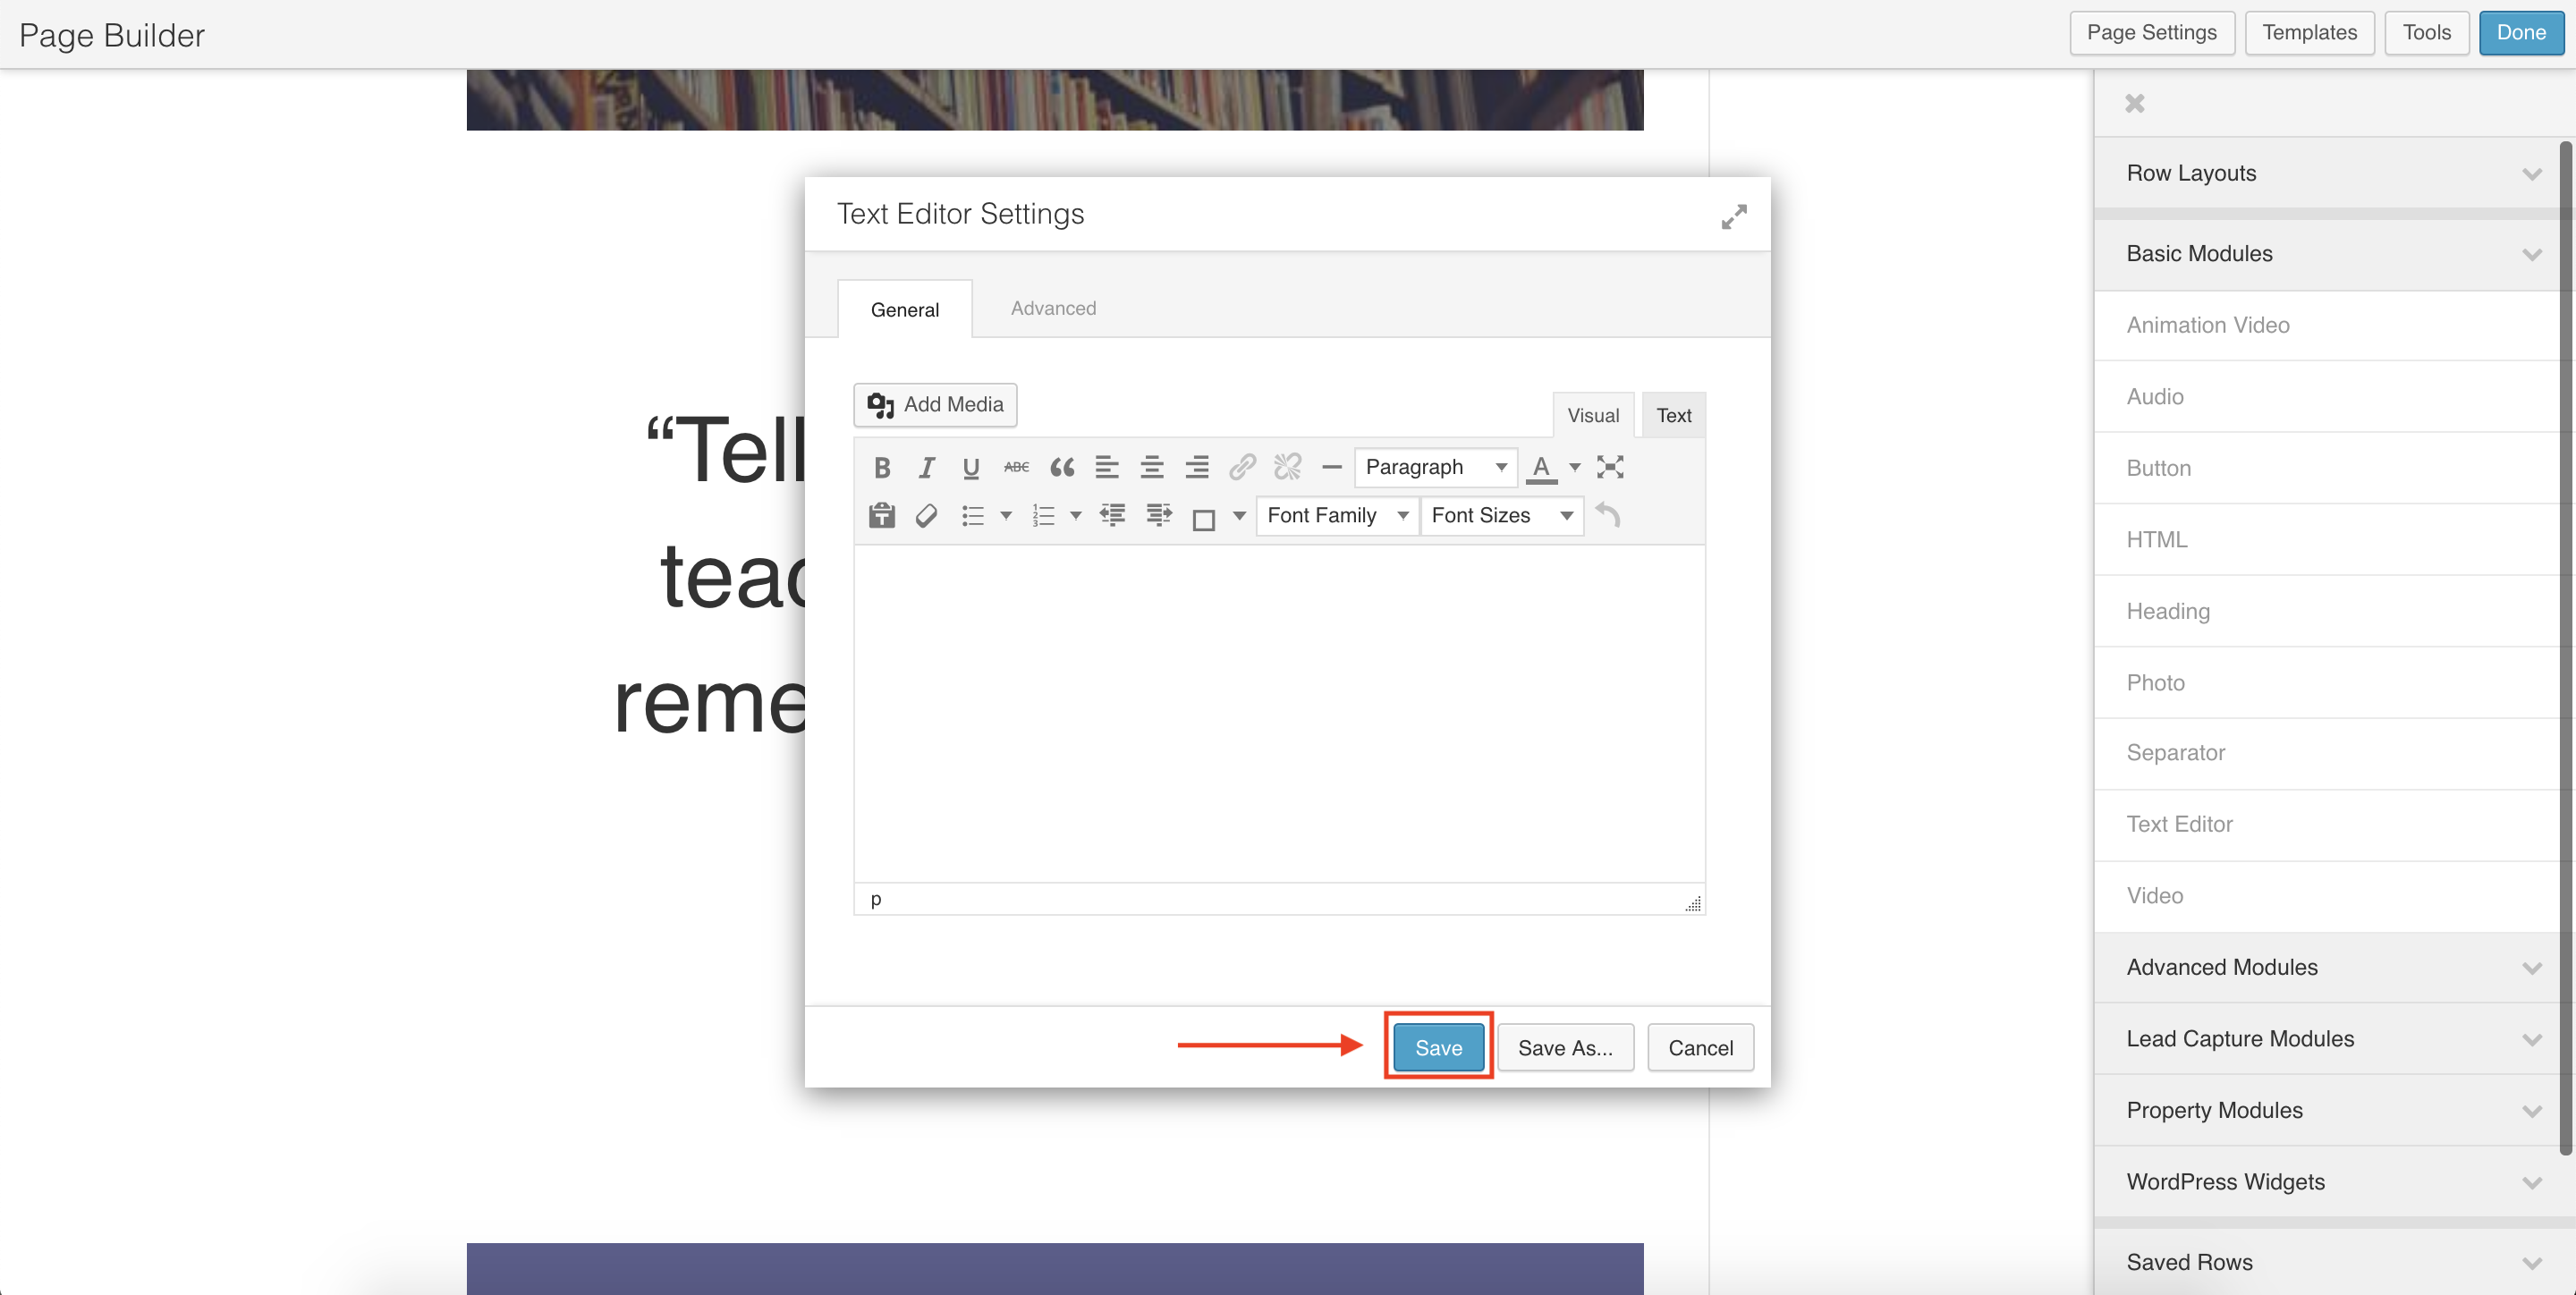
- Click on Save.
- Select a Template.
- Text Editor - type in or paste the content on the space provided. Click on Publish when done.
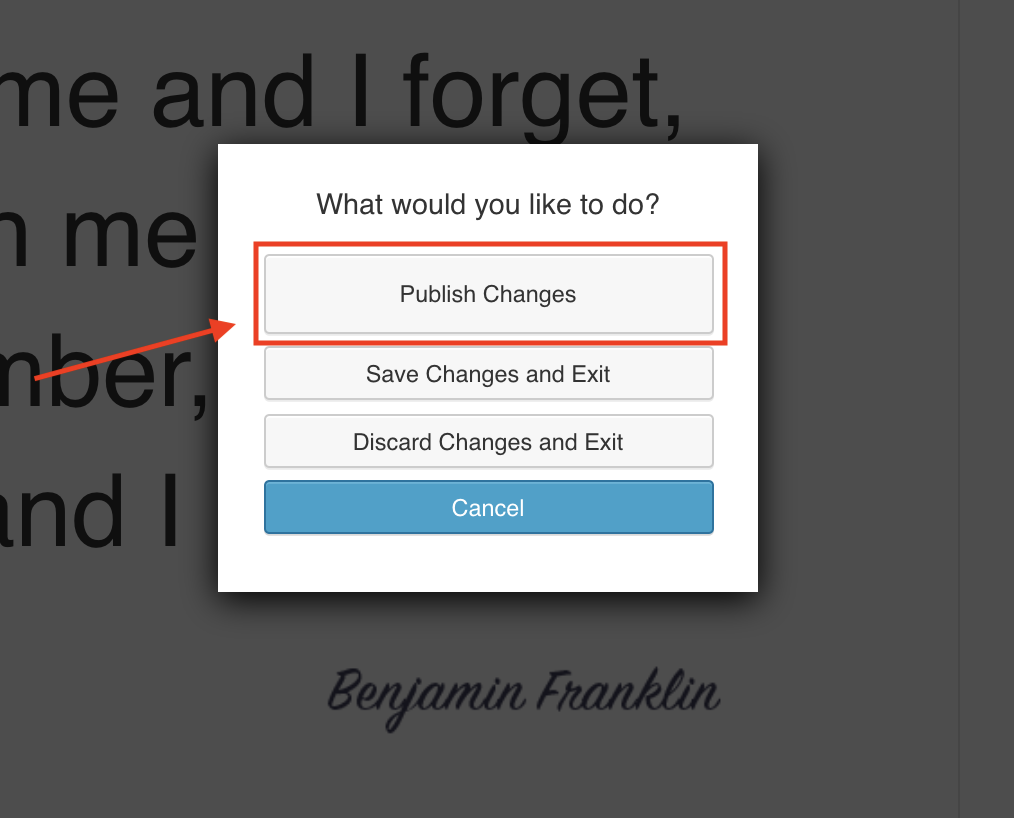
- Click on Done and Publish Changes.

You have now added a blog post to your website. If you have further questions or issues please reach out to support team at support@reiblackbookcom.