A button is a great way to add a clear and easy call to action for a future prospect to use when visiting your website, blog post, or landing page. The call to action can something like filling out a form submitting their information, so you can contact them about a potential property they want to sell. To add a button to your website, blog post, or landing page follow the instructions below.
You may also follow these Step by Step instructions to learn how to add a button to your website, blog post, or landing page.
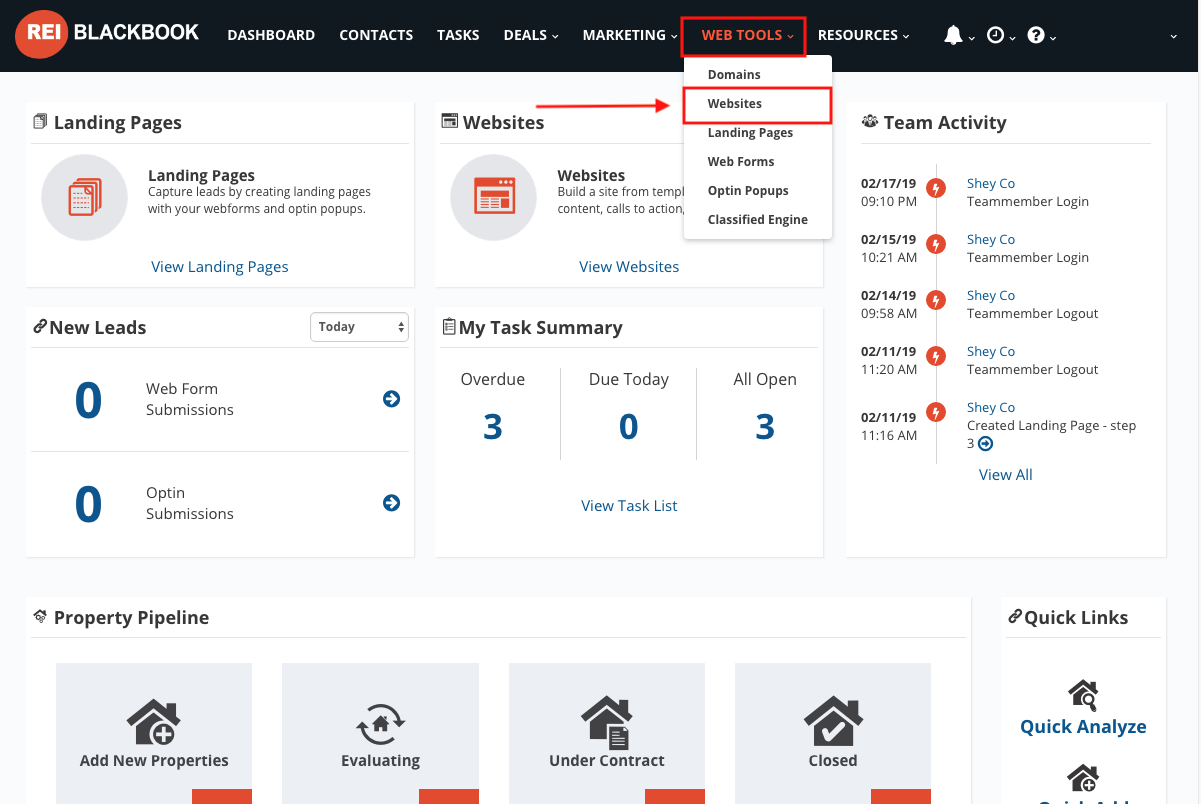
- From your account's Dashboard, click on Webtools and select Websites.
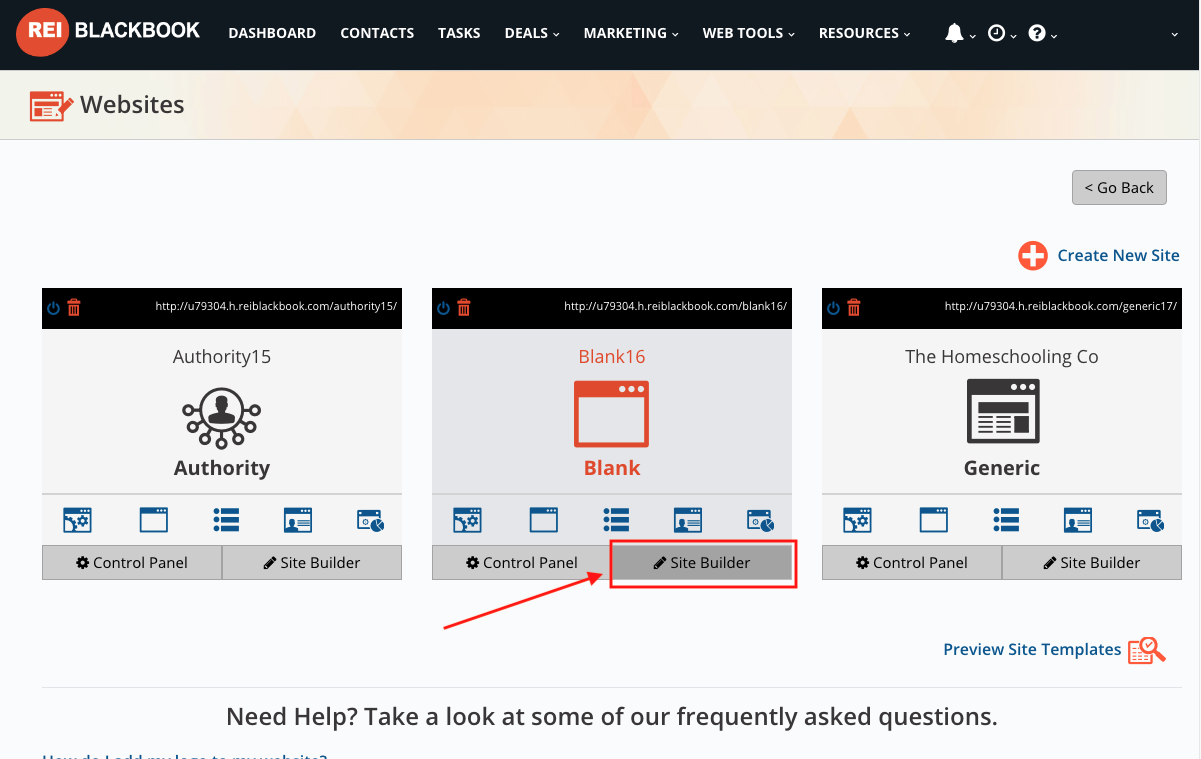
- Click on the SiteBuilder button of the website that you want to edit.
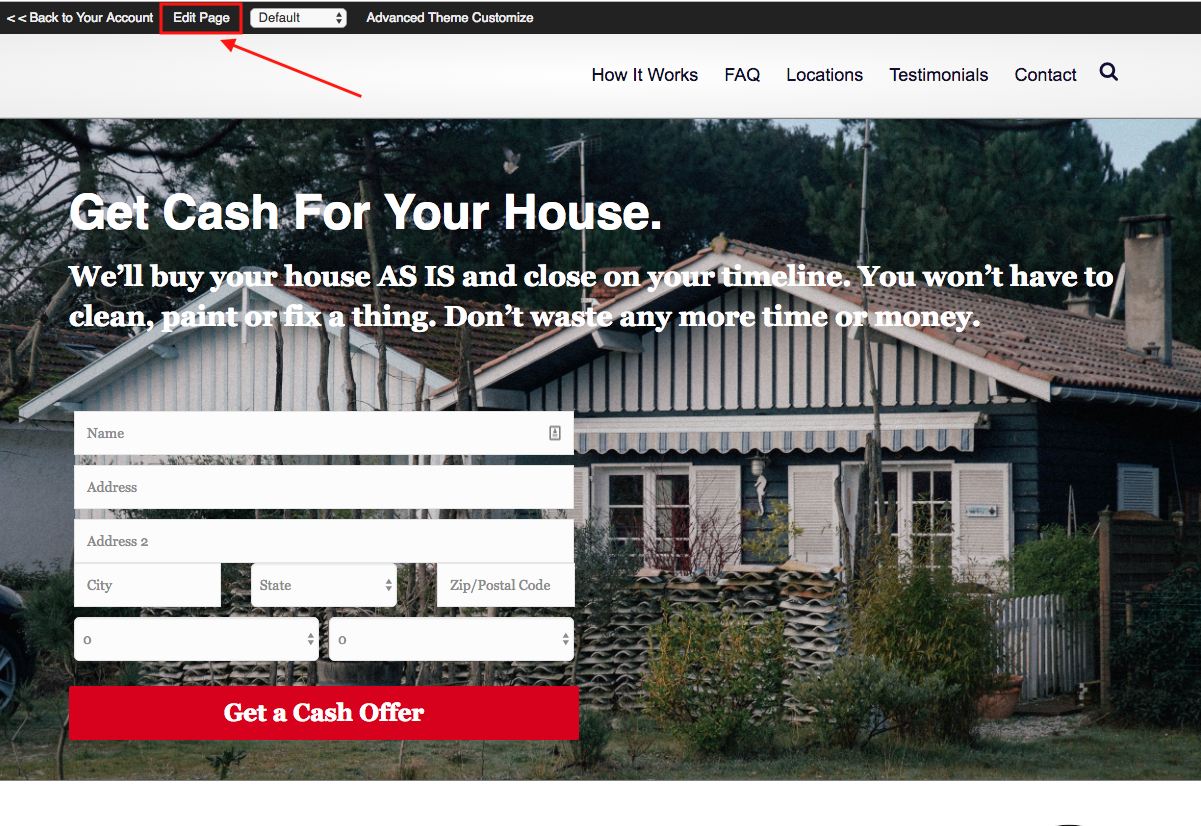
- On the top menu bar click on Edit Page.
- Click on the AddContent button.

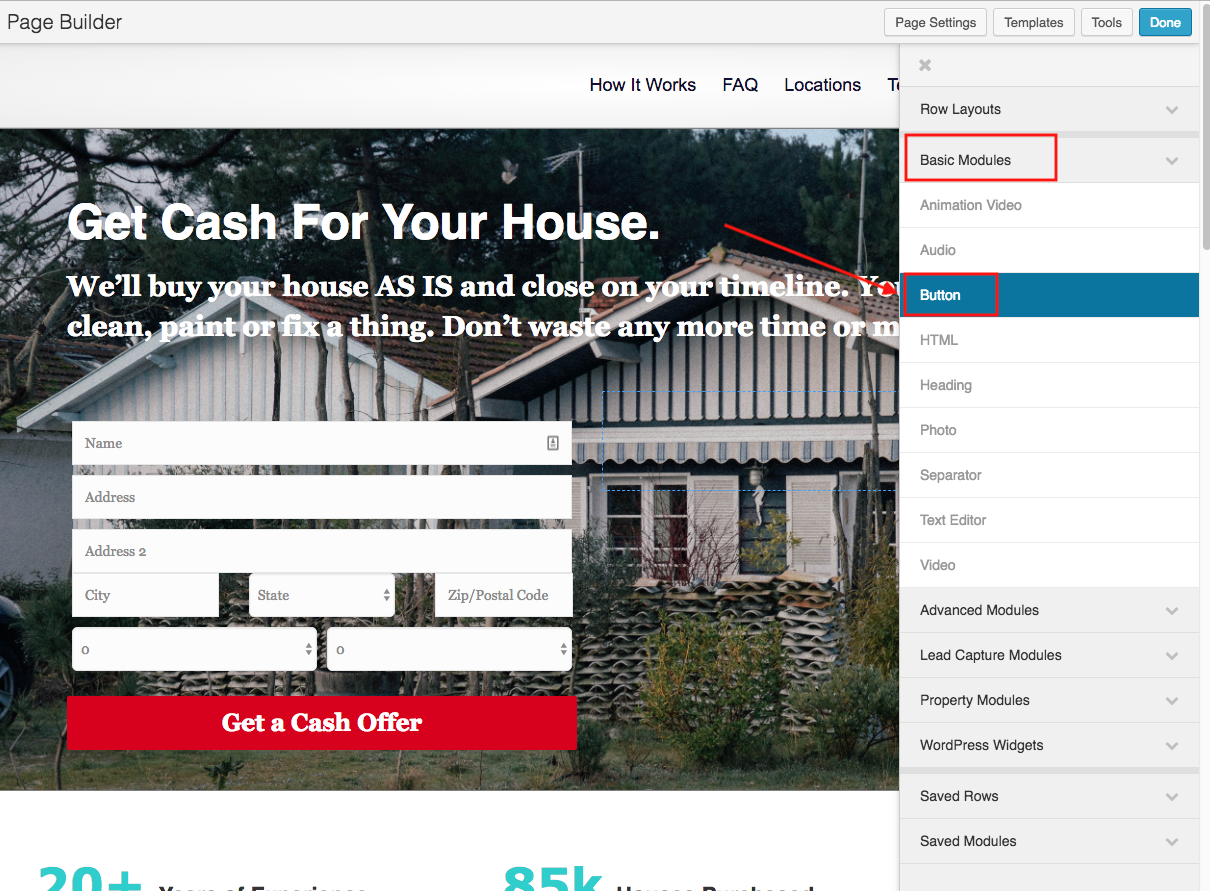
- Select BasicModules then drag and drop the Button module to the desired location on the page.
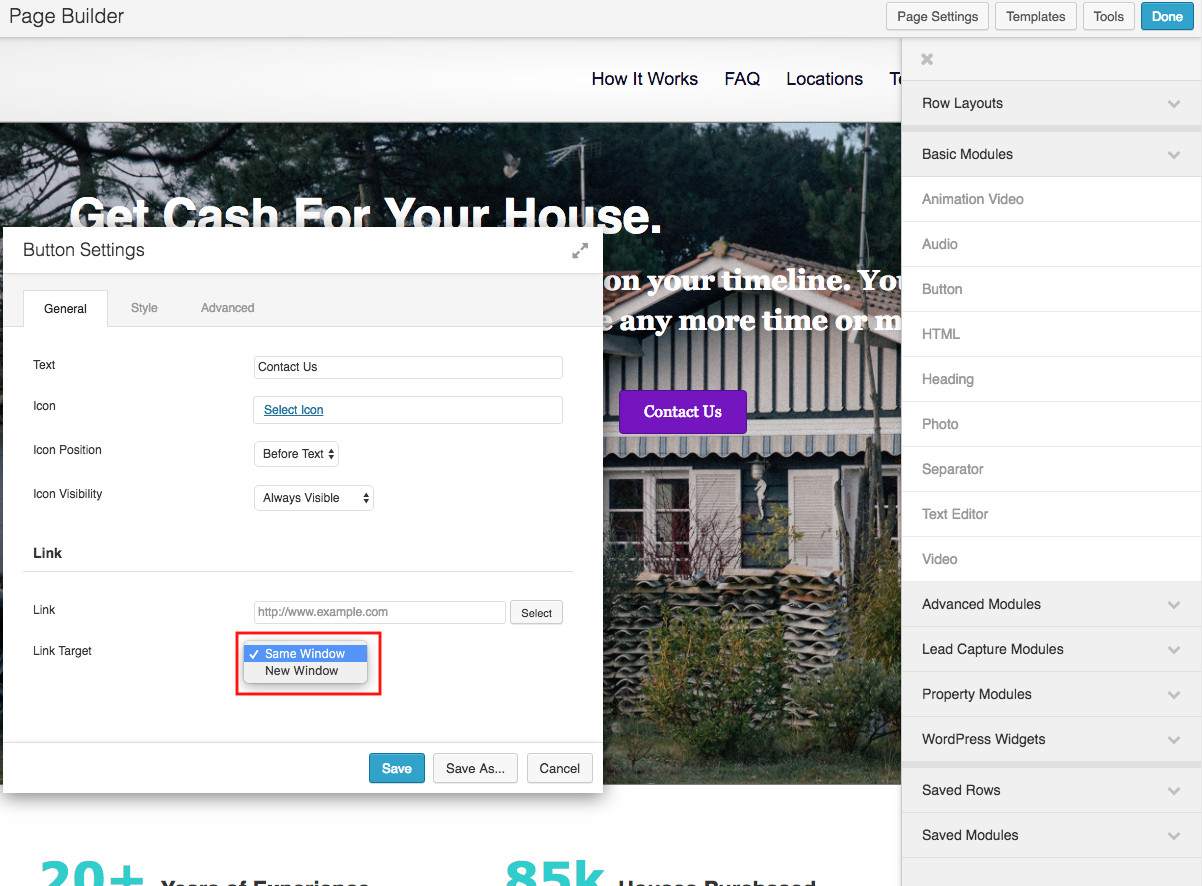
- This will open the ButtonSettings. Under the GeneralTab, you can update/edit the following:
- Text - shows the text that will be displayed on the button (i.e. Contact us now)
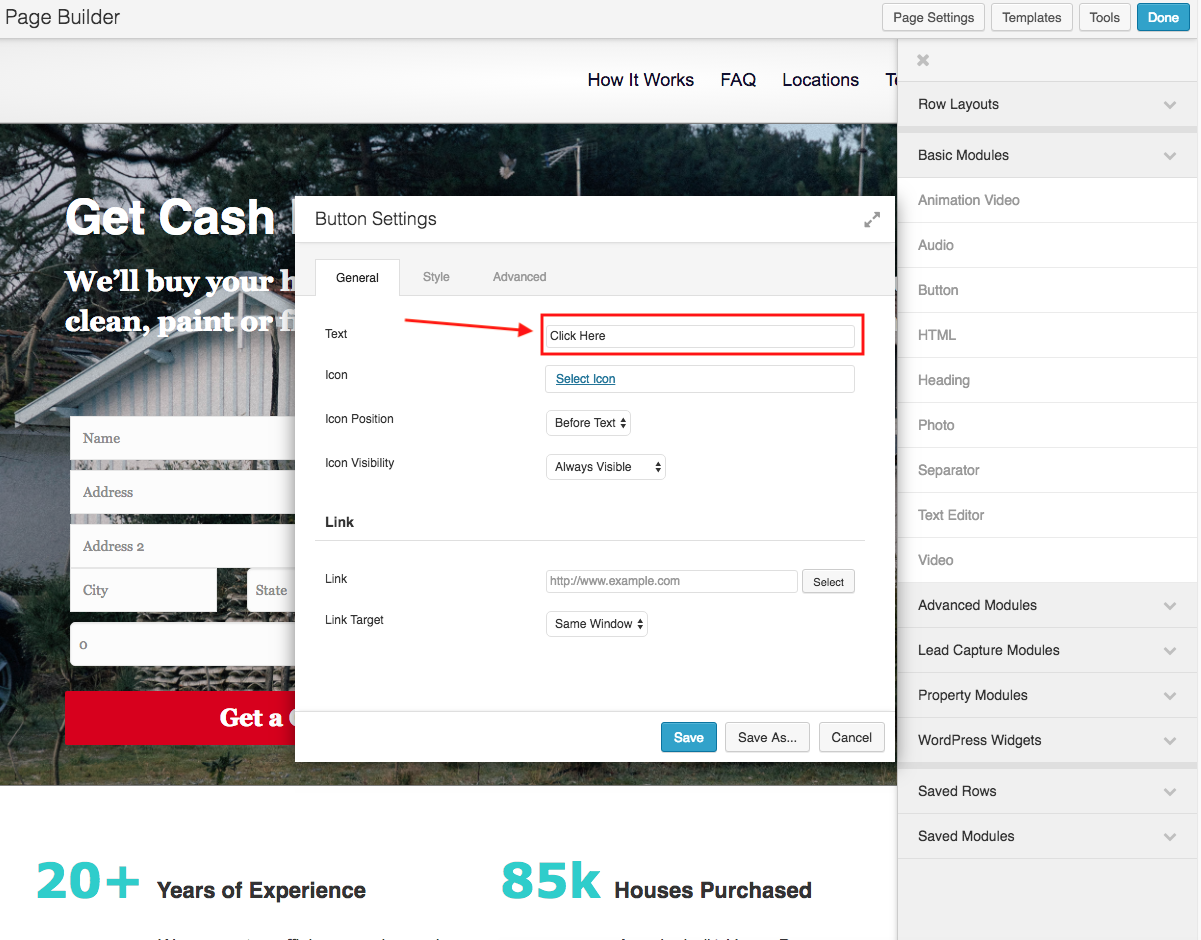
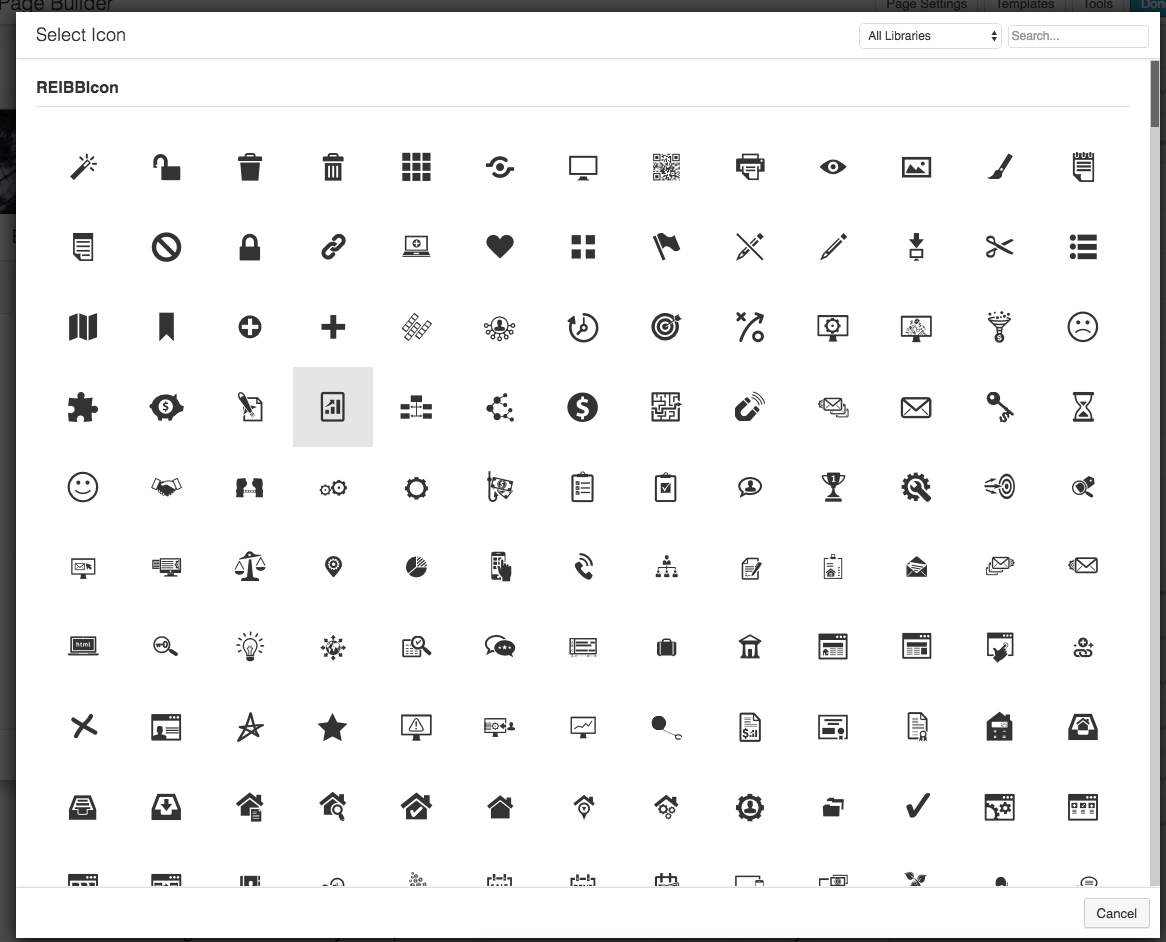
- Icon - select from a list of icons available to show beside the text on the button.

- IconPosition - you have the option to put the icon BeforeText or After Text on the button.

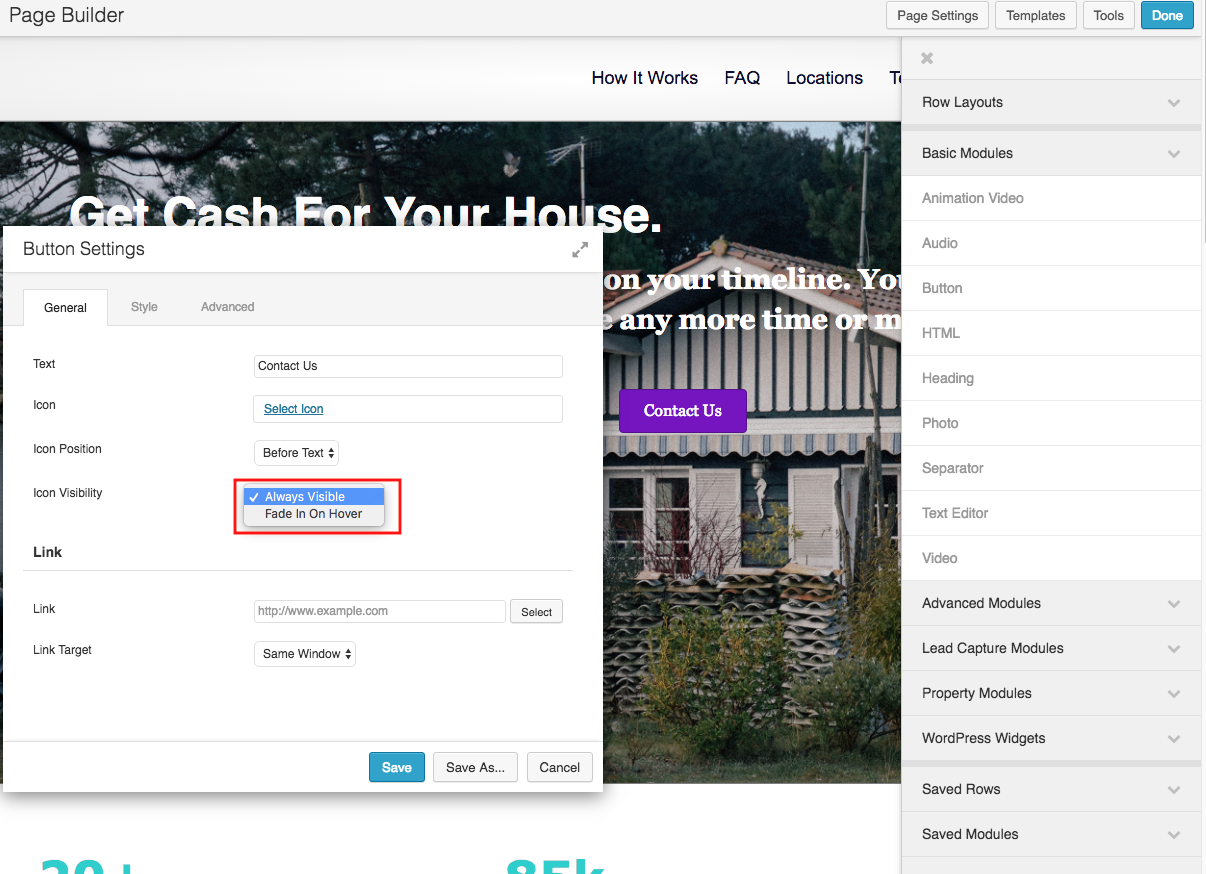
- IconVisibility - you have the option to make the icon AlwaysVisible or FadeInOnHover.
- Link - type in the URL of where the button is going to be linked to when it's clicked.
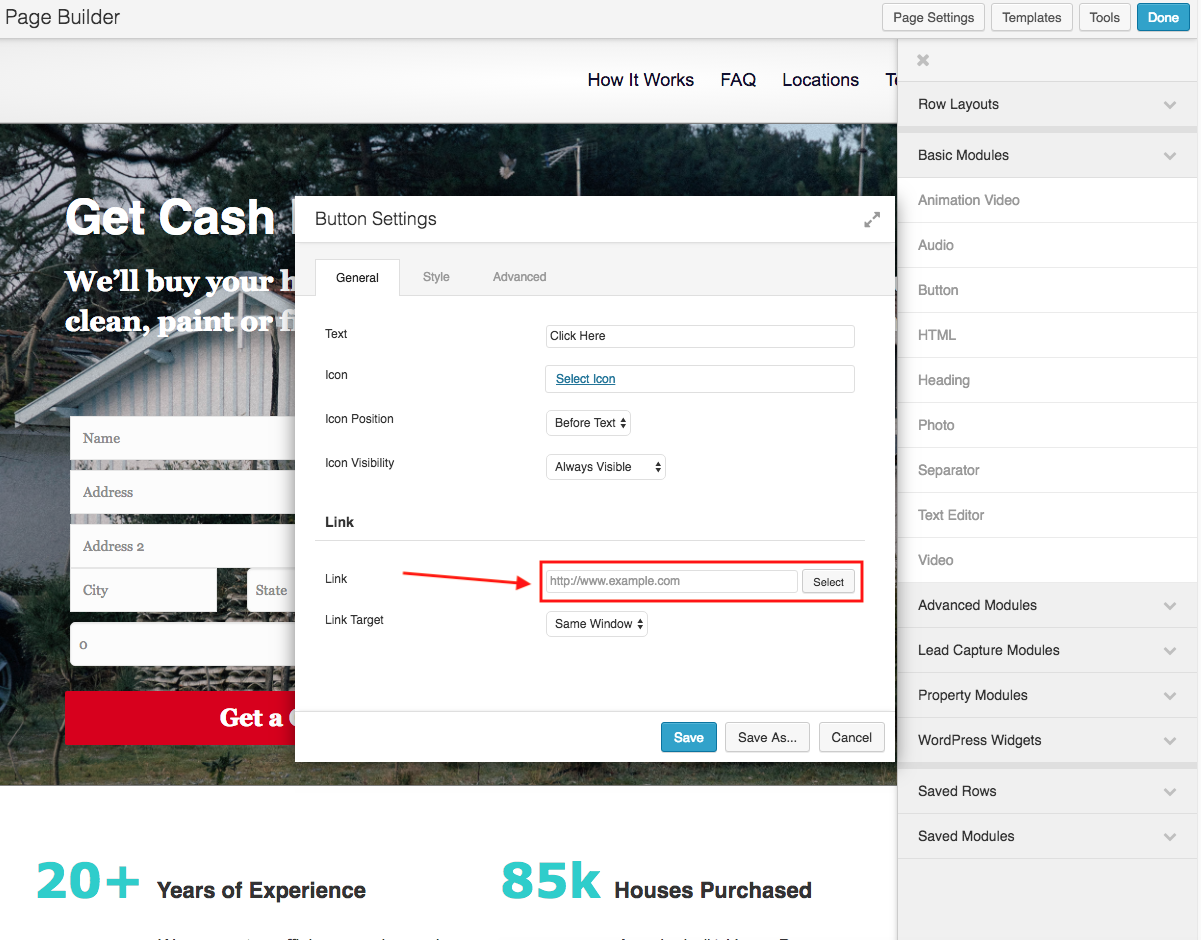
- LinkTarget - you have the option to NewWindow or SameWindow.
- Text - shows the text that will be displayed on the button (i.e. Contact us now)
- Under the Style tab there's a lot of different ways to customize the appearance of the button.
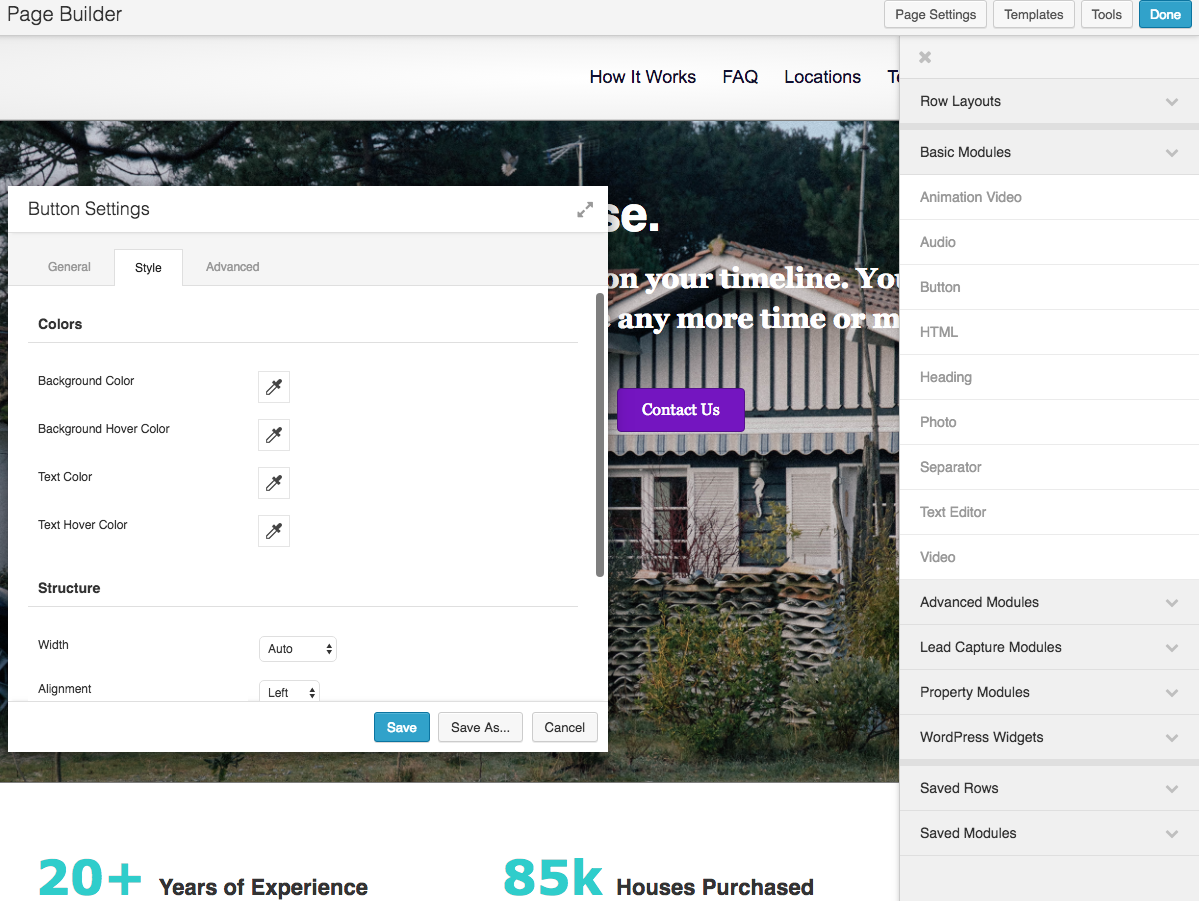
- Colors
- Structure
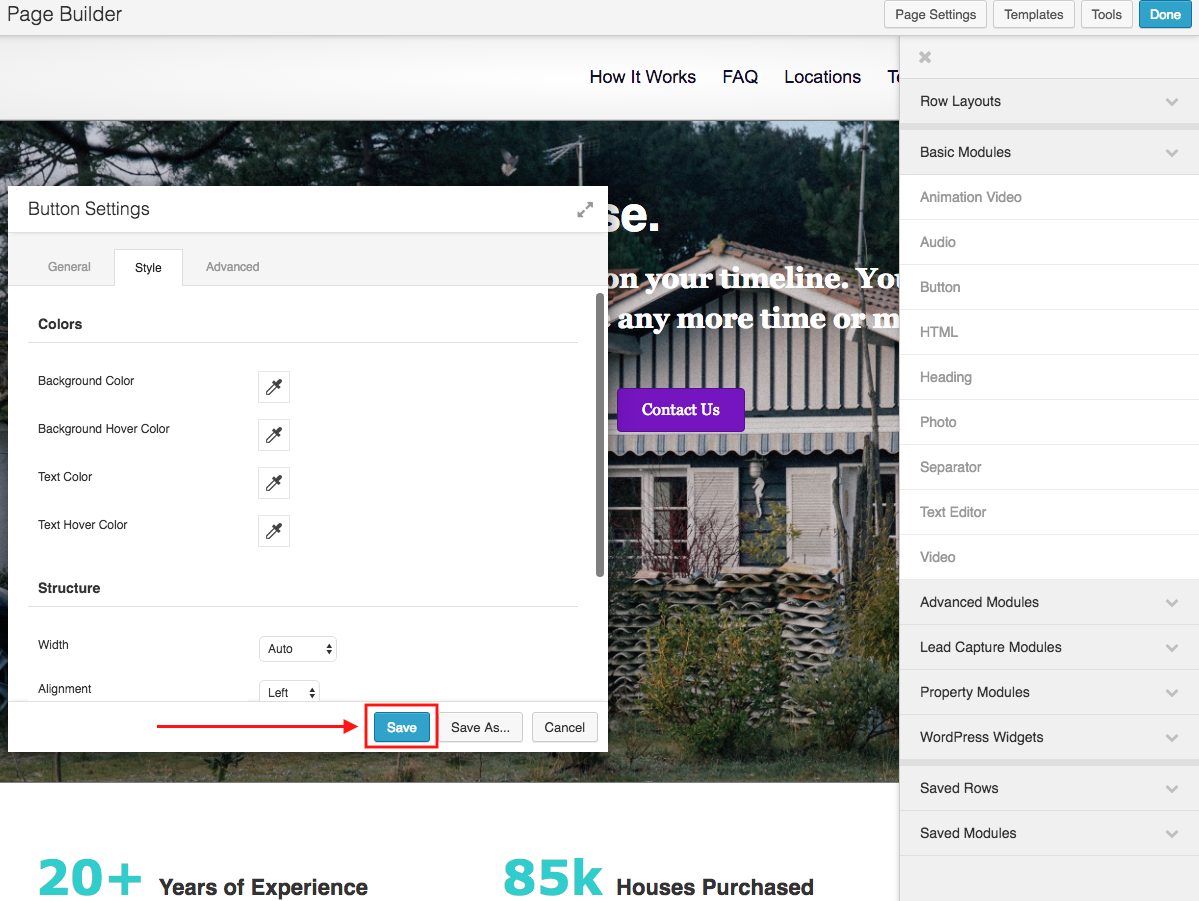
- Once you're done customizing the Button, click on the Save button.
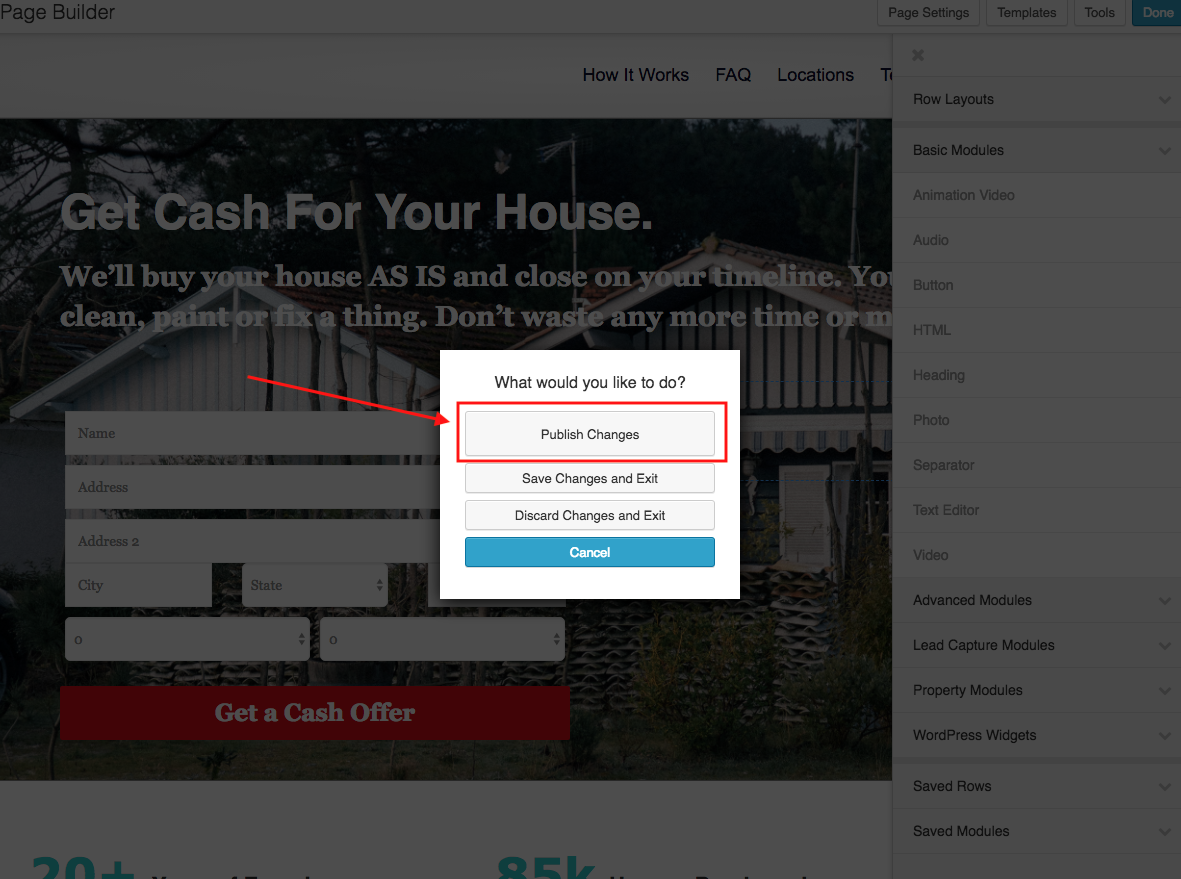
- Click on Done and Publish Changes.
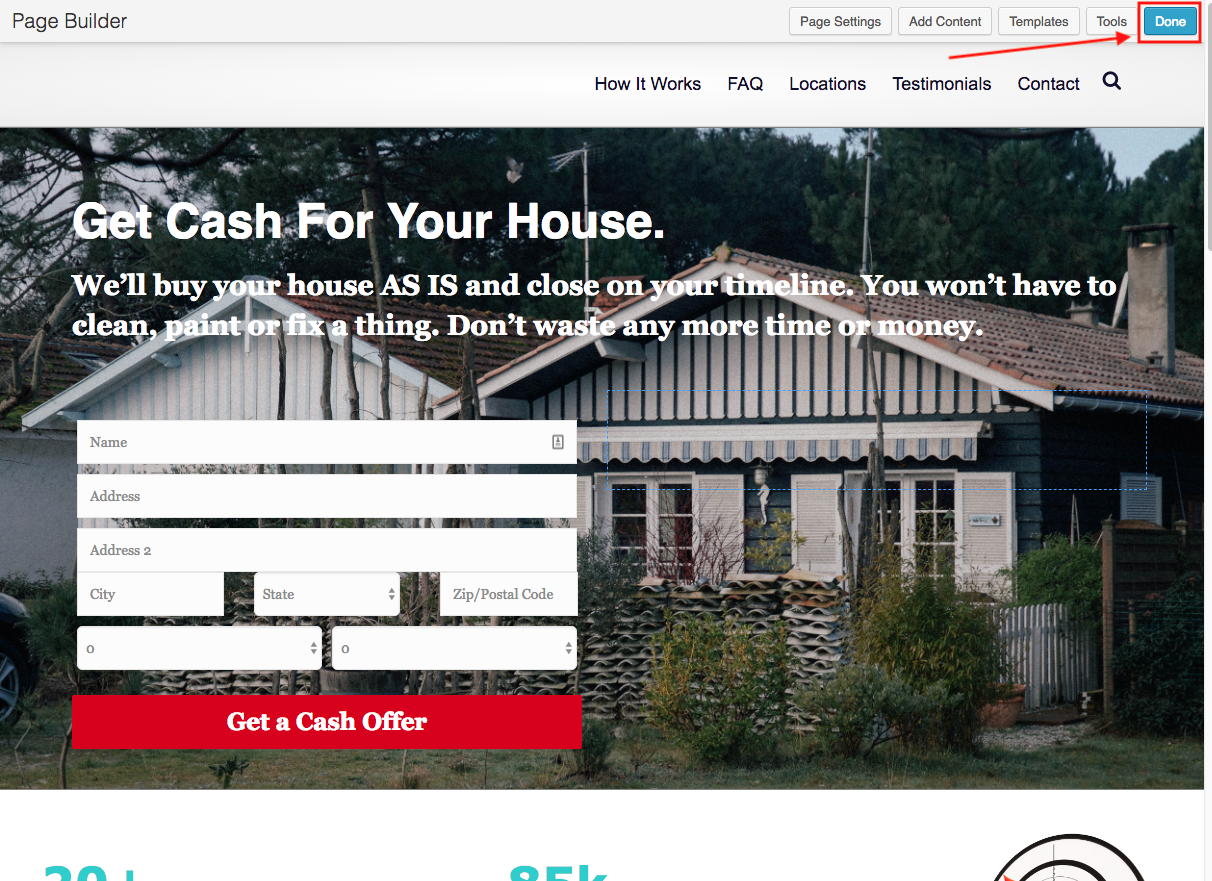
You have now added a button to your website. If you have any questions or comments on any of the instructions above, please feel free to reach out to us at any time at support@reiblackbook.com